Before you can catch a mole, you have to think like one. Their underground world is a network of highways and feeding paths, and your success depends on finding their main route. This is where a little detective work comes in. Placing a trap is easy, but placing it in the
right spot is what makes all the difference. This guide will teach you how to read the signs in your yard and pinpoint the high-traffic tunnels. Once you know how to set a
mole trap in the perfect location, you’re not just hoping for a catch; you’re strategically ensuring one.
Key Takeaways
- Find the mole’s highway for the best results: Successful trapping starts with finding a main travel runway. Use the flatten test to confirm activity; if a collapsed section of a tunnel is repaired within 24 hours, you’ve found the perfect spot.
- Set your trap like a professional: Always wear gloves to avoid leaving your scent, which can make moles suspicious. After setting the trap, cover it completely with a bucket or sod to block all light and make the tunnel appear natural.
- Check your traps daily and adjust your strategy: Monitor your traps at least once a day for a quick catch. If a trap remains unsprung for 48 hours, it’s time to move it to a different active tunnel to improve your odds.
How to Find Active Mole Tunnels
Before you can set a successful trap, you need to play detective. Placing a trap in a tunnel that a mole abandoned weeks ago won’t get you anywhere. The secret to effective trapping is finding a tunnel that’s currently in use. Moles are creatures of habit, often reusing the same main runways to travel between feeding areas. By identifying these active pathways, you can place your
mole traps right where they’ll have the biggest impact. It’s the most important step, and luckily, it’s pretty simple to figure out once you know what to look for. Let’s walk through how to pinpoint the perfect spot.
Spot the Telltale Signs of Moles
First, you need to learn how to read the landscape of your lawn. Moles create two main types of tunnels. You’ll see long, straight tunnels that act as their highways for traveling across your yard, and you’ll also find a more complex network of winding tunnels where they search for food. The straight, main runways are your best bet for placing a trap because they are high-traffic areas. Look for the raised ridges of soil that snake across your lawn. These surface tunnels are clear signs of a mole at work, creating paths just below the grass as they hunt for insects and worms.
Use the Flatten Test to Confirm Activity
Once you’ve located a promising-looking tunnel, you need to confirm a mole is actually using it. The easiest way to do this is with a simple “flatten test.” Find a section of a surface tunnel and gently press down a one-foot portion with your foot, collapsing the raised ridge. You can also poke a small hole in the top of the tunnel. Now, you wait. If a mole is actively using that path, it will repair the damage to continue its travels. According to the
University of Minnesota Extension, if the mole pushes the soil back up or plugs the hole within 24 to 48 hours, you’ve found an active tunnel.
Know Your Mole Tunnels: Surface vs. Deep
It’s easy to get distracted by the large mounds of dirt, or molehills, that pop up in your yard. While they are certainly a nuisance, you should ignore them when setting your trap. These molehills are just the exit points for deep tunnels where moles live and rest. They aren’t the active feeding and travel paths you want to target. Instead, focus all your attention on the raised ridges just under the surface of your lawn. These are the feeding tunnels moles use daily. Placing your trap in one of these surface runways is the key to understanding
how it works and catching your pest quickly.
What Are the Best Types of Mole Traps?
When you’re ready to reclaim your yard, you’ll find a few different styles of
mole traps. Understanding your options helps you pick the right tool for the job. The most common types are cinch, harpoon-style, and scissor-jaw traps. They vary in how they are set, where they are placed, and their durability. Let’s walk through what makes each one unique.
Cinch Mole Traps
Choosing a professional-grade trap is about investing in a tool that solves your problem quickly and for good.
Cinch mole traps are set inside the mole’s tunnel, activating with a simple bump as the mole tries to clear the path. This direct approach is incredibly effective. Available as a complete
mole trap kit and crafted from durable, galvanized steel, you’re getting a tool that will last for years, not just a single season. It’s a reliable, long-term solution for keeping your lawn free of molehills.
Harpoon-Style Traps
You’ve likely seen harpoon-style traps at your local hardware store, as they are common and easy to set up. This trap is placed on top of a flattened surface tunnel. When the mole pushes up the soil to reopen its runway, it triggers a set of sharp spikes that are driven into the ground. While accessible, their effectiveness often depends on getting the placement just right over the most active part of the tunnel.
Scissor-Jaw Traps
Scissor-jaw traps are another effective option that works from within the mole’s tunnel. As the name suggests, these traps have two scissor-like jaws that close when a mole triggers the mechanism. A key feature is the clear visual signal it provides. When the trap has been sprung, the handles on top change from a flat position to a raised shape, so you know at a glance if you’ve been successful. This takes the guesswork out of checking your traps.
Below-Ground vs. Surface-Level Traps
Regardless of the model, you’ll decide between a below-ground or surface-level setup. Traps like cinch and scissor-jaw models are set inside the tunnel, while harpoon traps sit on the surface. Moles are highly sensitive to light and will avoid tunnels where it filters in, which is why below-ground traps tend to be more effective. For any trap type, it’s a good practice to cover the area with a bucket or sod to completely block out light and ensure the mole approaches without caution.
What Tools and Materials Will You Need?
Before you head out to the yard, let’s get your toolkit ready. Having the right gear on hand makes setting a
mole trap much simpler and safer. You don’t need a lot, but a few key items will make a world of difference. Think of it like cooking: the right ingredients and tools ensure a better result. We’ll walk through the essential equipment, safety gear, and soil tools you’ll want to have by your side.
Gather Your Essential Equipment
The most important tool, of course, is the trap itself. Investing in professional-grade
mole traps made from durable, galvanized steel ensures you have a tool that is both effective and can be used for years. You’ll also want a thin probe or a long screwdriver to help you locate the exact path of the mole tunnel between mounds. A small flag or marker is also helpful for remembering where you’ve set your traps, especially if you have a large yard. Finally, a small bucket can be useful for carrying your tools and for holding any soil you dig up.
Don’t Forget Your Safety Gear
Safety first, always.
Mole traps are powerful, and you need to handle them with care. A sturdy pair of work gloves is non-negotiable. They not only protect your hands from the trap’s strong mechanism but also serve another important purpose: masking your scent. Moles have a keen sense of smell and can be deterred by human odors left on a trap. Wearing gloves helps keep the trap free of your scent, increasing your chances of a successful catch. Proper safety gear can help
protect you during the trapping process and give you peace of mind.
Prepare Your Soil Tools
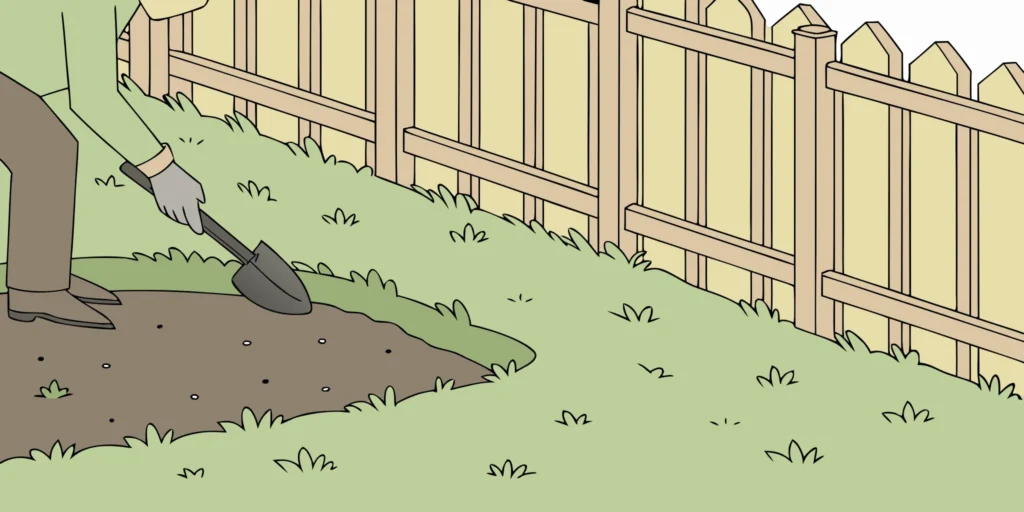
To place your trap correctly, you’ll need to do a little digging. A hand trowel or a small garden spade is perfect for carefully excavating the mole tunnel. These tools help you create a clean opening without causing the tunnel to collapse, which is key for a successful set. If you have compacted or rocky soil, a more robust tool might be necessary. Some trappers even use a hori-hori knife for its precision. The goal is to create just enough space to position the trap effectively. Having the right digging tool makes this step much easier and sets you up for success.
How to Set a Mole Trap: A Step-by-Step Guide
Setting a mole trap effectively comes down to location and proper technique. It’s a straightforward process that, when done correctly, yields great results. Follow these four key steps to place your trap for a successful catch and reclaim your lawn from these tunneling pests.
Find the Right Tunnel
First, you need to find an active mole runway. Look for the straight, raised tunnels in your yard, which moles use as their main travel routes, and try to avoid the meandering feeding tunnels. To confirm a tunnel is in use, gently step on a small section to flatten it. If the mole pushes the dirt back up within 12 to 24 hours, you’ve found an active tunnel. This is the ideal spot to place your trap for a quick catch. The entire
trapping process relies on finding these active areas, so this step is crucial.
Prepare the Tunnel Opening
Once you’ve located an active tunnel, carefully prepare an opening for the trap. Using a trowel, cut a small section of sod directly over the tunnel, just wide enough to fit the trap. Be careful not to collapse the tunnel on either side. The goal is to create a clean opening that intercepts the mole’s path. Clear any loose soil from the bottom of the tunnel to ensure the trap’s trigger mechanism can work properly. Set the piece of sod you removed nearby; you’ll need it again soon.
Position and Secure the Trap
Now it’s time to place your trap. Position the
Cinch Mole Trap so it straddles the tunnel, with its legs on either side of the path. Press the legs firmly into the ground until the trap is stable and won’t wobble. The trigger should be set just inside the tunnel opening. As the mole moves through to clear the tunnel, it will push against the trigger and spring the trap. This simple mechanism uses the mole’s natural behavior to ensure an effective catch.
Cover the Trap to Block Light
Your final step is to cover the trap to block out all light. Moles will avoid any tunnel that has light or air coming into it. Take the piece of sod you set aside and place it back over the opening, covering the trap. You can also use a bucket or a flat board for extra coverage. This makes the tunnel appear undisturbed, encouraging the mole to travel through it. For safety and easy relocation, place a marker flag next to your trap so you can find it again easily.
What Safety Precautions Should You Follow?
Using a mole trap is straightforward, but it’s essential to prioritize safety for yourself, your family, and your pets. A few simple precautions can ensure your mole-trapping efforts are successful and accident-free. Taking the time to handle and place your traps correctly not only protects your loved ones but also makes the trap more effective.
Keep Children and Pets Safe
Your first priority should be keeping curious kids and pets away from the traps. Place your
mole traps in low-traffic areas of your yard, away from sandboxes, swing sets, or pet play zones. It’s also a great idea to have a conversation with your children, explaining what the traps are and why they are not toys. You can also place a bucket or a large pot over the set trap as an extra barrier. This simple step adds a layer of protection and improves your chances of a catch by blocking out light.
Handle Your Trap Correctly
Properly handling your trap is key to both safety and success. Always wear a sturdy pair of gloves when setting a trap. This protects your hands and prevents you from leaving your scent on the trap, which can make moles wary. Before you begin, carefully read the instructions that come with your trap. Understanding exactly
how it works will help you set it correctly and confidently, minimizing any risk. An improperly set trap is often ineffective and can be a safety hazard, so taking a moment to get it right is well worth the effort.
Choose a Safe Location
The best spot for your trap is one that is both safe and strategic. You need to place the trap in an active mole tunnel, but you should also consider its proximity to paths and walkways. Avoid setting traps right next to a heavily used garden path or driveway. The goal is to intercept the mole in its main runway, which is often located along a fence, foundation, or other straight border in your yard. Choosing a location that is out of the way reduces the chances of it being accidentally disturbed by people or pets.
How Often Should You Check Your Mole Traps?
You’ve found the active tunnels and set your traps. Great job! But the work isn’t quite done. How often you check your traps is just as important as where you place them. Consistent monitoring is what turns a well-placed trap into a successful catch. Think of it as a simple routine that will get you closer to a mole-free yard. Let’s walk through the best practices for checking your traps, so you know exactly what to do and when.
Why You Should Check Your Traps Daily
Once your trap is in the ground, make a habit of checking it at least once a day, maybe even twice. Moles can be active at any time, so a morning and evening check gives you the best chance to catch one quickly. This helps you solve your mole problem sooner and prevents a captured mole from attracting other predators. Regular checks also let you see if a trap was accidentally sprung by shifting soil or a curious pet, so you can reset it right away. Making this a quick part of your daily routine ensures your
mole traps are always working for you.
How to Know if Your Trap Worked
You’ll know a
Cinch Trap has been sprung when the handles are pulled together. When you see this, it’s time to investigate. Don’t just pull the trap out of the ground. Instead, carefully dig around it to see if you’ve caught a mole. Sometimes, the mole might still be alive, and you’ll need to dispatch it humanely. If the trap is sprung but empty, don’t worry. It could be that the mole pushed dirt into the mechanism. Just clear out the tunnel, learn more about
how it works, and reset the trap carefully.
When Is It Time to Move Your Trap?
Patience is key, but you also need to know when to switch up your strategy. If a trap hasn’t been sprung within 48 hours, it’s time to move it. A lack of activity usually means the tunnel isn’t a main runway, or the mole has changed its patterns. Don’t get discouraged; this is just part of the process. Simply pull the trap and find another active tunnel to set it in. Re-evaluating your placement every couple of days keeps you one step ahead of the moles and greatly increases your odds of success. If you run into other issues, our
FAQs can offer more guidance.
What Common Trapping Mistakes Should You Avoid?
You’ve done your research, found an active tunnel, and have a great trap ready to go. You’re so close to a mole-free yard! But a few small missteps can derail your efforts and leave you feeling frustrated. The good news is that most trapping failures come down to a handful of common, and completely avoidable, mistakes.By learning what not to do, you can set your traps with confidence and dramatically increase your chances of success on the first try. Let’s walk through the most frequent errors so you can get it right.
Setting Up the Trap Incorrectly
Even the most effective trap is useless if it isn’t set correctly. Each trap model has its own specific mechanics, so always read the instructions that come with your device. A common oversight is not wearing gloves when handling the trap. Moles have a keen sense of smell, and leaving your scent on the trap can make them wary and cause them to avoid it altogether. Another frequent issue is poor placement within the tunnel. Make sure your trap is set firmly on the tunnel floor and is aligned with the runway. An unstable or crooked trap won’t trigger properly when the mole passes through.
Choosing the Wrong Tunnel
Placing a trap in the wrong spot is one of the biggest reasons for a lack of results. Moles create a complex network of tunnels, but they don’t use all of them with the same frequency. Many people make the mistake of setting traps in the winding, shallow surface tunnels. These are often temporary feeding tunnels that a mole might only use once. For the best results, you need to locate a main runway. These are typically straighter and deeper tunnels that moles use as their primary travel routes. Using the flatten test to confirm a tunnel is active is the surest way to know you’ve found a high-traffic area perfect for one of our
mole traps.
Letting Light into the Tunnel
Moles spend their lives in darkness and are extremely sensitive to changes in their environment, including light and air currents. If you leave the trap area uncovered, the light and draft will signal to the mole that something is wrong, and they will likely back away and dig around your trap. This is a simple mistake with an easy fix. After you
set your trap, be sure to cover the opening completely. You can use a large bucket, a piece of plywood, or the sod you originally removed. The goal is to block all light and restore the tunnel to its natural state, ensuring the mole travels through its path as usual.
Troubleshooting Failed Sets and Inactive Tunnels
Whether you are a homeowner reclaiming a pristine suburban lawn, a commercial grower managing nursery beds in Oregon, or a landscaper protecting high-value root stock, mole trapping requires precision. At
CINCH Traps, our 100+ years of handcrafting galvanized steel traps has taught us that when a trap fails, it is almost always due to a small, easily correctable detail in setup or tunnel selection. Built on the problem-solving legacy of our founder, Don Sprague, and backed by five major university studies that ranked CINCH #1 in effectiveness, here is how to troubleshoot the most common trapping challenges.
1. The Trigger Was Bypassed or the Trap Was Filled with Dirt
The Issue: You check your set and find that the mole has pushed soil directly into the jaws of the trap, bypass-triggering it or packing it with dirt without getting caught.
The Root Cause: Moles are highly sensitive to foreign scents and drafts. If there is a light leak or if you left human scent on the trap, the mole’s natural defense is to push a wall of dirt ahead of it to block the intrusion. This also occurs if the tunnel opening is not cleared smoothly, leaving loose debris that the mole pushes forward as it patrols.
The Professional Solution: - Always Wear Gloves: Always handle your traps with clean gardening gloves to prevent scent transfer.
- Clear the Runway: Use the specialized CINCH Tunnel Clearing Tool to scrape out all loose dirt, making the tunnel entrance clean and unobstructed.
- Block All Light: When placing the trap, cover the entire excavated opening completely with a bucket or thick sod. If the mole detects any light leak, it will immediately backfill the area with dirt.
2. No Trap Activity After 48 Hours (Inactive Tunnels)
The Issue: Your trap remains perfectly set and unsprung after two or three days.
The Root Cause: Moles dig shallow, winding “feeding runs” to forage for grubs and worms. Many of these temporary paths are used only once and then abandoned. If you placed your trap in a temporary feeding run rather than a primary travel highway, the mole may never return to that spot.
The Professional Solution: - The 48-Hour Rule: If a trap is not triggered within 48 hours, the tunnel is likely inactive. Do not leave it there; it is time to move the set.
- Perform the Flatten Test: Before relocating, learn how to find active mole tunnels. Press down a small section of several surface ridges and mark them with yellow lawn flags. Re-check the spots in 12 to 24 hours. The ridges that have been rebuilt are your high-traffic main highways.
- Target Structural Borders: Place your next set along straight paths—such as fence lines, driveways, sidewalks, or nursery row borders. Moles routinely use these boundaries as permanent travel corridors.
3. Trap Slipped or Jaws Failed to Secure the Catch
The Issue: The trap is sprung, but it is empty or has slipped out of the tunnel.
The Root Cause: This is typically caused by improper trap sizing. If the trap is too small for the tunnel, the mole can squeeze past the trigger wires or slide around the sides. If the trap is too large, it won’t fit snugly, causing the jaws to strike the tunnel walls instead of the pest, or allowing the trap to shift when triggered.
The Professional Solution: - Measure the Tunnel Diameter: Measure the actual diameter of the active tunnel before setting.
- Match Your Trap Size: Ensure your trap size matches the tunnel dimensions. CINCH Mole Traps are offered in:
- Small Mole Trap: Designed for tight 1 ¼” x 1 ½” tunnels.
- Medium Mole Trap (Most Common): Designed for standard 1 ⅞” to 2 ¼” tunnels.
- Large Mole Trap: Designed for wide 3” tunnels.
- Upgrade to a Complete Kit: If you are starting fresh or expanding your pest-control program, consider the CINCH Deluxe Mole Kit. It includes small, medium, or large traps, lawn flags, gloves, a tunnel clearing tool, and maintenance spray—everything you need for a professional-grade set. If you’ve lost a trap to heavy farm equipment, you can also purchase a single Replacement Mole Trap with free shipping.
How to Maintain Your Traps for Long-Term Success
A high-quality mole trap is an investment in your property. When you choose a
Cinch Trap, you’re getting a tool that’s handmade in Oregon from durable, galvanized steel and backed by a lifetime warranty. It’s designed to be the last mole trap you’ll ever need to buy. But like any good tool, a little bit of care will ensure it works perfectly for years to come. Proper maintenance isn’t complicated or time-consuming, but it makes a huge difference in your long-term success.Taking a few minutes to clean, store, and reset your trap correctly after each catch will keep it in top working condition. This simple routine ensures the mechanism stays sensitive and effective, preventing rust and damage while making sure you’re always ready to tackle the next tunnel. Think of it as protecting your investment. A well-maintained trap is a reliable trap, and a reliable trap means a mole-free yard. These next few steps will show you exactly how to care for your trap so it remains your go-to solution for any future pest problems.
Clean Your Trap After Each Use
After you’ve successfully caught a mole, it’s important to clean your trap before setting it again. Moles have a keen sense of smell, and any lingering human scent or scents from the previous catch could make them wary of the trap. Cleaning also removes any dirt, grass, or debris that might clog the mechanism and prevent it from triggering correctly. You don’t need any harsh chemicals. Simply rinse the trap with a garden hose and use a stiff brush to scrub away any packed-in soil. Let it air dry completely before you store it or reset it in a new tunnel. This quick step keeps your
mole traps ready for action.
Store Your Trap Properly
When you’re not actively using your mole trap, where you keep it matters. Proper storage protects it from the elements and prevents accidental damage. Find a dry, sheltered spot like a garage, shed, or utility closet. Storing your trap indoors keeps it away from rain and moisture, which helps maintain its condition over the long run. Even though our traps are made from durable galvanized steel, keeping them dry is always a good practice. It also ensures the trap isn’t accidentally stepped on or run over by a lawnmower. Taking a moment to store it correctly means it will be in perfect working order the next time you spot a fresh molehill.
Reset Your Trap for the Next Catch
How you reset your trap is just as important as where you place it. A sloppy setup can cause a mole to simply plug the trap with dirt instead of passing through it. After finding an active tunnel, your goal is to make the trap feel like a natural part of the run. Make sure the trap fits snugly in the opening with no loose soil left inside the tunnel. Use your hands to compact the dirt around the trap’s legs, securing it firmly in place. This encourages the mole to move straight into the trap rather than trying to dig around it. For a detailed walkthrough, our
How It Works page has visuals to guide you.
Related Articles
Why should I use a trap instead of poison or repellents? Traps offer a definitive solution. When you use a trap, you know for certain that you have removed the mole causing the damage. Poisons can be risky for pets, wildlife, and the soil, and you often can’t confirm if they worked. Repellents, like castor oil or sonic spikes, have very mixed results and tend to just push the mole to another part of your yard, rather than solving the problem for good.
I’ve set my trap in an active tunnel, but it hasn’t been sprung after two days. What should I do? Don’t get discouraged; this is a common part of the process. First, double-check your setup. Make sure the trap is stable, the opening is completely covered to block light, and you wore gloves to avoid leaving your scent. If everything looks right, it’s time to move the trap. Even a tunnel that passed the flatten test might not be a main highway. Find another promising straight runway and try again.
Should I set my trap in a molehill or a tunnel? You should always set your trap in a tunnel, never in a molehill. The molehills you see are just the exit points for deep tunnels where moles rest. They are not the active travel paths. The raised ridges you see snaking across your lawn are the surface-level feeding and travel tunnels. Placing your trap in one of these active runways is the only way to guarantee you intercept the mole.
How many traps do I need for my yard? The number of traps you need depends on the size of your yard and the extent of the mole activity. For a typical suburban lawn with one or two moles, starting with two or three traps is a great strategy. This allows you to cover multiple active runways at once and increases your chances of a quick catch. If you have a very large property or a severe infestation, you might need more to effectively manage the population.
What do I do with the mole once I’ve caught it? Once you’ve captured a mole, the most responsible next step is to dispatch it humanely. A captured mole should not be relocated, as it will likely not survive in a new territory and can transfer diseases or parasites. Check your local regulations for specific guidelines on handling wildlife. After dispatching the mole, you can bury it in your yard or dispose of it with your household waste, again following local rules.