A raised ridge tells you a mole passed through your lawn. It does not tell you whether the animal will return. That distinction matters because a perfectly set trap in an abandoned runway is still a trap in the wrong place.
To find active mole tunnels, flatten or open small sections of several promising raised runways. Mark each test spot and inspect it again after 12 to 24 hours. A repaired opening or newly raised soil shows that a mole still uses the route.
This guide focuses on the key pre-trap decision: finding, testing, and preparing the route most likely to produce a catch. If you first need to map all visible runs, start with our five-step guide to finding mole tunnels. Then use the process below to identify the best runway before setting a trap.
What active mole tunnels look like before you trap
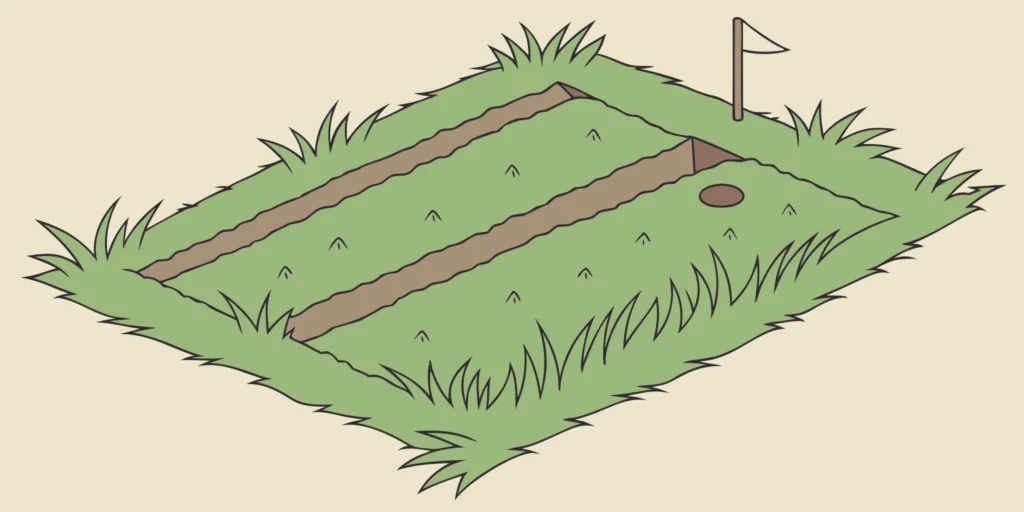
Most visible mole damage comes from shallow feeding tunnels just below the grass. As a mole pushes through soil looking for earthworms and other food, it lifts the turf into soft raised ridges. These runs can branch, curve, and crisscross a lawn. Some are used once. Others connect to regularly traveled routes.
Fresh signs worth testing
Look for ridges with loose, recently lifted soil and grass that has not settled back into place. A fresh runway may feel springy under light pressure. New activity may appear as a ridge that extends beyond yesterday’s endpoint or crosses an older route.
Fresh appearance alone is not proof of repeated use. A mole can make a long feeding run and never travel that branch again. Treat visible freshness as a reason to test the tunnel, not as a reason to set a trap immediately.
Surface ridges versus molehills
Volcano-shaped piles of excavated soil indicate that a mole is working below the surface, often in a deeper tunnel system. A mound confirms mole presence, but the loose soil around it usually makes a poor trap site. It can be difficult to locate the exact passage and create a snug trap fit.
For a first placement, favor a confirmed surface runway with a clear direction. Long, relatively straight ridges are easier to test and prepare than scattered mounds or twisting feeding branches.
Rule out similar yard damage
Make sure the damage is consistent with a mole before testing every ridge. Moles usually leave raised surface runways and piles of excavated soil. They do not normally leave open entry holes throughout a lawn. Voles and other small animals may use old mole runs, but their feeding damage and entrances call for a different plan.
If the pattern is mixed, monitor the raised runways first. Fresh lift and a repaired test spot are stronger evidence of current mole travel than an isolated hole.
How to confirm active mole tunnels in 24 hours
The repair test is simple, but testing several locations produces better information than choosing one ridge at random. Work with minimal disturbance so the mole can resume using its route naturally.
- Map the visible network. Walk the lawn and note raised ridges, intersections, boundaries, and fresh soil. Take a photograph so you can compare changes the next day.
- Choose promising test points. Select long straight runs, intersections, and tunnels beside a fence, walkway, garden edge, or other permanent boundary. Do not test only the newest branches.
- Flatten or open a small section. Press down a short section with your shoe, or make a small opening in the tunnel roof. Do not collapse several feet of runway.
- Mark each location. Use a small flag or stick so you can find the exact spot without walking over the whole network again.
- Check after 12 to 24 hours. A mole that uses the route will often lift flattened soil or repair an opening. Record which locations changed.
- Retest unclear evidence. Weather, irrigation, pets, and foot traffic can alter soft soil. Repeat the test at uncertain spots and one or two nearby routes.
Testing does not require tearing up the lawn. A few small marked spots reveal more than extensive digging. When one route is repaired while nearby branches remain flat, the repaired route is the better trapping location.
Which active tunnel is best for trap placement?
A repaired runway proves recent activity, but some active routes are more productive than others. Moles may use a short feeding branch only while food is available. Established travel routes connect feeding areas, nesting areas, and deeper systems, making them stronger trap candidates.
| Tunnel sign | What it suggests | Trap-site value |
|---|---|---|
| Long straight ridge that repairs after testing | A regularly traveled route | High |
| Active run beside a fence, walkway, or garden edge | A route guided by a boundary | High |
| Confirmed intersection connecting several runs | Repeated travel through the network | High if a straight section can be cleared |
| Short twisting branch with fresh soil | Recent feeding exploration | Moderate to low |
| Loose soil beneath a molehill | Connection to deeper activity | Low for a first placement |
| Ridge that stays flat after two tests | Likely abandoned or rarely used | Low |
Prioritize repeat travel
When two tunnels pass the repair test, choose the straighter and more established path. Runs beside fixed landscape features can be useful because the boundary may encourage repeated travel. A clean straight segment also gives you room to align a trap correctly.
Use intersections carefully
An intersection may indicate frequent travel, but do not place a trap where several openings make the tunnel hard to clear. Follow the best branch a short distance from the junction. Select a straight confirmed section where the trap can sit securely in the mole’s path.
Prepare the tunnel before setting a trap
After identifying a strong active route, shift from testing to careful preparation. The trap must align with the tunnel and fit snugly so a traveling mole cannot easily move around it. Preparation turns good location data into a productive setup.
Find the exact passage and direction
Use a narrow probe or similar tool to locate the tunnel cavity on both sides of the chosen spot. Gentle probing establishes direction and depth without collapsing a wide area. Once you understand the route, open only the section needed for trap placement.
Clear loose dirt and debris from the passage. Remove bends or obstructions near the setup point so the trap sits in a straight travel line. The CINCH Tunnel Clearing Tool is designed to dig out a tunnel and clear a straight section before placement.
Match the trap to the tunnel
A trap should fit the tunnel snugly. CINCH mole traps come in multiple sizes because tunnel diameter varies. If you are unsure which size is appropriate, consult the mole trap sizing guide and FAQs before setting.
A loose fit can leave space around the trap. An oversized setup can require excess excavation and make it difficult to restore the tunnel. The right size and a cleared passage support a clean, reliable placement.
Set with minimal disturbance
Avoid crushing long sections of runway or leaving unnecessary openings. Follow the trap instructions and restore the immediate setup area as directed. For a full walkthrough after confirming the location, see how to set a mole trap.
Why a confirmed tunnel still may not produce a catch
Active tunnel identification improves the odds, but it does not replace correct trap placement. If a trap remains empty, diagnose the setup before deciding that trapping does not work.
The mole used a different part of the network
A mole can maintain several active routes and may not travel every one daily. Look for new ridges and repeat the repair test around nearby main runs. Using at least two traps in separate confirmed locations can provide better coverage than relying on one site.
The trap site was difficult to navigate
Loose soil, roots, bends, or debris can interfere with a clean travel path. Reopen the setup carefully and check that the tunnel is straight and clear. Confirm that the trap aligns with the passage rather than sitting above, below, or beside the travel line.
The runway was disturbed too broadly
Extensive digging can damage the route you wanted to intercept. If a large section collapsed, move to a nearby straight portion of the same confirmed tunnel. Retest that section before resetting.
The location was chosen from appearance alone
A ridge can look fresh even after a mole has moved on. If you skipped the repair test, remove the trap and test several routes. One extra day spent confirming activity is more useful than repeatedly resetting in an abandoned branch.
Weather changed the route
Soil moisture affects where earthworms and other food are available. After heavy rain, irrigation, or a dry spell, fresh activity may shift to another part of the yard. Do not assume a previously productive runway will remain the best option.
When the visible pattern changes, repeat the repair test. Check both the former main route and the newest straight ridges. Move the trap based on confirmed activity rather than leaving it in place only because it worked before.
When to recheck, reset, or relocate your trap
Follow the trap instructions for inspection frequency, and resist disturbing the site constantly. When checking, examine more than the trap itself. Look for a repaired opening, newly raised ridge, soil pushed around the setup, or fresh activity that bypasses the location.
Leave the trap when the route remains active
If the surrounding runway still shows activity and the setup remains aligned, the location may still be sound. Verify that the trap functions as intended, then give the route time rather than opening it repeatedly.
Relocate when the evidence moves
If the tested tunnel stops showing activity while another route repairs quickly, follow the evidence. Confirm the new route, select a straight segment, and prepare it carefully. When several routes are active, multiple traps can cover more of the network without guessing.
The process is repeatable: test, mark, inspect, prepare, and monitor. Each cycle narrows the search and turns an intimidating network into a small number of practical trap sites.
Frequently asked questions about active mole tunnels
How can I tell if I have an active mole tunnel?
Flatten a small section of a raised runway or make a small opening. Mark it and return in 12 to 24 hours. Lifted soil or a repaired opening indicates recent use. Test several locations because a mole may use only part of the visible network.
Do moles reuse their tunnels?
Yes. Moles may repeatedly use established travel routes while making temporary feeding branches elsewhere. Long straight tunnels near permanent boundaries and routes that repeatedly repair after testing are strong candidates for regular use.
Are mole mounds a sign of an active tunnel?
A fresh mound confirms recent digging and mole presence, but it does not necessarily reveal the best trap location. Loose soil beneath a mound can make placement difficult. A confirmed surface runway is often easier to prepare.
Can I trap a mole without finding an active tunnel?
You can set a trap in any visible run, but the chance of success falls if the mole does not return. Confirming activity helps you avoid abandoned branches and focus on routes with evidence of repeated use.
Turn a confirmed runway into a confident setup
Finding active mole tunnels is the most important step before trap placement. Once a route passes the repair test, a straight clear passage and snug trap fit help turn evidence into an effective setup. CINCH traps are made in Oregon, backed by a lifetime guarantee, and supported by clear setup resources.
Shop the Deluxe Mole Kit to get traps and the Tunnel Clearing Tool for your first setup.
