You’ve worked hard on your lawn, only to wake up to a series of dirt mounds and raised tunnels crisscrossing the grass. It’s a frustrating sight that can make you feel powerless. While there are countless remedies out there, from folk tales to chemical repellents, nothing is as consistently effective as a direct approach. This is where a high-quality mole trapping kit becomes your most valuable ally. It’s a proven, straightforward solution that puts you back in control. This guide is designed to walk you through everything you need to know, from selecting the right equipment to using it effectively, so you can stop the damage and reclaim your yard for good.
Key Takeaways
- Invest in a durable, high-quality kit: A successful mole trapping strategy starts with the right tools. Choose a kit with traps made from strong, weather-resistant materials like galvanized steel to ensure they are effective and can be reused for years to come.
- Focus your efforts on active travel tunnels: Don’t just place traps near random mounds. The most effective way to catch moles is by identifying their main underground “highways” and setting multiple traps along these active runs to increase your chances of success.
- Handle traps carefully and check them daily: Moles are sensitive to scent and disturbances, so always wear gloves when setting your traps. Checking them every 24 hours allows you to monitor your progress, remove captured moles, and reset traps quickly to resolve the problem.
What to Look for in a Mole Trapping Kit
When you’re ready to reclaim your yard from moles, choosing the right trapping kit is your first and most important step. A good kit can make the difference between a mole-free lawn and ongoing frustration. But with so many options out there, it can be tough to know what to look for. You want a solution that’s not just effective, but also durable and easy to handle. Let’s walk through the key features that separate a high-quality mole trapping kit from the rest, so you can invest in a tool that gets the job done right.
Traps Built to Last
Your mole traps will be out in the elements, pushed into the dirt, and used repeatedly, so durability is non-negotiable. Look for traps made from strong, weather-resistant materials like galvanized steel. The best traps are often handmade in the USA from strong metal, so they last a long time. This kind of quality construction ensures your traps won’t bend, rust, or break after just a few uses. A sturdy trap provides a reliable, long-term solution to your mole problem, saving you the cost and hassle of replacing flimsy equipment season after season. Investing in durable mole traps means you’ll have a dependable tool ready whenever a new tunnel appears.
An Easy-to-Use Design
You shouldn’t need an engineering degree to set a mole trap. A user-friendly design is essential for fast and effective mole control, so you don’t have to guess how to use it. Complicated traps can lead to incorrect placement, which means fewer catches and more mole damage. Look for a kit with a straightforward mechanism and clear instructions. An intuitive design allows you to set the traps quickly, safely, and correctly every time. This is especially important if you’re new to trapping. The goal is to solve your mole problem with confidence, and a simple, effective trap design makes that possible.
Proven, Effective Results
When you buy a mole trapping kit, you’re buying a promise of a mole-free yard. Make sure the kit you choose can back up its claims with a track record of success. Look for products with positive customer reviews and testimonials. Many people find success after trying other methods that failed, which is a great sign of a product’s reliability. University studies or expert endorsements also add a layer of credibility. Don’t just take the company’s word for it; see what other homeowners and gardeners have experienced. Choosing a trap with proven effectiveness gives you the best chance of resolving your mole issue for good.
All the Essential Tools Included
A great mole trapping kit is more than just the traps themselves. It should be a complete system that gives you everything you need to get started immediately. A comprehensive kit will typically include several traps, a pair of gloves to keep your scent off the traps, a trowel for digging, and marker flags to help you locate your sets. Having all the necessary trapping accessories in one package is incredibly convenient. It saves you from making extra trips to the hardware store and ensures you have the right tools on hand to follow the best trapping practices from day one.
Finding the Best Mole Trapping Kits
Once you’ve decided that a trapping kit is the right approach, the next step is finding the one that fits your needs. Mole trapping kits bundle together the essential tools, which can save you time and guesswork. They often include multiple traps, marking flags, and sometimes even digging tools. Looking at a few different options will help you see what’s out there and decide which features are most important for tackling the mole problem in your yard.
The Cinch Traps Mole Kit
If you’re looking for a straightforward and effective solution, our Cinch Traps Mole Kit is a great place to start. We designed it to give you exactly what you need to get rid of moles without any unnecessary extras. The kit includes two of our handmade, galvanized steel mole traps, a pair of bright yellow flags to mark your trap locations, and a simple, step-by-step guide. It’s a complete package that takes the confusion out of the process, making it perfect for homeowners who want a reliable system that works right out of the box.
Kits with Multiple Trap Types
As you browse, you’ll find kits that come with a wider variety of tools. Some larger kits might include six or even twelve traps, along with accessories like nitrile gloves, specialized hand trowels, and extra marking flags. These all-in-one packages can be helpful if you’re dealing with a widespread infestation across a large property. While having extra tools is nice, the most critical component is always the trap itself. Make sure the traps included are high-quality, durable, and easy to set before you invest in a larger bundle.
Budget-Friendly vs. Premium Kits
Mole trapping kits come in a wide range of prices, from budget-friendly starter packs to premium bundles for serious pest control. The price difference usually comes down to the number of traps included, the quality of the materials, and the number of accessories. A lower-priced kit might seem appealing, but it’s important to check what you’re getting. A premium kit often includes more durable, reusable traps that will last for years, ultimately offering better value than a cheaper option with flimsy traps that need frequent replacement.
Comparing Price and Long-Term Value
When you’re comparing kits, think about the long-term value, not just the initial price tag. It’s tempting to buy a single, inexpensive trap, but clearing a yard of moles almost always requires more than one. As trapping experts often note, you need enough traps to handle the initial problem effectively. Investing in a quality kit with several durable mole traps is a more strategic approach. It ensures you can set traps in multiple active tunnels at once, which is the key to resolving an infestation quickly and keeping your yard clear for good.
How to Choose the Right Mole Kit for Your Yard
Picking the right mole kit feels a lot like choosing the right tool for any other job. You wouldn’t use a hammer to turn a screw, and you shouldn’t use a one-size-fits-all approach to mole trapping. The best kit for your yard depends on your specific situation, from the size of your mole problem to the type of soil you have. By taking a few minutes to evaluate your needs, you can find a solution that works effectively and gives you long-term results. Let’s walk through the key things to consider so you can invest in a kit that gets the job done right the first time.
Assess Your Mole Problem
First, take a walk around your property to get a clear picture of the mole activity. Are you seeing just a few mounds, or does your lawn look like a battlefield? The scale of the infestation will determine how many traps you need. As mole trapping experts often say, you need enough traps to clear an area of moles initially. Trying to fix a heavy infestation with a single trap is a recipe for frustration. A small, new problem might be solved with one or two traps, but for widespread tunnels, you’ll want a complete kit with multiple traps to cover the area effectively.
Match the Trap to Your Soil
The type of soil in your yard can influence how well a trap works. Moles create different types of tunnels, but you want to focus on the main “traveling runs” they use frequently. Some traps can be difficult to set in very compact, rocky, or sandy soil. The good news is that well-designed traps, like those made from galvanized steel, are sturdy enough to handle most conditions. The key is to find a trap that you can set securely and correctly within the tunnel. Understanding how it works and how a trap is placed will help you determine if it’s a good fit for your yard’s specific soil composition.
Read User Reviews
One of the best ways to gauge a kit’s effectiveness is to see what other people are saying about it. Look for reviews from customers who had a mole problem similar to yours. You’ll often find that people who have success with a particular kit say it works very well, even if they had trouble with other types of mole traps before. Pay attention to comments about ease of use, durability, and, most importantly, results. Honest feedback can give you the confidence that you’re choosing a proven solution from a range of mole traps that have worked for others in real-world situations.
Look for Durability and a Warranty
Mole trapping isn’t always a one-and-done task, so you need equipment that will last season after season. Look for kits with traps that are built from high-quality materials. For example, traps that are handmade in the USA from strong metal are designed to last a long time. A company that stands behind its products will also offer a solid warranty. A lifetime warranty is the ultimate sign of quality, showing that the manufacturer is confident in the trap’s durability and performance. Investing in a Cinch Traps Mole Kit means you’re getting a reliable tool you can count on for years to come.
How to Use Your Mole Trapping Kit
Once you have your mole trapping kit, you’re ready to reclaim your yard. Using your traps correctly is just as important as choosing the right ones, and it’s probably easier than you think. It might take a little practice, but following a few key steps will make the process straightforward and successful. Think of it less as a battle and more as a strategy. By understanding how moles operate, you can place your traps for maximum effect and get your lawn back to being yours.
The whole process boils down to four main steps: finding where the moles are most active, setting enough traps to be effective, placing them correctly within the tunnels, and checking on them regularly. It’s a simple system that works because it uses the mole’s own behavior against it. You’re not just randomly placing traps and hoping for the best; you’re making calculated moves. This approach has been proven effective for generations of gardeners and homeowners. Let’s walk through exactly how to set up your traps for the best results, so you can get back to enjoying your yard without any unwanted hills and ridges.
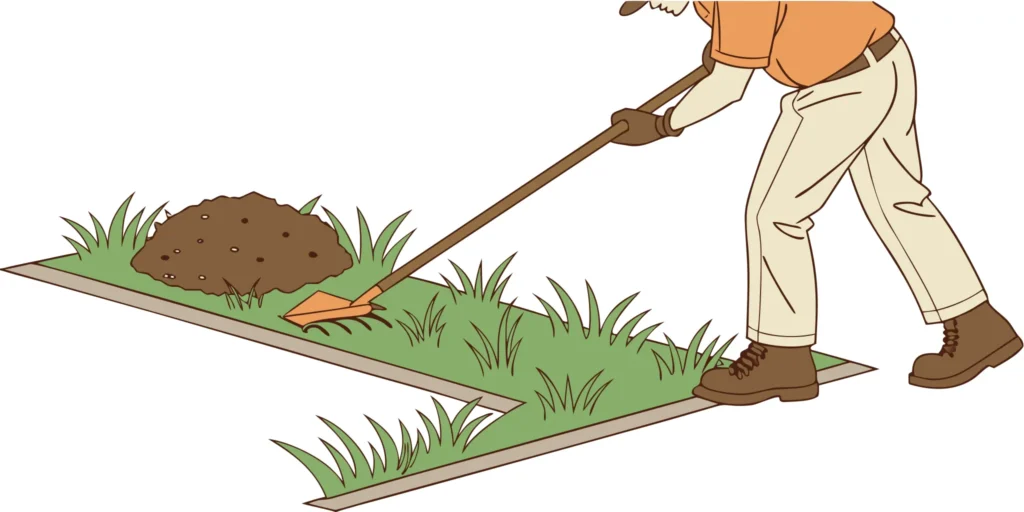
Find Active Tunnels
First, you need to play detective. Moles create a network of tunnels, but not all of them are created equal. You’re looking for the main highways, not the dead-end streets. These main “traveling runs” are typically straighter and connect different mounds. Moles use these paths daily, making them the perfect place for a trap. To find an active run, gently press down a small section of a tunnel with your foot. If the mole repairs the damage within a day or two, you’ve found a live one. As turf experts note, it’s best to set traps in these traveling runs because moles will come back through them more often than the winding feeding tunnels.
Set Multiple Traps
This is one of those times where more is definitely better. Trying to clear a yard full of molehills with a single trap is a recipe for frustration. For the best chance at success, you need to set multiple traps at once, especially if you’re dealing with a widespread problem. Place a trap in each active run you find. This increases the odds of catching the mole (or moles) quickly. Once you’ve cleared the area, you can maintain it with fewer traps. Think of it as an initial investment to solve the problem, followed by simple upkeep. Make sure your kit includes enough mole traps to cover the most active areas of your lawn.
Create a Tunnel Obstruction
Now it’s time to set the trap. Once you’ve located an active tunnel, carefully dig a hole just large enough to fit your Cinch Trap. The key is to create a small obstruction with soil in the middle of the tunnel that the mole will have to clear. As the mole pushes through the blockage, it triggers the trap. After placing the trap, gently backfill the soil around it and cover the hole to block out all light. Moles are sensitive to changes in their environment, so a draft or a beam of light can make them suspicious and cause them to avoid the area entirely. The Cinch Traps design makes this process simple and effective.
Check Your Traps Safely and Regularly
Patience is important, but so is persistence. Plan to check your traps every 24 hours. When you do, be careful not to disturb the area too much. It’s also a good idea to wear gloves when handling your traps to avoid leaving your scent behind. Moles have a keen sense of smell, and a human scent can signal danger, causing them to backfill the tunnel and avoid your trap. If you find a trap that’s been packed with dirt, it’s a sign the mole smelled something it didn’t like. Simply reset it, making sure to handle it with gloves. For more troubleshooting tips, you can always check out our FAQs.
Common Mole Trapping Mistakes to Avoid
Setting mole traps seems straightforward, but a few common missteps can leave you with a yard full of tunnels and no moles to show for it. Success isn’t just about having a great trap; it’s about using it correctly. By understanding how moles behave and what spooks them, you can avoid the frustrating trial-and-error that trips up many homeowners. Let’s walk through the most frequent mistakes so you can get your trapping strategy right from the very first try and reclaim your lawn faster.
Placing Traps in the Wrong Tunnels
It’s tempting to place a trap right where you see the most soil pushed up, but those are often temporary feeding tunnels that a mole may never use again. The real key is to find the main travel tunnels. These are the underground highways moles use daily. According to turfgrass specialists, it’s best to set traps in the traveling runs because moles pass through them more frequently. These are often straighter and may connect two mounds or run along a permanent structure like a driveway or foundation. Learning how it works and how to identify these active runways is the most critical step for effective trapping.
Choosing Low-Quality Traps
When you’re dealing with a persistent pest, the last thing you need is a flimsy trap that bends, rusts, or fails to trigger. As one expert mole catcher notes, “whatever type of trap you use you must buy good quality traps, and that is a minefield!” A poorly made trap is a waste of money and time. Look for traps made from durable, weather-resistant materials like galvanized steel. Investing in high-quality mole traps that are built to last not only increases your chances of success but also means you’ll have a reliable tool ready to go whenever a new pest problem appears.
Not Checking Your Traps Often Enough
Setting a trap and forgetting about it is a recipe for failure. Trapping is an active process that requires regular monitoring. For one, you need to know if your chosen location is working or if you need to move the trap to a different tunnel. If you have a significant infestation, you’ll need more than one trap and a consistent routine. It’s best to check your traps at least once a day. This allows you to quickly remove a captured mole and reset the trap to catch others. Consistent checks are the only way to know what’s working and get the problem under control.
Disturbing the Tunnels Too Much
Moles have a keen sense of smell and are highly sensitive to disturbances in their environment. If they detect human scent or notice their tunnel has been significantly altered, they will often abandon the area and dig a new path around your trap. When setting your traps, always wear gloves to avoid leaving your scent behind. Be as careful as possible not to collapse the tunnel. The goal is to make the trap seem like a natural part of their runway. If a mole keeps packing your trap with dirt, it’s a sign they smell trouble in the tunnel, so minimizing your impact is crucial.
Related Articles
Frequently Asked Questions
How many traps do I really need to solve my mole problem? While it’s tempting to start with just one, you’ll see much faster results by setting at least two or three traps. Moles create complex tunnel systems, and placing traps in multiple active runs at the same time significantly increases your chances of catching them quickly. For a larger yard or a more serious infestation, a kit with several traps is your best bet for getting the situation under control.
What does it mean if a mole keeps filling my trap with dirt? This is a classic sign that the mole is suspicious of something in its tunnel. Moles are very sensitive to changes, and they will often block off an area if they detect a human scent or a draft of light. If this happens, pull the trap out, reset it while wearing gloves, and make sure you cover the hole completely to block all light after placing it back in the tunnel.
Is it better to buy a complete kit or just individual traps? For most people, starting with a complete kit is the most effective approach. A good kit provides not only multiple traps but also essential accessories like marking flags so you don’t lose track of where you set them. It takes the guesswork out of the process and ensures you have everything you need to get started correctly, which often saves you time and frustration in the long run.
How can I be sure I’m placing the trap in the right spot? The key is to find the main “traveling runs,” which are like mole highways. These tunnels are usually straighter than the winding, messy feeding tunnels that branch off from them. To confirm a tunnel is active, gently press down a small section with your foot. If the mole repairs the flattened spot within 24 to 48 hours, you’ve found a perfect place for your trap.
Why is it so important to wear gloves when handling the traps? Moles have an excellent sense of smell, and they can easily detect human scent left on a trap. This scent acts like a warning sign, telling the mole to avoid the area. By always wearing gloves when you handle and set your traps, you prevent this from happening and make the trap seem like a natural, non-threatening part of the tunnel.
