If you’ve searched online for how to get rid of moles, you’ve been flooded with advice. Unfortunately, most of it is wrong. Let’s clear the air: putting chewing gum in the tunnels doesn’t work. Neither do those ultrasonic spikes. The biggest myth is that killing the grubs in your lawn will solve the problem. Moles’ primary food source isn’t grubs; it’s earthworms. Since you can’t (and shouldn’t) eliminate earthworms, grub control is a waste of money. When you’re ready to stop trying folk remedies and actually kill moles in your yard, you need a method based on facts, not fiction. Trapping is the only method recommended by agricultural experts because it physically removes the pest. This guide will show you the correct way to trap, so you can finally see real results.
Key Takeaways
- Stop wasting money on myths: Moles primarily eat earthworms, not grubs, so common fixes like grub control products and sonic spikes won’t solve your problem. Understanding their true diet is the first step to effective removal.
- Find the mole’s main highway: Don’t place traps randomly. The most effective way to catch a mole is to locate an active tunnel by collapsing a small section and checking if the mole repairs it within a day. This is the perfect spot for your trap.
- Get confirmed results with trapping: While baits and repellents leave you wondering if they worked, trapping provides clear proof of success. A sprung trap means you have physically removed the mole, making it the most reliable method for taking back your yard.
What Are Moles and Why Are They Wrecking Your Yard?
If you’ve woken up to a network of raised ridges and dirt mounds across your once-pristine lawn, you’re likely dealing with a mole. These small, velvety mammals are expert diggers, and while they aren’t trying to ruin your yard on purpose, their natural behavior can cause a lot of frustration for homeowners and gardeners. Understanding what moles are and what drives them is the first step to taking back your lawn. They aren’t malicious; they’re just hungry and looking for a meal in all the wrong places, like right under your grass.
What Moles Eat
It’s a common myth that moles are after your garden plants or the grubs in your soil. In reality, moles are insectivores, not rodents, and they have a very specific diet. Their main food source is earthworms. In fact, earthworms can make up the majority of their diet, along with other insects and larvae they find while tunneling. This is a crucial point because it means many popular pest control methods are ineffective. As experts at Purdue University note, since moles mainly eat earthworms, using grub control products won’t solve your mole problem. They are simply tunneling through your yard in search of their next wormy meal.
The Damage Moles Cause
The real problem with moles isn’t what they eat, but where they search for food. To find enough earthworms, moles create extensive networks of tunnels just below the ground’s surface. These feeding tunnels are the raised ridges you see crisscrossing your lawn, and the mounds of dirt, or molehills, are the soil they excavate from deeper tunnels. This activity not only looks messy but can also damage the root systems of your grass and plants, causing them to dry out and die. A single, energetic mole can dig up to 100 feet of new tunnels in just one day, quickly turning a beautiful yard into an uneven, lumpy mess.
How to Find Active Mole Tunnels
Before you can effectively get rid of moles, you need to think like one. Placing traps randomly in your yard is a recipe for frustration. The secret to success is finding the tunnels moles use every day. Think of it as finding the main highways they travel, not the little side streets they use once for a snack. By identifying these active runways, you can place your traps in the perfect spot for a quick and effective catch. It only takes a little observation to pinpoint exactly where you need to focus your efforts.
Surface vs. Deep Tunnels
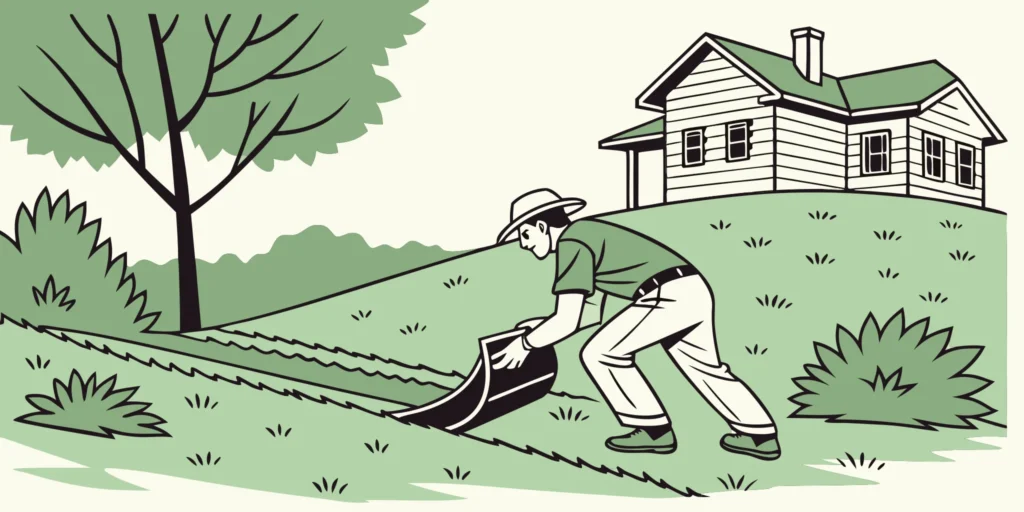
Moles create two different kinds of tunnels, and knowing the difference is key. The most obvious ones are the surface tunnels, which look like raised, squiggly ridges across your lawn. These are feeding tunnels where moles search for worms and grubs, and they often use them only once. The real prize is finding the deeper, main tunnels. These are the mole’s primary travel routes, connecting their nests to feeding areas. These tunnels are usually straighter and might not have a visible ridge. Your best bet is to look for straight paths that connect two mounds of dirt or that run along a permanent structure like a driveway or foundation. The how it works page shows exactly how to place a trap in one of these main runs.
Test for an Active Tunnel
Once you’ve located what you think is a main tunnel, you need to confirm it’s active. This is easier than it sounds. Simply press down a small, one-inch section of the tunnel with your heel or a small shovel to gently collapse it. You can mark the spot with a stick or a landscape flag so you can find it again easily. Now, you just have to wait. Check on the spot 24 hours later. If the mole has pushed the dirt back up to reopen the tunnel, you’ve found an active highway. This is the ideal location to set your mole traps because you know the mole will be coming through again.
Common Mole Control Myths
When you’re desperate to save your lawn, you’ll try just about anything. I get it. But a lot of the mole control advice floating around the internet and shared over the fence is, frankly, a waste of time and money. Before you spend another dollar on a “quick fix,” let’s clear up some of the most common myths. Knowing what doesn’t work is the first step toward finding what does.
The Grub Control Myth
This is probably the most persistent myth out there. The theory is that if you kill all the grubs in your lawn, the moles will move on. It sounds logical, but it’s based on a false premise. Moles are insectivores, but their favorite meal isn’t grubs; it’s earthworms. In fact, earthworms can make up 70-90% of their diet. While they might snack on a grub occasionally, they won’t starve without them. Using grub control products won’t eliminate their primary food source, so the moles will continue to tunnel through your yard in search of delicious earthworms.
Why Repellents and Gadgets Don’t Work
You’ve probably seen them online or in garden stores: ultrasonic spikes that vibrate the ground, solar-powered noisemakers, and even little pinwheels that are supposed to scare moles away. As tempting as these hands-off solutions are, there is no scientific evidence that they work. Moles may be startled by a new vibration or sound initially, but they quickly get used to it and go right back to their destructive digging. These gadgets are simply not a reliable or long-term solution for getting rid of moles. Save your money for a method that has been proven to be effective.
Ineffective Home Remedies
If you search for home remedies for moles, you’ll find a long list of strange suggestions, from putting chewing gum or razor blades in the tunnels to stuffing them with human hair or mothballs. Unfortunately, none of these tactics work. Moles will simply dig around these items and continue on their way. They are not scared off by odd smells or objects in their tunnels. These remedies are old wives’ tales that get passed around but have no basis in reality. You can find more answers to common questions on our FAQs page.
The Truth About Mole Poisons
Many people assume you can get rid of moles with the same poison you’d use for mice or rats. This is another common mistake. Moles are not rodents; they are insectivores. They have no interest in eating the grain-based pellets found in most rodent poisons. In recent years, poison baits shaped like earthworms have come on the market. These contain a nerve poison called Bromethalin. While these can be effective, they also pose a risk, as the poisoned mole may die anywhere, including on the surface where a pet or predator could find it. This is why many people prefer a more controlled removal method using mole traps.
Why Trapping Is the Most Effective Method
After trying repellents and gadgets that just don’t work, it’s easy to feel frustrated. You’ve probably spent money on sonic spikes that just seem to move the moles to a different part of the yard, or granules that wash away with the first rain. The good news is there’s a solution that gets the job done right. While it requires a little patience, trapping is widely considered the most successful and reliable way to control moles for the long term. Unlike poisons that you can’t be sure a mole ever ate, or repellents that just annoy them for a little while, a sprung trap is a clear sign of success. You know for certain that you’ve removed the animal responsible for tearing up your lawn.
Trapping puts you in control. It allows you to strategically target the most active areas of your yard and physically remove the problem at its source. It’s a straightforward method that has been proven effective for generations, long before all the modern gimmicks hit the market. Think of it this way: instead of trying to make your entire yard unpleasant for moles, you are focusing your efforts on the exact pathways they use every day. This targeted approach is not only more effective but also more efficient. By learning a few key things, like which traps to use and where to put them, you can solve your mole problem for good. Let’s walk through exactly how to do it.
Types of Mole Traps
When you start looking at mole traps, you’ll see a few common designs. Scissor-style traps are designed to be placed over a tunnel and are triggered when a mole pushes through. Harpoon traps work similarly, using a spring-loaded mechanism to spear the mole as it moves through its runway. The best trap for you often depends on the depth of the mole tunnels in your yard. For example, some find scissor traps work best for deeper tunnels, while other designs are easier to set in the shallow surface runs you see right under the grass. The key is choosing a trap that is effective, easy to set, and built to last more than one season.
Why Choose Cinch Traps
This is where choosing the right tool makes all the difference. Our Cinch Traps are designed to be simple, durable, and incredibly effective. Many people tell us our traps worked quickly, even after they had tried everything else without success. Unlike complicated traps that are difficult to set, our mole traps are handmade in Oregon from galvanized steel for a simple, powerful, and long-lasting solution. They work by being placed directly inside the tunnel, ensuring a catch. Because they’re built to last and come with a lifetime warranty, you can trust them to protect your yard year after year.
Where to Place Your Traps
A great trap only works if you put it in the right spot. Moles dig a complex network of tunnels, but they only use a fraction of them as daily “highways.” These are the active tunnels you want to target. To find one, gently poke a hole in the top of a surface tunnel with your finger or a small stick. Mark it with a flag and check it again in a day or two. If the mole has repaired the hole, you’ve found an active runway. You should also look for long, straight tunnels, especially ones that run along a permanent structure like a driveway, foundation, or fence line. These are often main travel routes and are perfect locations for a trap. Our How It Works page has more tips for identifying the best spots.
How to Set a Mole Trap
Once you’ve found an active tunnel, it’s time to set your trap. The most important step is to carefully follow the manufacturer’s directions. Every trap is a little different, and proper setup is critical for success. For Cinch Traps, you’ll start by excavating a small section of the active tunnel, just big enough to fit the trap. Place the unset trap inside the tunnel, making sure the jaws are aligned with the direction of the runway. After setting the trap, cover the opening with a piece of sod or a board to block all light, which encourages the mole to travel through and investigate. Then, all you have to do is wait. If you have more questions, our FAQs page is a great resource.
Should You Use Mole Bait?
When you’re dealing with mole damage, you want a solution that works. You’ve probably come across mole bait as an option, and it’s worth understanding how it functions and how it stacks up against other methods. While some people find success with bait, it comes with a different set of challenges and outcomes compared to trapping. Let’s walk through what mole bait is and whether it’s the right choice for your yard.
How Mole Bait Works
Mole baits are designed to trick a mole into thinking it’s found a meal. Most popular baits are shaped like worms and are made to have a similar texture and scent to a mole’s primary food source. These worm-like baits contain a poison, often Bromethalin, that kills the mole after it’s eaten. To use them, you identify an active tunnel and place the bait inside. It’s important to wear gloves when handling the bait, as transferring your scent can make moles suspicious and cause them to avoid it altogether. You place the bait, cover the hole, and wait, hoping the mole takes it.
Bait vs. Trapping: Which Is Better?
While bait can be effective, it leaves you with a lot of uncertainty. You don’t know if a mole actually took the bait or if it was pushed aside. You also won’t know where the mole dies, which could be anywhere in its tunnel system. Trapping, on the other hand, gives you clear confirmation that you’ve caught the pest. Experts often consider trapping the most successful long-term control method because it physically removes the mole from your property. With effective mole traps, you get a quick, definitive result. You set the trap, and you know for certain when the problem is handled, allowing you to move on to the next active tunnel.
Pro Tips for Successful Mole Trapping
Setting a trap is a great first step, but a little strategy goes a long way in getting rid of moles for good. These animals are creatures of habit, and understanding their behavior is the key to outsmarting them. By following a few professional techniques, you can make your trapping efforts much more effective and see results faster. Think of it as working smarter, not harder. These simple tips will help you place your traps in the right place at the right time, increasing your chances of success with every set.
Target Active Tunnels
To catch a mole, you need to place your trap where the mole is actually spending its time. Moles create a complex network of tunnels, but they only use a fraction of them regularly. These are their main highways. To find an active tunnel, gently press down a small section of a raised mole run with your foot or poke a small hole in the top. Mark the spot with a flag or stick and check it again in 24 to 48 hours. If the mole has pushed the dirt back up to repair the tunnel, you’ve found an active runway. This is the perfect place to set your trap.
Use Multiple Traps
Don’t put all your eggs in one basket. A single mole can maintain an impressive network of tunnels, so using just one trap is a game of chance. To get the job done efficiently, it’s best to use several mole traps at once. Place traps in a few different active tunnels throughout your yard. This approach covers more ground and significantly improves your odds of catching the mole, no matter which route it decides to take. By setting multiple traps, you can resolve your mole problem in days rather than weeks.
Wear Gloves to Mask Your Scent
Moles have a poor sense of sight, but they make up for it with a powerful sense of smell. They are sensitive to any foreign scents in their environment, including yours. If a mole detects human scent on or around a trap, it may become suspicious and avoid the area entirely, digging a new tunnel around it. To prevent this, always wear gloves when you handle and set your traps. Simple garden gloves will do the trick. This small step masks your scent and makes the trap seem like a natural part of the tunnel, ensuring the mole doesn’t get spooked. You can find more answers to common questions on our FAQ page.
Check Your Traps Daily
Consistency is crucial for successful trapping. Make it a habit to check your traps every day. Daily checks let you know if a trap has been sprung so you can quickly and humanely dispose of the captured mole. It also helps you see if your chosen location is effective. If a trap hasn’t been triggered after a couple of days, the mole may have changed its pattern. You can test the tunnel again for activity or simply move the trap to a different active run. Regular monitoring allows you to adapt your strategy and stay one step ahead of the pests.
The Best Time of Year to Trap
You can trap moles any time you see fresh activity, but your efforts will be most effective during certain seasons. The best times to trap moles are in the spring and fall. During these periods, the soil is typically moist and easy for moles to dig through, making them especially active near the surface. They are busy expanding their territories and searching for food. By focusing your trapping efforts during these peak seasons, you can catch them when they are most active and vulnerable, helping you protect your lawn before they can establish a deeper network.
Are Mole Traps Safe Around Kids and Pets?
When you have little ones or furry friends running around the yard, their safety is your top priority. The good news is that you can absolutely get rid of moles without putting your family at risk. The key is choosing the right kind of trap and using it correctly. Unlike poisons or baits that can be accidentally ingested, a well-placed, enclosed trap is a much safer solution for your household. By placing the trap inside the mole’s tunnel, you contain the mechanism underground, away from curious kids and pets.
Choose Enclosed Traps for Safety
The safest mole traps are the ones that work entirely underground. Cinch Traps are designed to be set directly inside an active mole tunnel, which means the working parts of the trap are not exposed on your lawn’s surface. This design significantly reduces the risk of an accidental encounter with a child or a pet. Once set, the only thing visible above ground is the top of the trap, which indicates its location. These types of mole traps provide a quick, clean kill without the mess, containing the mole within its own tunnel and keeping any potential hazards out of sight and out of reach.
Safely Handle and Dispose of Moles
Proper handling is just as important as placement. First, always wear gloves when you set a trap. This isn’t just for hygiene; it also prevents your human scent from getting on the trap, which could make a wary mole avoid it. Once you’ve caught a mole, continue to wear gloves to remove the trap from the ground. You can then dispose of the mole according to your local regulations, often by burying it or placing it in a sealed bag in the trash. This simple process ensures you never have to directly touch the mole, making disposal clean and straightforward for everyone.
How to Know the Moles Are Gone
After setting your traps and putting in the work, you want to be certain the moles are actually gone for good. The last thing you need is to declare victory, only to find a fresh mound of dirt in your lawn a week later. Thankfully, there’s a simple and reliable way to check if your yard is officially mole-free. It all comes down to observing their tunnels.
The most effective method is to perform a simple test. Walk through your yard and use your foot to flatten sections of the mole tunnels you find. Stomp down a few spots on every major runway. Now, all you have to do is wait and watch for a day or two. If you come back and the tunnels are still collapsed, that’s a fantastic sign. The absence of new mounds or raised ridges is your confirmation that you’ve successfully handled the problem. When the tunnels stay flat and your mole traps stop catching anything, you can confidently say the moles are gone.
On the other hand, if you check on the flattened tunnels and see they’ve been pushed back up, you know you still have work to do. A repaired tunnel is a clear sign of an active mole that is still using it as a highway. This isn’t a failure; it’s just valuable information. It tells you exactly where you need to focus your trapping efforts next. Simply reset your traps near this new activity and repeat the process until the tunnels stay down for good.
How to Keep Moles from Coming Back
After you’ve successfully trapped the moles in your yard, the last thing you want is a new family moving in. While you can’t completely mole-proof your property (they are persistent little diggers, after all), you can make your yard a much less appealing place for them to settle. A long-term strategy involves managing their environment and being prepared for any newcomers. By taking a few preventative steps, you can significantly reduce the chances of another mole invasion and keep your lawn looking its best. These proactive measures focus on making your yard less of a five-star resort for moles and more of a place they’d rather just pass through. It’s all about creating a less inviting habitat and staying vigilant. This approach saves you from having to deal with a widespread infestation all over again. Instead of waiting for dozens of mounds to appear, you can address the problem as soon as it starts, keeping your yard healthy and intact.
Reduce Their Food Source
You might have heard that getting rid of grubs will get rid of your moles. While it’s true that moles eat grubs, they are more of an occasional snack than a main course. A mole’s primary food source is the earthworm. In fact, studies show that earthworms make up the vast majority of their diet. Because earthworms are a sign of healthy soil, you wouldn’t want to eliminate them anyway. Using broad-spectrum pesticides to kill every insect in your lawn is often ineffective for mole control and can harm beneficial organisms. So, while a grub treatment might remove a small part of their food supply, it won’t stop a hungry mole from tunneling through your yard in search of earthworms.
Make Your Yard Less Inviting
Moles are creatures of comfort. They thrive in soil that is soft, moist, and easy to dig through. If your lawn is a bit soggy, you’re basically rolling out the welcome mat for them. One of the simplest ways to make your yard less attractive is to adjust your watering schedule. Instead of frequent, shallow watering, switch to deep, infrequent soakings. This encourages deep root growth for your grass and allows the top layer of soil to dry out between waterings, making it tougher for moles to dig their surface tunnels. A well-drained, less-compacted lawn is not only healthier for your grass but also a lot more work for a mole to get through, which might encourage them to move on to easier territory.
Consider Physical Barriers
The most reliable way to handle new moles is to stop them before they can establish a complex network of tunnels. While some people attempt to install underground mesh barriers, this is often expensive, labor-intensive, and impractical for an entire yard. The most effective and practical “barrier” is a consistent trapping routine. Moles are solitary, so a new set of tunnels usually means a single new mole has arrived. By learning how to set a mole trap and keeping one on hand, you can quickly deal with any newcomers. Regularly walking your property and watching for new activity allows you to place a trap and solve the problem in a day or two, long before major damage occurs.
Related Articles
- How to Get Rid of Moles in Your Lawn: 3 Pro Methods
- Get Rid of Moles Permanently: What Really Works
- Does a DIY Mole Control Kit Actually Work?
Frequently Asked Questions
I set my trap in what I thought was an active tunnel, but I haven’t caught anything. What am I doing wrong? Don’t get discouraged, this is a common part of the process. Moles can be unpredictable and sometimes abandon a tunnel. First, double-check that you wore gloves when setting the trap, as human scent can make them wary. If it has been a few days with no activity, the mole has likely moved on. Your best bet is to find a different active tunnel, preferably a long, straight one that connects two mounds or runs along a driveway, and try setting your trap there instead.
My yard is a total mess. How many moles am I actually dealing with? It’s easy to look at the damage and assume you have a whole army of moles, but they are actually solitary creatures. The extensive network of tunnels and mounds you see is often the work of just one or two very industrious individuals. A single mole can dig an impressive amount in a short time, so the damage looks worse than the infestation actually is. This is good news, as it means you only need to catch one or two animals to reclaim your yard.
Once the moles are gone, what’s the best way to fix my lawn? After you’ve confirmed the moles are gone for good, you can start the repair work. For the raised ridges, you can simply walk along them and gently press the turf back down with your foot. For the molehills, which are piles of dirt, use a rake to spread the soil out thinly across the surrounding grass. This will help level the area. You can then reseed any bare patches that were created, and with a little time, your lawn will recover.
Should I still use grub control products just in case? While it might seem like a good backup plan, focusing on grub control is not an effective strategy for getting rid of moles. Moles are insectivores, and their primary food source is earthworms, not grubs. Even if you eliminate every grub in your yard, the moles will continue tunneling in search of worms. Your time and energy are much better spent on trapping, which directly removes the animal causing the damage.
There are so many types of mole traps. Why are Cinch Traps a good option? Choosing a trap can feel overwhelming, but a good one should be effective, durable, and straightforward. Cinch Traps are designed to be set directly inside the tunnel, which is a highly effective placement that contains the entire process underground. They are handmade from galvanized steel, so they are built to last for many seasons. Many people find their simple design easier and safer to set compared to more complex traps, making them a reliable choice for getting the job done right.
