You don’t need to call in an expensive professional to handle a mole problem. With the right tool and a little know-how, you can solve it yourself. Cinch traps are the secret weapon for countless gardeners and homeowners because they are simple, reusable, and incredibly effective. The key to success is understanding the mole’s behavior and placing the trap correctly in its main travel path. It might seem tricky at first, but the process is surprisingly easy once you see it broken down. We’re here to show you exactly how to use cinch mole traps with confidence, covering every step so you can get results quickly.
Key Takeaways
- Find the mole highways: Your success comes from placing traps in active, high-traffic tunnels. Use the stomp test to identify these main runways, which are often found along straight paths like fences or driveways.
- Double your chances with two traps: For the best results, always set two traps in the same tunnel facing opposite directions. This simple strategy ensures you catch the mole regardless of which way it’s traveling.
- Finish the job after a catch: Once you’ve caught a mole, collapse the empty tunnels to prevent new pests from moving in. Then, repair your lawn and keep an eye out for any new activity for a week or two.
Why Cinch Mole Traps Are So Effective
When you’re dealing with a mole problem, you want a solution that’s straightforward and, most importantly, one that actually works. Cinch traps have been the go-to choice for homeowners and professionals for decades because they are built on a foundation of durability, simplicity, and a proven design. You don’t need special bait, complicated setups, or a degree in pest control to get your yard back. These traps are designed to work with the mole’s natural behavior, making them incredibly efficient. Let’s walk through what makes these traps a reliable tool in your gardening shed.
Built to Last in the USA
There’s nothing more frustrating than buying a tool that gives out after just a few uses. That’s why our mole traps are handmade in Oregon from durable, galvanized steel. This isn’t flimsy material; it’s a professional-grade tool designed to withstand the dirt, moisture, and pressure of being outdoors season after season. Think of it as a long-term investment in a mole-free yard. Because they are built to last, you can count on your Cinch trap to be ready whenever a new mound appears, providing a dependable solution for years to come.
A Simple, Effective Design
The beauty of the Cinch trap is its simplicity. You don’t need to mess with bait or create elaborate dirt blockages to lure a mole in. The trap is designed to work with a simple bump from the mole as it moves through its tunnel to clear the path. All you have to do is place a set trap in an active tunnel, and the mole does the rest of the work for you. This straightforward approach removes the guesswork and makes the trapping process much less complicated. You can see a full breakdown of the process on our How It Works page.
The Proven Trigger Mechanism
So, how does it work so well? Cinch traps feature long jaws that can be positioned perfectly within the mole’s tunnel. When you place the trap, you create a small disturbance in the mole’s path. Moles are tidy creatures and will almost always return to investigate and repair the tunnel. As the mole pushes dirt to clear the way, it bumps into the trigger wires, and the trap springs shut. This reliable trigger mechanism uses the mole’s own instincts to ensure a high success rate, making it one of the most effective methods for reclaiming your lawn.
Find Active Mole Tunnels in Your Yard
Before you can set a trap, you need to play detective. Moles are creatures of habit, and they don’t use all their tunnels equally. Some are main highways they travel daily, while others are just for a quick snack. The secret to successful trapping is finding those high-traffic areas. Placing your trap in an active runway is the difference between catching a mole on the first try and waiting for weeks with no results. Let’s walk through a few simple ways to pinpoint exactly where these pests are busiest.
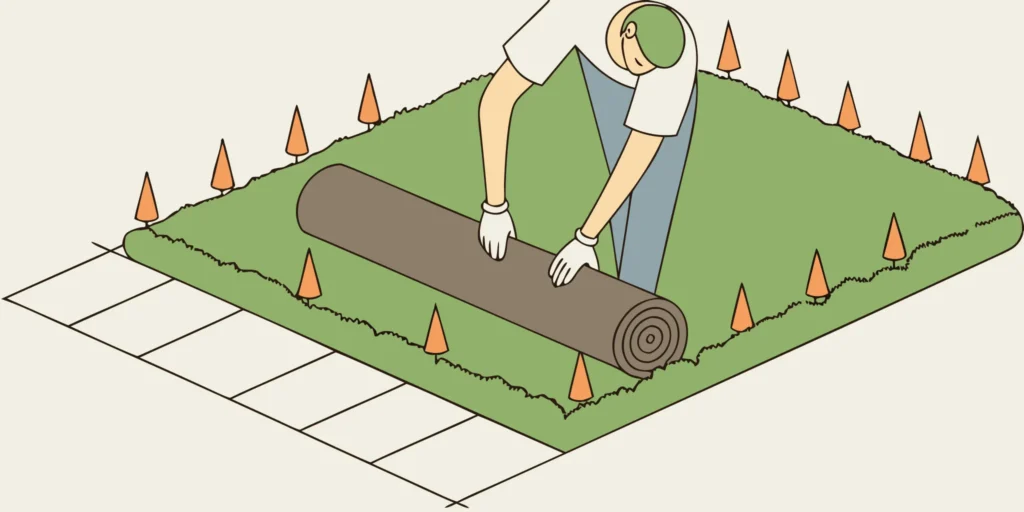
Look for Fresh, Cone-Shaped Mounds
Start with the most obvious clue: the molehills. Look for fresh, cone-shaped mounds of dirt in your yard. These aren’t just random piles; they’re excavation sites. A fresh mound will be made of fine, loose soil and often looks like a small volcano, with the actual tunnel entrance hidden underneath. If the dirt looks dark and damp, that’s a great sign of recent activity. These mounds are your first indicator that you have an active mole problem and need the right mole traps to handle it. Older mounds will look flattened and may have weeds growing on them, so focus your attention on the newest ones.
Use the “Stomp Test” on Surface Tunnels
Moles also create raised ridges across your lawn as they search for food just below the surface. To find out which of these surface tunnels are currently in use, you can perform a simple “stomp test.” Find a few of these raised sections and gently press them down with your foot, just enough to collapse the tunnel. You don’t need to stomp hard. Mark the spots with a small flag or stick so you can find them again easily. Check back in 12 to 24 hours. If the mole has pushed the dirt back up to reopen the tunnel, you’ve found an active runway. This is a perfect spot to set your trap.
Understand Mole Travel Patterns
Think of a mole’s tunnel system like a road map. Some tunnels are main arteries used every day, while others are quiet side streets. Your goal is to find the highways. Moles often create their main travel tunnels along straight, protected paths, like the edge of a driveway, a fence line, or the foundation of your house. These long, straight runs are usually the most frequently used routes. By focusing your efforts on these main thoroughfares instead of the winding, erratic feeding tunnels, you significantly increase your chances of a quick catch. You can learn more about their behavior by checking out our mole and gopher FAQs.
What to Grab Before You Start
Before you head out to the yard, gathering a few key items will make the trapping process much smoother and more effective. Being prepared means you can set your traps quickly and correctly without running back and forth to the garage. Think of it as setting up your workstation. With the right tools in hand, you’ll feel confident and ready to tackle those tunnels. Let’s walk through exactly what you’ll need for the job and a few important tips to keep in mind before you get started.
Your Trapping Toolkit
First things first, you need a reliable trap. Investing in a professional-grade mole trap made from durable, galvanized steel ensures you have a tool that is both effective and can be used for years. Besides your Cinch trap, a good pair of gardening gloves is essential for protecting your hands and minimizing your scent on the trap. You’ll also need a tool for digging. Many experts find that a Hori Hori, a type of Japanese gardening knife, is the perfect partner for a Cinch trap because it cleanly slices into the turf without collapsing the tunnel. A small trowel or spade works well, too. Finally, grab a small flag or stick to mark the trap’s location.
Important Safety Tips
One of the best things about Cinch traps is their simplicity. You don’t need to mess with complicated dirt blockages or use bait. A well-placed trap in an active tunnel is all you need for the mole to do the work for you. When handling your trap, always be mindful of the trigger mechanism and keep your fingers clear once it’s set. Moles can be surprisingly clever and may learn to avoid traps, so wearing gloves helps mask your scent. It’s also a good idea to check your local regulations regarding trapping. For more specific questions, our FAQs page is a great resource for quick answers on handling and setting your traps safely.
How to Set Your Cinch Mole Trap, Step by Step
Alright, you’ve found the active tunnels and you have your Cinch trap ready to go. Setting the trap is the most important part, and it’s easier than it looks. The design is brilliantly simple, and once you get the hang of it, you’ll be able to set one in under a minute. Let’s walk through it together.
Step 1: Expose the Main Tunnel
First things first, you need to open up the mole’s main travel path. Using a small shovel or garden trowel, carefully dig into the soil between two fresh mounds. You’re looking for the main runway, which is usually about six to eight inches below the surface. Once you dig down, you should see two distinct tunnel openings. Clear out any loose dirt from the openings so the path is unobstructed. This ensures the mole has a clear shot through your trap. Getting this step right is key to making sure your mole traps are in the perfect position.
Step 2: Prepare the Trap
Now, grab your trap. Hold it with the jaws pointing down and get familiar with the different parts. You’ll see the trigger wire, which is the key to the whole mechanism. To start, pull this trigger wire back so it’s out of the way. This gives you room to work with the jaws and setting wires. It’s a simple motion that prepares the trap for the next step. If you’re a visual learner, watching a quick video on the How It Works page can be super helpful. This initial prep makes the whole process smoother and safer.
Step 3: Set the Trigger Wires
This is where the magic happens. With the trigger wire pulled back, lift the large jaw wire and move it to the other side of the trap. Now, take the front setting wire and place it across the jaw wire you just moved. Next, lay the back setting wire across the front one. Finally, push the trigger wire forward so its small tab sits just behind the back setting wire. Give it a gentle wiggle to make sure everything is secure. The trap is now set and extremely sensitive. Handle it carefully from here on, holding it by the top loops.
Step 4: Position the Trap in the Tunnel
With your trap set, it’s time to place it. Carefully lower the trap into the tunnel opening you created in the first step. Make sure the jaws are aligned with the direction of the tunnel. For the best results, you should always use two traps. Place one in each opening, facing opposite directions. This doubles your chances of catching the mole, no matter which way it’s traveling. You don’t need to cover the hole unless you have curious pets or children. Moles dislike the open air and will come to investigate the disturbance. You can find more helpful tips on our FAQs page.
Find the Best Spot for Your Trap
Okay, you’ve identified the active tunnels in your yard. Now comes the most important part: choosing the perfect spot to place your trap. Where you set your Cinch trap is just as critical as how you set it. Moles are creatures of habit, and placing your trap in their main travel routes is the key to getting quick results. Think of it like finding the busiest intersection in a city. Let’s walk through the best places to set your traps for maximum success.
Target High-Traffic Tunnels
Moles create a network of tunnels, but not all of them are created equal. Some are temporary feeding tunnels used only once, while others are major highways they travel through daily. Your goal is to find these high-traffic tunnels. These are typically the longer, straighter runs connecting two mounds or running along a permanent structure. If you’ve used the “stomp test” we talked about earlier, you’ll know a tunnel is active if the mole has repaired the collapsed section. Placing your mole traps in these main thoroughfares ensures you’re setting up right where the action is, which is the fastest way to solve your mole problem.
Place Traps Along Edges and Borders
If you’re looking for a guaranteed hotspot, check along the edges of your property. Moles love to build their main tunnels along solid borders like driveways, sidewalks, fences, and foundation walls. These structures provide a straight, protected path for them to travel. This is where the design of the Cinch trap really shines. Its long jaws are perfect for reaching into tunnels that run alongside or slightly under these edges, a spot that can be tricky for other traps. By focusing on these border areas, you’re using the mole’s own habits to your advantage and setting yourself up for a successful catch.
Why Two Traps Work Better Than One
Here’s a pro tip that can double your chances of success: always use two traps at once. When you dig into a mole’s tunnel to set a trap, you’ve created a disturbance. The mole will eventually come to investigate and repair the damage, but you don’t know which direction it will approach from. By placing two Cinch Traps in the tunnel facing opposite directions, you’re covered no matter which way the mole arrives. This simple strategy is the most effective way to ensure a catch and is a standard practice among professional trappers. It saves you time and gets your yard back to normal that much faster.
You’ve Caught a Mole. Now What?
Success! You checked your trap and found you’ve caught the culprit that’s been tearing up your lawn. It’s a great feeling to know your hard work paid off. But the job isn’t quite finished. Taking the right steps after a catch is just as important as setting the trap correctly. It ensures the problem is truly solved and helps you restore your yard to its former glory. Here’s what to do next.
Safely Remove the Trap and Mole
First things first, let’s get the trap and the mole out of the ground safely. Always wear a pair of sturdy gloves when handling the trap and the animal. Carefully remove the entire trap from the tunnel. Once it’s out, you can disengage the trap to release the mole. The next step is disposal. It’s important to handle this part responsibly, so be sure to check your local city or county regulations for proper guidelines on disposing of wildlife. Following these rules is the best way to ensure you’re doing things correctly and respectfully.
Repair the Tunnel Area
Now that the mole is gone, it’s time to deal with the network of tunnels it left behind. Leaving them as they are can invite other pests to move in or cause your lawn to become uneven and unstable. The easiest way to fix this is to simply collapse the tunnels. You can walk along the raised ridges, pressing them down with your feet. For deeper tunnels, you might need a shovel to fill them in with soil. Once the tunnels are collapsed, you can rake the area smooth and reseed any bare patches to get your grass growing back thick and healthy.
Check for More Mole Activity
You caught one mole, but was it working alone? Moles are often solitary, but it’s possible another one could move into the vacant tunnel system. For the next week or two, keep a close eye on your yard. Look for any signs of fresh activity, like new mounds of dirt or newly raised ridges in the lawn. If you spot any, it’s time to get your Cinch Traps back out. Knowing the mole trapping process makes it easy to reset your traps and quickly handle any new arrivals before they can do more damage.
Troubleshooting Common Trapping Issues
It can be frustrating to set a trap perfectly only to find it untouched the next day. Don’t get discouraged. Moles are clever creatures, and a few small adjustments are often all it takes to succeed. If you’re having trouble, let’s walk through the most common issues and how to solve them. With a little patience and the right technique, you can get your yard back. Our effective mole traps are designed for success, and these tips will help.
Why Isn’t My Trap Working?
If your trap isn’t catching anything, you might be dealing with a cautious mole. Moles are harder to trap than gophers because they are smarter and can learn to avoid them. They are sensitive to their environment and may simply be digging around or under the trap. It’s also possible the tunnel you’ve chosen isn’t a primary runway. Moles use some tunnels for feeding and others for frequent travel. If you’re in a less-used feeding tunnel, the mole may not return for days. The key is to ensure you’re in an active, main tunnel.
Adjust Trap Placement and Sensitivity
Proper placement is everything. To confirm you’ve found a good spot, stomp down a few raised sections of a surface tunnel. If the tunnel is raised again the next day, it’s an active spot for trapping. Once you’ve found an active tunnel, make sure your trap is sensitive enough to spring with a light touch. Our traps are designed to activate with a simple bump from the mole as it moves through its tunnel clearing dirt. Double-check that the trigger wires are set correctly and that no rocks or roots are interfering with the mechanism. You can always review the steps on how it works.
What to Do with a Sprung Trap
Finding a sprung trap with no mole inside can feel like a setback, but it’s a good sign. It means a mole is active in that tunnel and interacted with the trap. Often, a mole will try to block a new obstruction by pushing dirt ahead of it, which can spring the trap without the mole getting caught. If this happens, simply clear the dirt from the tunnel, reset the trap, and place it back in the same spot. After catching a pest, you remove the trap, put the dirt back, and keep an eye on the area for more activity. The same principle applies here: reset and remain vigilant.
Keep Your Cinch Traps Working for Years
Your Cinch traps are built from durable, galvanized steel to last a lifetime. With just a little bit of routine care, you can make sure they stay in perfect working order season after season. Taking a few minutes to clean and inspect your traps will ensure they remain as effective as the day you bought them. Think of it as a small investment to protect your bigger investment: your yard.
How to Clean and Store Your Traps
After you’ve successfully caught a mole, it’s a good idea to clean your trap before setting it again. Use a wire brush or a piece of steel wool to scrub off any dirt, mud, or debris. A clean trap has a much smoother trigger action. One common mistake is to lubricate older traps with oil, but this can actually attract dirt and grime, causing the mechanism to jam. Instead of oil, consider using a light coat of our maintenance spray to fight corrosion and keep the parts moving freely. When you’re done for the season, store your clean traps in a dry place like a shed or garage to protect them from the elements.
Inspect Your Traps Regularly
Before you set a trap, give it a quick visual inspection. Check that the jaws are properly aligned and can open and close without any issues. Over time and with heavy use, they can sometimes get slightly bent. If you notice the jaws don’t open completely when you set the trap, you can gently bend them back into their original position. Also, take a look at the trigger wires. If they look worn or bent out of shape, replacing them is an easy fix that can make a huge difference in the trap’s sensitivity and success rate. You can find all the replacement parts you need right on our site.
Related Articles
- How to Set a Mole Trap: Video & Step-by-Step Guide
- How to Set a Scissor Claw Mole Trap in 5 Steps
- How to Set a Mole Trap Spring-Loaded Safely
- Easy Mole Trap 101: The Ultimate 2026 Guide
- How Do Mole Traps Work? 4 Types Explained
Frequently Asked Questions
Do I need to use bait with my Cinch trap? You don’t, and that’s one of the best things about this design. The trap works by using a mole’s natural instinct to clear its tunnel. When you set the trap, you create a small disturbance. The mole comes to investigate and pushes dirt to repair the path, which bumps the trigger. Bait is unnecessary and can sometimes even attract the wrong kind of attention from other animals.
How long should I wait before checking my traps? It’s a good practice to check your traps once every 24 hours. Moles are active throughout the day, so this gives them plenty of time to encounter the trap. Checking too frequently can disturb the area and leave your scent behind, which might make a mole suspicious. A daily check is the perfect balance to see your results without interfering with the process.
Are these traps safe to use if I have pets or children? Because the trap is set underground in the mole’s tunnel, it is generally out of the way. However, if you have curious pets or young children who play in the yard, it’s always best to take an extra precaution. You can cover the hole where you placed the trap with a bucket, a board, or a paver stone. This not only keeps kids and pets safe but also blocks light from entering the tunnel, which encourages the mole to come investigate the disturbance.
I found a sprung trap but no mole. What should I do? Don’t be discouraged; this is actually a good sign. It means a mole is definitely using that tunnel. Most often, this happens when the mole pushes a large amount of dirt ahead of itself to clear the tunnel, setting off the trap before it can get caught. All you need to do is clear the dirt out of the tunnel, carefully reset the trap, and place it right back in the same spot.
Can I use my mole trap to catch a gopher? While our mole and gopher traps look similar, they are designed specifically for the animal they are named for. Moles and gophers have very different behaviors and create different types of tunnels. For the best results, you should always use a mole trap for a mole problem and a gopher trap for a gopher problem. Using the correct trap is the key to a quick and successful catch.
