The network of tunnels under your lawn might seem like a chaotic mess, but there’s a logic to it. Moles create a complex system of roads, with some acting as temporary side streets for finding food and others serving as main highways for daily travel. The key to stopping them is learning to read this underground map. Instead of guessing, you can learn to identify the high-traffic areas where a trap will be most effective. This article will teach you the simple techniques for how to find mole tunnels in your yard, turning you into an expert navigator of their world and putting you in control.
Key Takeaways
- Know the signs of mole activity: Before you act, confirm you are dealing with moles by identifying their unique clues, like cone-shaped molehills and raised surface tunnels, which are different from the damage caused by gophers.
- Find the mole’s highway with a simple test: The most important step is finding a tunnel in current use. Flatten a section of a raised ridge with your foot and check back in 24 hours; if it is repaired, you have found an active runway.
- Focus on what works, which is trapping: Skip the unproven home remedies, as they are ineffective. The most reliable solution is to place a quality trap directly in a confirmed active, straight tunnel to solve the problem for good.
Is It Moles? Signs of Activity in Your Yard
Before you can solve your underground pest problem, you need to be sure you know who you’re dealing with. The battle plan for moles is different from the one for gophers, so a correct identification is your first, most important step. Luckily, moles aren’t very subtle. They leave behind a few distinct clues that are easy to recognize once you know what to look for. If you’ve noticed your yard looking a little worse for wear, let’s walk through the tell-tale signs of mole activity.
Spotting Molehills
One of the most obvious signs of a mole is the molehill. These are cone-shaped mounds of soil that look like tiny volcanoes erupting on your lawn. When moles dig their deep tunnels, they have to push the excavated dirt somewhere, and that somewhere is your yard’s surface. The soil in a molehill is typically made of chunky dirt clods. This is a key difference from gopher mounds, which are usually crescent-shaped and made of finer, more pulverized soil. If you see a collection of these round, conical piles, you can be fairly certain a mole is the culprit. You can learn more about the differences by checking our mole and gopher FAQs.
Identifying Raised Ridges and Surface Tunnels
Have you noticed raised lines snaking across your lawn, almost like a network of veins just under the surface? These are surface tunnels, and they are a dead giveaway for moles. Moles create these shallow runways as they search for their next meal of earthworms, grubs, and insects. As they move just below the ground, they push the soil upward, creating a distinct ridge you can see and feel. These feeding tunnels are often used only once, but they create a clear map of where the mole has been. Understanding how it works when moles create these tunnels is the first step to reclaiming your yard.
Noticing Patches of Dead Grass
If you’re seeing random patches of brown, dead grass that you can’t explain, it could be due to mole activity. As moles dig their surface tunnels, they sever the roots of the grass from the soil. This cuts the grass off from its vital supply of water and nutrients, causing it to wither and die. These patches of dead grass often appear directly over the raised ridges of their tunnels. So, if you see a combination of raised lines and dying grass, it’s a strong indicator that a mole is disrupting your lawn’s root system. Once you’ve confirmed the damage is from moles, you can start looking for an effective mole trap to solve the problem.
Decoding Mole Tunnels: Surface vs. Deep
To effectively stop moles, you first need to understand how they operate. Think of their underground world as a network of roads. Moles create two distinct types of tunnels, each with a different purpose. One type is for finding food, and the other is for getting around. Recognizing the difference between them is the secret to figuring out where a mole is most active and where you should focus your efforts.
The first kind are shallow surface tunnels, which are all about feeding. These are the raised, squiggly lines you see crisscrossing your lawn. The second kind are deep tunnels, which act as the main highways for moles to travel between their dens and feeding areas. These deeper tunnels are what create the classic volcano-shaped molehills. Knowing which tunnel you’re looking at helps you predict the mole’s behavior. While you might see a lot of surface activity, the deep tunnels are often the most consistent travel routes and the best place to set a trap. By learning to read these signs, you can move from randomly guessing to strategically placing your traps for the best results.
Surface Tunnels for Feeding
Surface tunnels are the mole’s dining hall. Located just an inch or two beneath the ground, these are the paths a mole creates as it searches for its next meal of earthworms, grubs, and insects. You can spot them easily as raised ridges in your lawn, almost like veins running through the grass. A mole is a busy creature and can dig up to 100 feet of these feeding tunnels in a single day, which is why the damage can seem to appear overnight. While these tunnels show you where a mole has been looking for food, they can sometimes be used only once. They are a clear sign of a mole’s presence, but they aren’t always the most reliable spot for trapping.
Deep Tunnels as Main Highways
If surface tunnels are the side streets, deep tunnels are the main highways. These are the primary travel corridors moles use to move between their nests and their favorite feeding grounds. Located anywhere from 3 to 12 inches below the surface, you won’t see these tunnels directly. Instead, you’ll see the evidence they leave behind: molehills. Those cone-shaped mounds of fresh dirt are formed as the mole pushes soil up from its deep excavation work. These main runways are used daily, making them the perfect place to intercept a mole. Finding a main runway is your goal, because it’s the most strategic location to set your mole traps and solve your problem for good.
When Is the Best Time to Find Mole Tunnels?
Timing is everything when it comes to outsmarting moles. These little creatures operate on a schedule, and understanding their daily and seasonal patterns is your secret weapon. By learning when they’re most active, you can find their main tunnels more easily and set your traps for the best chance of success. It’s all about knowing when and where to look, which saves you a ton of time and guesswork. Focusing your efforts during these peak times makes the process of how it works much more straightforward and effective. Instead of randomly checking old tunnels, you can confidently identify the active highways moles are using right now.
Best Times of Day to See Fresh Activity
Moles aren’t strictly nocturnal; they work in shifts around the clock. However, you’ll see the most evidence of their work in the early morning and late evening. This is when they are busiest, pushing up fresh soil as they expand their network of tunnels in search of worms and grubs. I recommend taking a quick stroll through your yard first thing in the morning or just before dusk. Look for newly formed molehills or raised ridges that weren’t there hours before. This fresh activity is the clearest sign you’ve found a tunnel a mole is currently using, making it the perfect spot to take action.
Best Seasons to Locate Active Tunnels
Spring and fall are the best seasons for finding active mole tunnels. During these milder months, the soil is damp and easy to dig, which means moles stay busy creating feeding tunnels just below the surface. You’ll see their tell-tale raised ridges all over the lawn. In contrast, moles are harder to track in the dead of summer and the deep freeze of winter. As experts from Purdue University note, moles follow their food sources deeper when the ground is dry or frozen. While they don’t hibernate, their activity moves far below ground, making surface tunnels less common. If you must deal with moles in extreme weather, focus on areas that stay moist, like irrigated flower beds.
How to Find an Active Mole Tunnel: A 5-Step Guide
Finding the right place to set a trap is the most important part of dealing with moles. Instead of randomly placing traps and hoping for the best, a little detective work will show you exactly where the moles are traveling. Following these five steps will help you pinpoint the active tunnels in your yard, so you can place your traps for the best results.
Step 1: Survey Your Yard and Map the Tunnels
Before you do anything else, take a walk around your property to get a sense of the overall mole activity. Look for the raised ridges of surface tunnels and the classic volcano-shaped molehills. Try to see the patterns in their network. Do the tunnels run in straight lines? Do they connect multiple mounds? Do they follow a fence line or the edge of a driveway? Think of it like creating a map of the mole’s world. This initial survey helps you understand the scope of the problem and identify potential highways the moles use daily. Understanding general mole behavior can give you a big advantage in predicting their paths and habits.
Step 2: Zero In on High-Activity Areas
Moles are creatures of habit, and they prefer areas where digging is easy and food is plentiful. They love the soft, moist soil found in well-watered lawns and garden beds because it’s full of their favorite foods: earthworms and grubs. As you survey your yard, pay special attention to these spots. Areas near sprinkler heads, lush flower beds, or vegetable gardens are often hotspots for mole activity. Focusing your search on these prime locations will save you time and effort. You’re much more likely to find a frequently used tunnel in these areas than in dry, compacted soil. This is where the moles are actively searching for food, making it a great place to start your investigation.
Step 3: Perform the Stomp Test on Surface Ridges
Once you’ve identified some promising surface tunnels, it’s time to see which ones are currently in use. This is where the simple but effective “stomp test” comes in. Find a raised ridge and gently press down a one-foot section with your foot, just enough to flatten it without completely collapsing it. You can mark the spot with a stick or flag so it’s easy to find later. Come back and check on it in 12 to 24 hours. If the mole has pushed the dirt back up and repaired the tunnel, you’ve found an active runway. This is a sure sign that a mole is using that path regularly and is a perfect spot to learn how it works to set a trap.
Step 4: Use a Probe to Find Deep Tunnels
While surface tunnels are easy to spot, moles use deeper tunnels as their main travel corridors. These can be anywhere from three to 12 inches below the surface. To find them, you’ll need a probe. You can use a long screwdriver or a dedicated soil probe, which you can find among other useful accessories. Go to an area between two molehills or alongside a surface run and start poking the probe into the ground every few inches. When you feel a sudden drop or give, you’ve broken through the top of a tunnel. This is how you locate those hidden highways. Mark these spots, as they are some of the most effective places to set a trap.
Step 5: Locate the Main Travel Runway
The ultimate goal is to find a main travel runway. These are the straightest, most established tunnels that moles use for their daily commute between their dens and feeding areas. They often run parallel to man-made borders like sidewalks, driveways, and building foundations, or along natural edges like fence lines. Use your probe to confirm a straight tunnel path between two mounds or along one of these edges. An active main runway is the single best place to set your trap because you have the highest probability of catching a mole as it moves through. Once you’ve located one of these high-traffic routes, you’re ready to set your mole traps and take back your yard.
How to Tell if a Mole Tunnel Is Active
Finding an active mole tunnel is the most important step in reclaiming your yard. Placing traps in old, abandoned tunnels is a waste of time and effort. Moles create a vast network of tunnels, but they only use a fraction of them regularly. Your goal is to find their current “highways.” Luckily, there are a few simple ways to figure out which tunnels are in use right now, so you can focus your efforts where they’ll have the biggest impact.
The “Stomp Test” Explained
The easiest way to check for activity is a simple trick called the “stomp test.” Find a raised surface ridge in your yard and gently press a small section of it down with your foot, collapsing the tunnel. You don’t need to flatten the whole thing, just a foot-long section will do. Mark the spot with a small flag or stick so you can find it again easily. If a mole is still using that tunnel as a travel lane, it will push the dirt back up to repair the damage. This simple test for moles is a reliable way to confirm you’ve found a busy pathway.
Visual Clues That Confirm Activity
Beyond the stomp test, your eyes are your best tool. Active tunnels often look a certain way. Look for the long, straight ridges that connect molehills; these are usually the main travel routes. Moles also tend to create tunnels along permanent structures like fences, driveway edges, or landscape borders, as these provide cover and a clear path. If you see a fresh mound of dark, damp soil, that’s another great sign of recent activity. Learning to spot these visual clues will help you understand how moles operate and where to place your traps for the best results.
How Long to Monitor a Tunnel Before Acting
Patience is key, but you don’t have to wait long. After you’ve performed the stomp test on a few different tunnels, give it about 24 hours. Check back on your marked spots the following day. If the collapsed section has been pushed back up into a ridge, you’ve found an active tunnel. This is the perfect place to set a trap. If the tunnel remains flat after a day or two, it’s likely abandoned, and you can move on to test other areas. This short monitoring period ensures you’re not wasting your time and are placing your traps in the most strategic locations.
Where Should You Focus Your Search?
Once you know how to spot an active tunnel, you can narrow your focus to the most promising areas of your yard. Moles don’t dig randomly; their tunnels follow a certain logic based on food sources, shelter, and ease of travel. By concentrating your efforts on these high-traffic zones, you’ll save time and significantly increase your chances of success. Think of it as learning to read a map of their underground world. Instead of guessing, you can strategically place your traps where they are most likely to be effective.
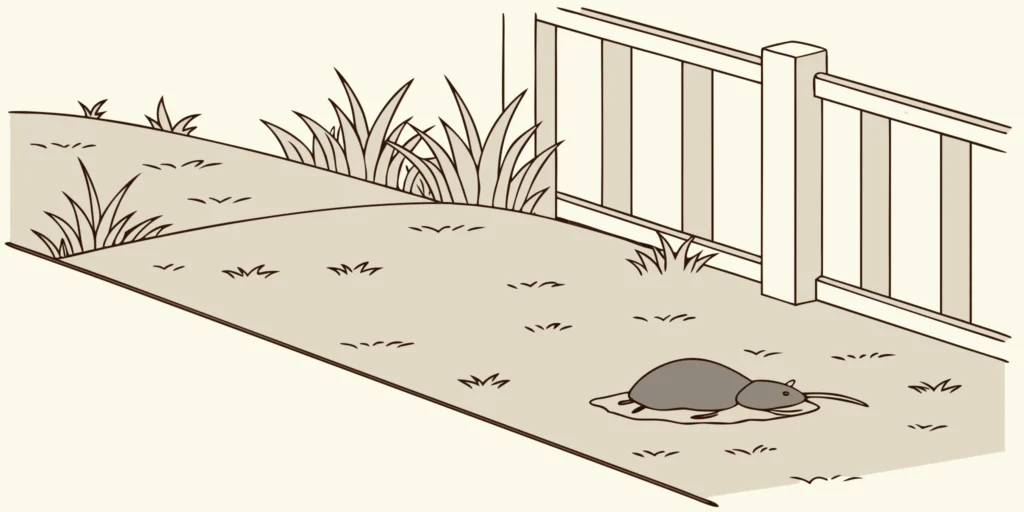
Along Fences and Property Lines
Moles often use man-made and natural borders as guides for their main tunnels. Fences, retaining walls, sidewalks, and even the edges of driveways provide a straight, protected path for them to travel. These are their highways. As you survey your yard, pay close attention to any raised ridges running parallel to these structures. Pest control experts suggest you look for tunnels that “run along fences or borders.” Because these are frequently used travel routes, they are ideal locations to set a mole trap and catch a mole on its daily commute.
Near Garden Beds and Landscaping
If you have a garden, you’ve probably noticed that moles seem to love it as much as you do. That’s because garden beds and landscaped areas are a five-star restaurant for moles. The rich, moist soil is teeming with earthworms, grubs, and other insects that make up their diet. Moles can disturb newly planted gardens or bulbs, creating a mess and damaging your plants in their search for food. Check carefully around the edges of your flower beds and vegetable patches for signs of fresh digging. These feeding areas are hotspots for mole activity and prime real estate for trapping.
In Straight Lines Between Molehills
Not all tunnels are created equal. Moles create winding, shallow tunnels for feeding and deeper, straighter tunnels for traveling. A study from Purdue University notes that you should look for the straight tunnels to travel between their nest and feeding areas. Wiggling tunnels are where they are searching for food, but the straight ones are the expressways they use over and over again. These main runways, often connecting two molehills or a feeding area to a border, are the absolute best places to set a trap. Finding one of these is like finding the key to their entire network.
Common Mole-Hunting Mistakes to Avoid
Getting rid of moles can feel like a frustrating game, and it’s easy to spend a lot of time and energy on methods that just don’t work. The good news is that you can get ahead of these critters by learning from the most common slip-ups. Understanding where people usually go wrong will save you a ton of headaches and help you reclaim your yard much faster. Let’s walk through a few key mistakes so you can approach your mole problem with a clear, effective plan.
Wasting Time on Inactive Tunnels
It’s tempting to place a trap in the first tunnel you see, but that’s often a waste of time. Moles create an extensive network of tunnels, but they only use a small number of them as their main travel routes. Many of the shallow, winding ridges you see are temporary feeding tunnels that a mole might use once and then abandon. To be effective, you need to find the mole highways. These are typically deeper, straighter tunnels that connect multiple mounds or run along a permanent structure like a fence or walkway. Focusing your efforts here is how you get results. Our guide on how it works shows you exactly how to set a trap in one of these main runways for the best chance of success.
Forgetting Tunnels Change with the Seasons
Mole behavior isn’t static; it changes with the weather. During the pleasant temperatures of spring and fall, moles are active near the surface, making their tunnels easy to find. However, when the ground gets very dry in the summer or freezes in the winter, they retreat deeper into the soil to find food and shelter. If you’re only looking for surface ridges during these times, you’ll likely miss them entirely. You have to adapt your strategy. In extreme weather, use a soil probe to locate those deeper, more insulated tunnels where the moles are actually spending their time. You can find more tips for different conditions in our mole and gopher FAQs.
Relying on Unproven Home Remedies
When you’re desperate for a solution, it’s easy to fall for old wives’ tales and so-called “quick fixes.” You’ve probably heard of them: putting chewing gum, mothballs, or human hair in the tunnels. Some people even swear by ultrasonic spikes or garden pinwheels. Unfortunately, research has shown that these methods simply don’t work. Moles are not deterred by strange smells or vibrations in the long run. You’ll just end up wasting your time and money while the moles continue to destroy your lawn. Instead of relying on gimmicks, the most recommended and effective method is trapping. Using a proven, well-designed mole trap in an active tunnel is the surest way to solve your problem for good.
You’ve Found an Active Tunnel. Now What?
Congratulations, you’ve officially done the hardest part. By locating an active mole tunnel, you’ve figured out exactly where to focus your efforts. This is a huge step toward getting your lawn back. Now that you know where the action is, you can move forward with a clear plan. You have a few different options for dealing with your unwelcome guests. Let’s walk through the most common and effective solutions, from trapping to natural deterrents, so you can decide which approach is best for your situation. Taking targeted action is far more effective than randomly trying different things, and you’re perfectly set up for success.
Setting Traps for the Best Results
Trapping is widely considered the most effective and reliable way to handle a mole problem. Since you’ve already found a main runway, you have the perfect spot to set a trap. The best times to do this are in the spring and fall when moles are most active near the surface. Placing effective mole traps directly in their path is the surest way to stop the damage. For the best results, you’ll want to place a trap in the main tunnel, which you can find by probing between two molehills. Following the specific how-to-use instructions for your trap is key to ensuring a quick and successful catch.
Using Bait as an Alternative
Another option for mole control is using bait. Most mole baits are designed to look and feel like a mole’s primary food source: the earthworm. These gummy worm-like baits are laced with poison, and when a mole eats one, it’s a fatal meal. You place the bait directly into an active tunnel, where the mole will hopefully find it during its travels. While some people find success with this method, it’s important to remember that you are introducing poison into your yard. This can be a significant concern if you have pets or young children who play outside. Always read and follow the safety instructions carefully if you choose to use baits.
Trying Natural Deterrents
If you prefer a less direct approach, you might consider natural deterrents. The most common natural mole repellent is castor oil. It won’t harm the moles, but it has a smell and taste that they find very unpleasant, which can encourage them to move elsewhere. You can find granular or liquid products containing castor oil that you apply to your lawn. While this method is safe for pets and kids, it’s often more of a temporary fix than a permanent solution. For a severe infestation, deterrents alone may not be enough to solve the problem, but they can be a useful part of a larger mole prevention strategy.
Knowing When to Call a Professional
Sometimes, a mole problem can feel completely overwhelming. If your yard is very large, the mole network is extensive, or you’ve tried everything without success, it might be time to call in a professional. There’s no shame in asking for help. Pest control experts have the experience and tools to handle even the most stubborn infestations efficiently. They can assess the scale of your problem and implement a solution that saves you time and further frustration. If you feel like you’re fighting a losing battle, getting help from a pest management professional is a smart and practical next step.
Take Back Your Yard with Cinch Traps
Okay, you’ve done the detective work and found an active tunnel. Now for the satisfying part: getting your yard back. When it comes to dealing with moles for good, trapping is one of the most direct and reliable methods you can use. It physically removes the pest causing all that damage, putting a swift end to the problem. While there are many options out there, the right trap makes all the difference.
This is where a high-quality mole trap becomes your best friend. The Cinch Mole Trap is a favorite for a reason; it’s effective, easy to set, and built to last. One expert even calls it their favorite because it fits well in tunnels and has an adjustable trigger. To get the best results, you need to place your trap in a tunnel that moles use often. According to Purdue University, it’s very important to place traps in the straight, main runways that connect different parts of their underground network. This is the most effective way to get rid of moles in your lawn.
Once you’ve chosen your spot, the setup is key. The goal is to make the trap seem like a natural part of the tunnel. A great guide on trapping moles suggests placing the trap so its jaws are hidden, as moles can be wary of foreign objects. After setting it, gently cover the area with loose soil to block any light from entering the hole. By following these simple setup steps, you create an environment the mole will enter without suspicion, allowing the trap to do its job effectively.
Related Articles
- Get Rid of Moles Permanently: What Really Works
- Get Rid of Moles Overnight? Here’s What Works Fast
- The Best Way to Catch a Mole: A Step-by-Step Guide
- Does a DIY Mole Control Kit Actually Work?
Frequently Asked Questions
What’s the easiest way to tell a molehill from a gopher mound? The simplest way is to look at the shape and the dirt. A molehill is a cone-shaped mound, like a little volcano, and the soil is usually chunky. Moles push dirt straight up from their deep tunnels. A gopher mound is typically crescent-shaped or fan-shaped with a dirt plug on one side, and the soil is very fine and pulverized because they kick it out behind them.
I flattened a tunnel, but the mole didn’t fix it. What does that mean? If you come back after a day and the tunnel is still flat, it simply means that tunnel is not in use. Moles create many feeding tunnels that they only use once. Don’t waste your time on that spot. Just move on and perform the same stomp test on a different tunnel, preferably a straighter one that looks more like a highway.
How many traps do I actually need for my yard? This depends on the size of your yard and the scale of the problem, but you don’t need to put a trap in every single tunnel. A good strategy is to start with two or three traps. Focus on placing them in what you’ve identified as the main travel runways. It’s more effective to have a few traps in the right spots than a dozen traps in the wrong ones.
Why are traps considered better than baits or repellents? Trapping is the most direct and certain method because it physically removes the mole causing the damage. Baits introduce poison into your yard, which can be a risk for pets and wildlife, and you can’t be sure the mole even took it. Repellents, like castor oil, are often a temporary fix at best; they might annoy a mole enough to move to a different part of your yard, but they rarely solve the problem for good.
I see both molehills and raised ridges. Where is the best place to set my trap? The absolute best place is in a main travel runway. These are the straight tunnels moles use for their daily commute. You can often find them by probing the ground in a straight line between two molehills or along a permanent edge like a sidewalk or fence. While the raised ridges show you where a mole has been feeding, the main runways are the high-traffic areas where you have the greatest chance of success.
