Mole trapping is less about brute force and more about strategy. These critters live in a dark, predictable world, and understanding their habits is the key to winning the battle for your lawn. They use specific tunnels as their daily highways, and your job is to become an expert traffic controller. Instead of randomly placing traps and hoping for the best, you can learn to think like a mole. This guide will show you how to identify their most active runways and master the subtle technique of how to set a mole trap tunnel so they never see it coming, turning their own instincts against them.
Key Takeaways
- Find Their Highway, Not Their Driveway: Your success hinges on placing traps in a mole’s main travel routes. Use the poke test to confirm a tunnel is active before setting your trap, focusing on the straight runs between fresh mounds.
- Create a Seamless Ambush: Moles are wary of anything unnatural. Ensure your trap is set firmly on the tunnel floor and meticulously cover your work to block all light and air, making the trap feel like a normal part of their world.
- Be Patient, But Proactive: Check your traps daily to stay on top of the situation. If a trap hasn’t been triggered or shown any signs of activity after two or three days, it’s time to move it to a new, more promising location.
Find Active Mole Tunnels
Before setting a trap, you need to play detective. Moles create a complex network of tunnels, but they don’t use all of them regularly. Placing your trap in a high-traffic runway is the key to success. A little observation ensures you’re setting your trap where it will be most effective. The goal is to find the tunnels moles are actively using right now. It’s simpler than it sounds, and a few easy checks will point you in the right direction.
Look for Fresh Mole Activity
Your first clue is the classic molehill—that volcano-shaped mound of dirt. Look for fresh ones, which will be made of dark, damp, and loose soil. Older mounds are often flattened, dry, or have weeds growing on them. You can also look for raised ridges in your lawn. Fresh ridges will feel soft under your feet, while old ones are firm. Focus your efforts around the newest signs of digging. Once you’ve pinpointed these spots, you’re ready to set your mole traps effectively.
Test Tunnels with the Poke Method
Once you’ve found a promising tunnel, confirm a mole is using it with the poke test. Find a straight section of a tunnel, preferably between two fresh molehills, and gently collapse a one-inch section with your heel. Or, just poke a hole through the top with a stick. Mark the spot so you can find it again and check back in 12 to 24 hours. If the collapsed section has been repaired or the hole is plugged, you’ve found an active runway. This is exactly where you want to set your trap. This simple method removes all the guesswork.
Surface vs. Deep Tunnels: What’s the Difference?
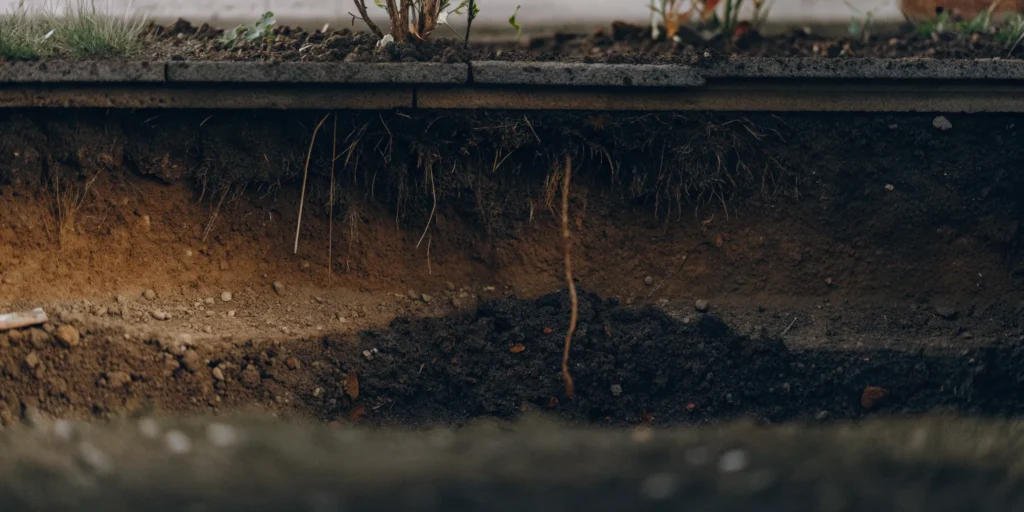
Moles dig two main types of tunnels, and knowing the difference helps you choose the best trapping location. Surface tunnels are the visible, raised ridges just beneath your grass. These are feeding tunnels that moles may only use once, making them less reliable for trapping. Deeper tunnels, or main runways, are the mole’s primary travel routes, usually three to twelve inches underground. These are the highways moles use daily. You can find them by probing the ground between two fresh molehills. Targeting these deeper runways gives you the best chance of a successful catch. For more on mole behavior, check out our FAQs.
Gather Your Mole Trapping Tools
Before you head out to the yard, let’s get your gear in order. Having the right tools on hand makes the process smoother and much more effective. Think of it as your mole-trapping toolkit. You don’t need a lot, but the few items you do need are essential for getting the job done right the first time. We’ll cover the trap itself, the tools for finding and preparing the tunnel, and the basic safety gear you should always use.
Cinch Traps for Moles
The most important item on your list is, of course, an effective trap. Our mole traps are designed to be set directly inside the mole’s tunnel, which is the most reliable place to catch them. Because they’re placed back-to-back, you’ll catch the mole no matter which direction it’s coming from. Made from durable galvanized steel right here in Oregon, these traps are built to last season after season. Their simple, powerful design has been proven effective for over a century, so you can feel confident you’re using a tool that actually works.
Digging and Probing Tools
To set a trap, you first need to find an active tunnel and create a clean opening. A soil probe—often a simple metal rod with a handle—is perfect for locating tunnels without tearing up your lawn. Once you find a main runway, you’ll need a small trowel or a specialized tunnel clearing tool to dig a neat hole just big enough for the trap. The goal is to disturb the tunnel as little as possible, so using the right digging tools is key to making your trap set look natural to an approaching mole.
Safety Gear
Working with any kind of trap requires a focus on safety. First, always wear a pair of sturdy gloves. This protects your hands from the trap and also minimizes the human scent you leave behind, which can make moles suspicious. Most importantly, you need a plan to keep kids and pets away from the area. Once a trap is set, mark its location with a small flag or stick. This not only prevents accidental encounters but also makes it easy for you to find and check your traps regularly.
Choose the Right Type of Mole Trap
Before you can set a trap, you need to pick the right tool for the job. Moles create different types of tunnels, and your yard has unique soil conditions. Choosing a trap that works with your specific situation is the key to getting results quickly. Think of it like this: you wouldn’t use a hammer to turn a screw. The same logic applies here. The most effective trap is one designed for the type of mole activity you’re seeing. Let’s walk through the main types so you can feel confident you’re making the best choice for your lawn.
Scissor Traps for Deep Tunnels
If you’ve identified deep feeding tunnels—those main highways moles use a few inches below the surface—a scissor-style trap might be what you need. These traps are designed to be placed directly into the tunnel and are triggered when a mole pushes through the soil to clear the path. Because they work underground, they are effective in these deeper, more established runways. They require a bit of digging to set up properly, but they are a reliable option for intercepting moles as they travel along their primary routes.
Harpoon Traps for Surface Runs
For those tell-tale surface runs that look like raised ridges in your lawn, a harpoon-style trap is an excellent choice. These traps are set directly on top of the active tunnel. When the mole moves through the run, it pushes up on a trigger pan, which releases the harpoon. Our Cinch mole traps are a perfect example of this design. They are incredibly easy to set and work in those shallow tunnels just beneath the grass. For best results, you can place two traps back-to-back in the same run to catch a mole coming from either direction.
Match the Trap to Your Soil and Tunnels
Your yard’s environment plays a huge role in a trap’s success. Hard, clay-based soil or ground with a lot of rocks and roots can make it difficult to set certain types of traps. Before you buy, take a moment to assess your conditions. Is your soil soft and loamy or dense and compacted? Are the tunnels shallow or deep? The best trap is one that functions smoothly in your specific environment. Taking the time to understand how a trap works and matching it to your soil and tunnel type will save you a lot of frustration and lead to a mole-free yard much faster.
Prepare the Perfect Trap Site
Choosing the right location is the most critical step for successfully trapping a mole. Moles are creatures of habit, and they reuse their main tunnels daily. By placing your trap in one of these high-traffic areas, you significantly increase your chances of a quick catch. It’s less about setting more traps and more about setting one or two traps in the perfect spot. Taking a few extra minutes to properly prepare the site will save you a lot of time and frustration later.
Find the Best Spot in the Tunnel
First, you need to find an active tunnel. Look for the tell-tale signs: raised ridges of dirt snaking across your lawn or fresh, volcano-shaped mounds of soil (molehills). These are clear indicators of mole activity. To confirm a tunnel is currently in use, gently poke a small hole in the top of a surface ridge with a stick or probe. Mark the spot with a flag and check it again in 24 hours. If the mole has repaired the hole and plugged it back up, you’ve found an active runway—the ideal place to set your trap.
Clear the Tunnel for Easy Access
Once you’ve located an active tunnel, it’s time to prepare it for the trap. Using a small trowel or knife, carefully cut a section of sod slightly larger than your trap’s footprint. Lift the piece of turf out and set it aside—you’ll use it again later. Next, use your hands or a small tool to clear any loose dirt or debris from inside the tunnel. You want to create a clean, unobstructed path for both the mole and the trap mechanism. This ensures your Cinch Traps for moles can function perfectly without getting clogged with soil.
Position Your Trap for Success
With the tunnel cleared, you can now place the trap. Set it directly inside the run, making sure it’s snug and stable. The goal is for the trap to feel like a natural part of the tunnel system. After the trap is in place, use the piece of sod you removed earlier to cover the opening completely. Gently pack loose soil around the edges of the sod to block all light and prevent any air from flowing through. Moles are sensitive to changes in their environment, and a draft or a beam of light will make them suspicious, causing them to avoid the area and your trap altogether.
How to Set Your Mole Trap, Step-by-Step
You’ve located an active tunnel and have your tools ready—now for the main event. Setting a mole trap might seem intimidating, but it’s a straightforward process once you understand the goal. The key is precision. Getting the small details right is what separates a successful catch from a frustratingly empty trap day after day. Your mission is to place the trap directly in the mole’s path and make it seem like a completely natural part of its underground world. A perfectly set trap is one the mole won’t even notice until it’s too late.
Think of it like this: you’re creating a seamless interruption in their daily commute. Moles are creatures of habit and are very sensitive to changes in their environment, like light and air currents. When they sense a collapse or blockage in their tunnel, their instinct is to go repair it. You’ll use this instinct to your advantage. The process involves carefully opening the tunnel, placing the trap inside, and then meticulously covering your work to block out every bit of light and air. This setup tricks the mole into thinking it’s just another bit of tunnel to clear, leading it right where you want it. Let’s walk through each step together to make sure your trap is positioned for success.
Place the Trap Inside the Tunnel
First, you need to create an opening to access the tunnel. Using a small spade or trowel, carefully cut a square of sod that’s just a bit larger than your trap. Lift this piece of grass out and set it aside; you’ll use it again later to cover the hole. Once the tunnel is exposed, use your hands (wear gloves!) or a small tool to clear out any loose dirt or debris from the bottom of the run. You want to create a clean, unobstructed path so the mole can pass through easily and the trap’s mechanism won’t get clogged with soil. This simple prep work ensures the trap can function exactly as it’s designed to.
Set the Trap’s Trigger and Sensitivity
With the tunnel prepped, it’s time to arm your trap. Carefully follow the instructions that came with your specific model. For our Cinch Traps, this involves compressing the powerful spring and setting the trigger plate. Once the trap is set, gently lower it into the opening you created. Make sure the jaws of the trap are aligned with the direction of the tunnel, not blocking it. The mole should be able to run straight through the trap’s opening. Proper placement is one of the most important factors for a successful catch, so take a moment to get it just right.
Cover and Conceal the Trap
Moles are sensitive creatures; they dislike drafts and light in their dark, sealed tunnels. An uncovered trap will likely make them suspicious, and they’ll just dig around it. To avoid this, you need to completely conceal your setup. Take that piece of sod you set aside and place it back over the hole, grass-side up. For extra insurance, you can place a bucket, a piece of plywood, or a large pot over the entire area. The goal is to block all light and prevent air from flowing through, making the mole feel comfortable enough to enter the trap zone and investigate the “blockage.”
Secure the Base of the Trap
A wobbly trap is an ineffective one. Before you cover everything, give the trap a gentle push to ensure it’s sitting firmly on the tunnel floor. If the trap rocks or shifts easily, the mole might just push it aside instead of triggering it. Press down on the ground around the trap’s base to create a solid foundation. A stable trap is critical because it ensures the mechanism fires with maximum force the moment the mole moves the trigger. This final check takes only a few seconds but makes a huge difference in your trapping success.
Handle Your Traps with Care
Once your trap is in the ground, a little extra attention goes a long way. Handling your traps carefully is about more than just getting results—it’s about ensuring safety for everyone in your household and making sure your efforts pay off. A well-placed trap is only effective if it’s set correctly and managed properly. Think of these final steps as the finishing touches that seal the deal, turning a good trap placement into a successful catch. By being mindful of your surroundings, perfecting your technique, and staying organized, you’ll get the most out of your traps and solve your mole problem efficiently.
Keep Children and Pets Safe
Your first priority should always be safety. Mole traps are powerful tools designed to be effective, which means they can be dangerous if not handled with caution. Always make sure that children and curious pets are kept away from any area where you have set a trap. Before you even place a trap, have a conversation with your family about where the traps are and why they need to stay clear. For extra peace of mind, consider setting traps in parts of the yard that are less frequented. The goal is to get rid of moles, not to create a hazard for your loved ones. For more answers to common safety questions, you can review our mole and gopher FAQs.
Use Proper Trap Handling Techniques
How you handle the trap right after placing it can make or break your success. Moles are sensitive creatures and will avoid anything that seems unnatural in their tunnel. After setting the trap, gently crumble loose soil back into the hole, making sure it fills the space around the jaws and under the trigger. This makes the trap feel like a part of the tunnel system. It’s also critical to block any light from entering the tunnel. Use a clump of sod, a rock, or a bucket to cover the opening completely. Even a tiny sliver of light can signal danger to a mole and cause it to back away. Our guide on how it works shows this process in detail.
Mark and Monitor Trap Locations
In a large lawn or garden, it’s surprisingly easy to forget exactly where you set your traps. To avoid losing them, use a marker like a small flag or a painted stick to indicate each location. This not only helps you find your traps again but also prevents you from accidentally stepping on one. Make it a habit to check your traps every day. A daily check lets you see if you’ve made a catch, if a trap has been sprung by accident, or if it needs to be moved to a more active tunnel. Consistent monitoring is key to staying on top of the problem and ensuring your traps are always working for you. We offer several accessories that can help you stay organized.
How Often Should You Check Your Traps?
Once your traps are set, the waiting game begins. But you can’t just set them and forget them. Consistent monitoring is the key to successfully clearing your yard of moles. Making it a part of your daily routine, like checking the mail or watering your plants, will give you the best shot at catching these elusive pests.
A quick daily check-in helps you stay on top of the situation. You’ll know right away when you’ve had a successful catch, see if a trap needs to be reset, or decide if it’s time to move a trap to a more active tunnel. This proactive approach not only makes your trapping efforts more effective but also ensures any captured moles are dealt with quickly.
Why Daily Checks Are Important
It’s essential to check your traps every day. Moles are constantly working, and an active tunnel today might be abandoned tomorrow. Daily checks allow you to remove a captured mole promptly and reset the trap to catch the next one. If a trap has been sprung without a catch, you can quickly reset it, so you don’t miss any opportunities.
Think of it as maintaining your line of defense. By checking your mole traps daily, you’re maximizing their effectiveness and ensuring they are always ready for action. A few minutes each day is all it takes to significantly improve your success rate and reclaim your lawn from these tunneling troublemakers.
Know the Signs of a Successful Catch
So, how do you know if you’ve caught a mole? The most obvious sign is a sprung trap. With Cinch Traps, the handles will be together, indicating the trap has been triggered. But even if the trap hasn’t been sprung, you should look for signs of mole activity.
A key indicator is a plugged hole. If the hole is filled with dirt, it means a mole used that tunnel. This is great news because it confirms you’ve placed your trap in an active runway. Understanding how it works will help you recognize these signs. Seeing this activity means you’re in the right spot, and it’s likely just a matter of time before you have a catch.
When to Reset or Move a Trap
If a trap sits in the same spot for two or three days with no signs of activity—no sprung trap and no fresh dirt—it’s time to move it. Don’t get discouraged; this is a normal part of the process. Simply find a new, active tunnel and try again. Persistence is your best friend when it comes to mole trapping.
If you find a trap has been sprung but is empty, or if it’s been buried in the dirt, just clear it out and reset it in the same location. Sometimes a mole can accidentally trigger a trap without getting caught. If you’re still having trouble after a few attempts, our FAQs page has answers to common issues that can help you troubleshoot.
Avoid These Common Mole Trapping Mistakes
Setting a mole trap can feel like a game of strategy, and sometimes, the moles seem to have the upper hand. If you’re feeling frustrated with empty traps, don’t worry—it happens to everyone. Often, a few small adjustments are all it takes to turn things around. Success comes down to understanding mole behavior and avoiding the simple mistakes that can send them scurrying in the other direction.
Getting the details right is what separates a successful trapping session from a week of waiting for nothing. From picking the perfect spot to making sure your trap is properly concealed, every step matters. Let’s walk through the most common pitfalls so you can set your traps with confidence and get your yard back. By sidestepping these errors, you’ll significantly improve your chances of catching those destructive critters.
Choosing the Wrong Tunnel
One of the biggest mistakes is setting a trap in the wrong place. It’s easy to see a big mound of dirt and assume that’s the best spot, but those are often just exit points. Instead, you need to find their active highways. As one professional trapper explains, you should “set your traps along the ‘runs’ being made by the moles. These are the ‘lines’ they create in the ground, not the large mounds.” These surface runs are the main travel corridors moles use daily to search for food. Placing your mole traps in these active pathways is the key to ensuring a mole will actually encounter it.
Placing the Trap Incorrectly
Once you’ve found the right tunnel, how you place the trap inside is critical. A wobbly or poorly positioned trap will either be ignored or pushed aside by a mole. Moles are constantly maintaining their tunnels, so they notice anything out of place. A great piece of advice is to “firm the bottom of the run where you put the trap.” A solid, level base ensures the trap is stable and functions correctly. If the trap can rock or shift, the mole might sense the instability and avoid it, or it could misfire. Taking a moment to create a firm foundation makes your trap a natural part of the tunnel floor, increasing your odds of a successful catch.
Letting Light and Air into the Tunnel
Moles spend their lives in the dark and are extremely sensitive to changes in their environment. If light or a draft of fresh air enters their tunnel system, it’s an immediate red flag that something is wrong. This is why you must “make sure there is not even the tiniest amount of air or light getting in to the run around the trap.” After you set your trap, carefully cover any openings you made. You can use a piece of sod, a clod of dirt, or even a bucket to block all light. This simple step recreates the mole’s natural, dark environment, making them feel safe enough to travel through the tunnel and right into your trap.
What to Do if Your Traps Aren’t Working
It can be frustrating to check your traps day after day and find them empty. If you’re not having any luck, don’t give up. Usually, a few small adjustments are all it takes to get things back on track. Moles are creatures of habit, but they’re also sensitive to changes in their environment. A bit of troubleshooting can help you figure out what’s going wrong and how to fix it.
Before you assume your yard is home to the world’s smartest mole, let’s walk through some common issues. From the trap’s exact placement to the time of year, several factors can influence your success. By carefully reviewing your setup, you can turn those empty traps into a mole-free lawn.
Adjust Your Trap’s Position and Sensitivity
The smallest details can make the biggest difference. If a mole senses something is off, it will simply block the tunnel and dig a new route around your trap. One of the most important techniques is to crumble loose soil back into the hole so it falls around and under the trigger. This makes the trap feel like a natural part of the tunnel.
Also, make sure no light or air can get into the tunnel around the trap. Moles are accustomed to the dark, and a sudden draft or beam of light is a dead giveaway that something is wrong. Use clumps of sod or extra dirt to completely seal any openings after you’ve placed the trap. You can see a detailed diagram of a perfect setup on our How It Works page.
Move Your Trap to a Different Tunnel
Location is everything in mole trapping. If a trap remains untouched for a few days, you’ve likely chosen an inactive or secondary tunnel. Moles create a network of tunnels, but they use some more frequently than others. You want to place your traps in their main highways, not the quiet side streets.
Look for the long, straight “runs” they create, which are the main arteries of their tunnel system. These are different from the large mounds of dirt (molehills), which are just exit points for excavated soil. By focusing your efforts on these active runs, you significantly increase the odds of a catch. If you need to cover more ground, consider setting a few mole traps along different primary tunnels.
How Weather and Seasons Affect Trapping
Timing can play a surprisingly large role in your trapping success. Moles are active year-round, but their behavior changes with the seasons and weather. They are most active during the early morning and late evening, making these the best times to check your traps.
The most effective time of year for trapping is late winter and early spring. During this period, food is scarcer, and the moles are actively searching for mates, which means they are moving around more. Trapping before they have their young in the spring can also help manage the population more effectively. For more seasonal tips, check out our mole and gopher FAQs.
Maintain Your Traps for Long-Term Use
Your Cinch Traps are built from durable, galvanized steel and designed to last a lifetime. With just a bit of simple maintenance, you can ensure they work effectively season after season. Proper care isn’t just about cleaning; it’s also about knowing the best times to put your traps to work and when to store them away. This small amount of upkeep protects your investment and is a key part of keeping your yard pest-free for years to come. It’s a straightforward process that makes a big difference in your long-term success against these persistent pests.
The user-friendly design of our traps makes maintenance simple, so you can focus on what matters: getting rid of moles. Taking a few extra minutes to care for your traps after you retrieve them will guarantee they are ready to go the next time you spot a fresh tunnel. Think of it as a simple routine that pays off with a pristine lawn. The lifetime warranty covers the craftsmanship, and your care routine will keep them in prime working condition. By following these steps, you’re not just maintaining a tool; you’re ensuring your property remains protected from the damage these critters can cause.
Clean and Care for Your Traps
After each catch, take a moment to clean your trap. Use a stiff brush and water to remove any dirt, mud, or debris from the trigger and jaws. This ensures the mechanism remains sensitive and functions correctly. Since our traps are made of galvanized steel, you don’t have to worry about rust, but keeping them clean is key to consistent performance.
Part of caring for your trap also involves how you place it. When you set a trap, always crumble loose soil around the jaws and under the trigger plate. This simple step helps camouflage the trap and makes the tunnel feel natural to the mole, increasing your chances of a quick catch. For more tips, you can always check our FAQs.
Know When to Set and Store Them
Timing is everything with mole trapping. Moles are most active during the spring and fall when the soil is damp and easy for them to dig through. These are the ideal seasons to set your mole traps for the best results. During the peak heat of summer or when the ground is frozen solid in winter, mole activity slows down considerably, making trapping less effective.
When trapping season is over, give your traps a final cleaning and make sure they are completely dry. Store them in a shed, garage, or toolbox where they’ll be protected from the elements. Storing them properly prevents any potential damage and ensures they are in perfect shape for when the moles return. This way, you’ll be ready to defend your lawn as soon as you see the first signs of new activity.
Related Articles
- How it Works | Cinch Traps | The Best Mole & Gopher Trap
- FAQS moles gophers | Cinch Traps | The Best Mole & Gopher Trap
- Get Rid of Moles Permanently: What Really Works
- Mole Kit | Cinch Traps | The Best Mole & Gopher Trap
- Mole Trap | Cinch Traps | The Best Mole & Gopher Trap
Frequently Asked Questions
How many traps do I actually need for my yard? This is less about the size of your yard and more about the mole’s tunnel system. Moles create a few main “highways” they use constantly. Your goal is to find those. I always suggest starting with two traps placed back-to-back in one of these main runs. For a typical suburban lawn, one or two sets are often enough to solve the problem if you place them strategically. If you have a very large property with separate areas of damage, you might need a couple more sets to cover the different tunnel networks.
Do I need to use bait with my Cinch Trap? Nope, you can save the bait for other pests. Moles are insectivores, meaning they eat earthworms, grubs, and other insects they find while digging. They aren’t scavengers looking for a free meal. Cinch Traps are designed to work based on a mole’s natural instinct to clear a blockage in its tunnel. When it pushes into the dirt you’ve placed around the trigger, the trap is sprung. It’s the placement, not the bait, that guarantees success.
What if a mole just pushes dirt into my trap without setting it off? This is a classic sign that the mole is suspicious of your setup. It usually means it detected something unnatural and decided to block off that part of the tunnel and dig around it. The most common culprits are a wobbly trap, a light leak, or your scent. Try resetting it, making sure you press the trap firmly into the tunnel floor so it doesn’t move. Double-check that you’ve covered the opening completely to block all light and air. And always handle your traps with gloves.
Is it better to trap in the spring or fall? Both seasons are prime time for trapping, but for slightly different reasons. Trapping in the spring is fantastic because you can catch moles before they have their young, which prevents a much larger problem from developing. In the fall, moles are working overtime to find and store food for the winter, so they are very active and predictable in their main tunnels. The only times to avoid are the driest part of summer or when the ground is frozen solid, as their activity slows down.
Will catching one mole solve my problem? It’s definitely possible. Moles are solitary animals, so often a single mole is responsible for all the damage you see in your yard. After you make a catch, I recommend leaving the area alone for about a week and keeping an eye out for any new ridges or molehills. If you don’t see any fresh activity, you can confidently declare victory. If new tunnels appear, it simply means another mole has moved into the territory, and it’s time to set your traps again.