If you’ve ever asked yourself why your lawn suddenly looks like it was used for miniature cannon practice, you’re not alone. Moles are a persistent problem for gardeners and homeowners all over the Portland area, turning prized turf into a network of tunnels and dirt mounds. It’s easy to feel overwhelmed by the damage and confused about the best course of action. While many products claim to be the ultimate solution, trapping remains the single most proven method for mole control. But success depends entirely on the tool you choose. We’ll break down what to look for in the most effective mole traps in Portland, Oregon, and show you how to use them for guaranteed results.
Key Takeaways
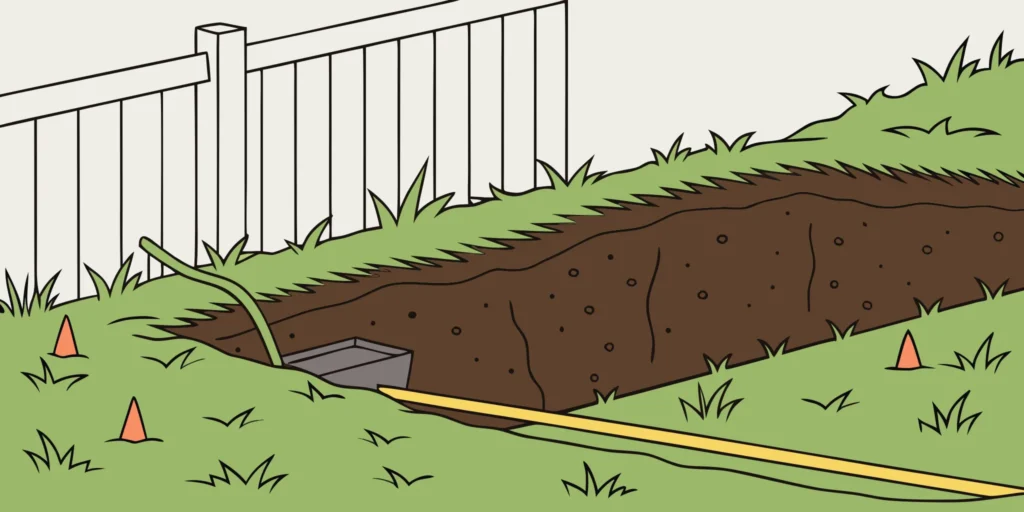
- Place traps in active runways for best results: Moles use main tunnels, often straight paths along fences or sidewalks, as daily highways. Confirm a tunnel is active by pressing down a small section; if it’s pushed back up within a day, you’ve found the perfect spot.
- Choose a durable trap that can handle Portland weather: Our wet climate will quickly rust and ruin flimsy traps. Investing in a tool made from galvanized steel means you get a reliable, long-lasting solution that works season after season, saving you money and frustration.
- A careful setup prevents trap avoidance: Moles are sensitive to changes in their environment. Make your trap feel like a natural part of the tunnel by completely blocking all light and air from the opening and packing the surrounding soil firmly.
What Are the Most Effective Mole Traps in Portland?
Portland’s damp soil makes it a prime location for moles, and trapping is the most reliable way to protect your yard. But not all traps are created equal. The best choice depends on whether you’re targeting deep “highway” tunnels or the shallow feeding tunnels that leave visible ridges in your lawn. Understanding the key differences between trap types will help you choose the right one and reclaim your yard. Here’s a look at the most effective options for Portland homeowners.
Scissor Traps for Deep Tunnels
Scissor traps are a powerful, traditional option designed for a mole’s main, deep tunnels. They work with two scissor-like jaws that snap shut when a mole passes through. Setting them requires digging into an active runway, which can be a bit more work, but their strength is unmatched for these deeper paths. They are one of the most effective methods for trapping moles that have established a complex network under your yard. If you’re dealing with a persistent mole problem and can confidently identify their main travel routes, a scissor trap is a solid choice for getting the job done right.
Harpoon Traps for Surface Tunnels
If you’re seeing those raised, squiggly lines just under the grass, a harpoon trap is designed for exactly that. These traps are placed directly over a shallow, active tunnel and are often much easier to set than deeper traps. When the mole moves through to repair the disturbed tunnel, it hits a trigger that releases a set of sharp spikes. Because they target surface activity, they are a popular and straightforward tool for homeowners looking to get rid of moles in their lawn without a lot of digging or complicated setup. They are great for quick action on new, visible damage.
Cinch Traps: The Gold Standard
For an all-around solution that’s both effective and easy to use, Cinch Traps are the gold standard. Our traps work in both deep and shallow tunnels, giving you the versatility to handle any mole problem you encounter. Handmade right here in Oregon from durable galvanized steel, our mole traps are built to last in our wet Pacific Northwest climate. They are simple to set and have been ranked #1 in university studies for their effectiveness. Plus, every trap is backed by a lifetime warranty. It’s a reliable, locally made tool that delivers professional results without the hassle, making it the top choice for Portland gardeners and homeowners.
Why Are Cinch Traps Your Best Choice?
When you’re dealing with a mole problem, you want a solution that’s reliable, effective, and built to last. Cinch Traps check all those boxes, and there’s a reason they’ve been a trusted name since 1909. Our traps aren’t just another piece of hardware; they are a thoughtfully designed tool created to solve your mole problem for good. From the materials we use to the design principles we follow, every aspect of a Cinch Trap is geared toward success.
What truly sets our traps apart is a combination of superior craftsmanship, scientifically-backed performance, and a promise of quality you can count on. We build our traps with the specific challenges of the Pacific Northwest in mind, ensuring they can handle our damp soil and persistent pests. Let’s get into what makes Cinch Traps the gold standard for homeowners and professionals in Portland and beyond.
Handmade in Oregon from Durable Galvanized Steel
Right here in Oregon, we handcraft each Cinch Trap from heavy-duty galvanized steel. This isn’t just a point of local pride; it’s a commitment to quality. Galvanized steel is incredibly strong and resists rust, which is essential for a tool that spends its life in the damp Portland soil. Unlike flimsy alternatives that might break or wear out after a single season, our mole traps are built for the long haul.
This durable construction means you get a reliable, powerful trap that works every time. Pest control experts agree that a well-made trap is a “game-changer for homeowners looking for mole removal techniques that work.” When you invest in a Cinch Trap, you’re getting a permanent solution, not a temporary fix.
Proven Effective in University Studies
A great trap is more than just strong; it has to be smart. Successful trapping requires a bit of strategy, and as professionals note, it’s essential to understand their behavior to catch moles effectively. That’s why our design isn’t based on guesswork. Cinch Traps have been ranked #1 in multiple university studies because they are engineered to work with a mole’s natural instincts.
The trap’s mechanism is sensitive and fast, ensuring a quick and humane dispatch. We’ve spent over a century perfecting a design that targets active tunnels where moles travel most. By understanding how it works, you can see why our traps provide consistent results. This scientific approach removes the frustration and delivers the outcome you need: a mole-free yard.
Backed by a Lifetime Warranty
We stand behind the quality of our traps, and we prove it by offering a lifetime warranty on every one. This is our promise to you that you’re buying a product built to last. If your trap ever fails due to a defect in materials or craftsmanship, we’ll make it right. This level of confidence is something you should expect from any tool you rely on for your home.
Think of it this way: top-rated local services like Mole Trappers PDX build their reputation on providing reliable, expert results. We hold our products to that same high standard. Our lifetime warranty gives you peace of mind, knowing you’ve made a one-time purchase for a lifetime of protection against moles and gophers. You can find more details in our FAQs.
Where Can You Find the Best Mole Traps in Portland?
When you’ve got mole tunnels crisscrossing your lawn, you want a solution, and you want it fast. The good news for Portland-area residents is that you have excellent options right in your backyard. Whether you prefer to buy directly from a local maker, browse the aisles of your favorite garden center, or hand the job over to a professional, you can find the perfect trap to reclaim your yard. Let’s break down where to look for the most effective mole traps in and around Portland.
Cinch Traps: Oregon’s Premier Manufacturer
One of the best ways to get a quality trap is to go straight to the source. We are proud to say that all of our mole traps are handmade right here in Oregon. When you buy directly from us, you’re not just getting a durable, galvanized steel trap; you’re supporting a local business with a legacy of quality that dates back to 1909. Buying direct ensures you get a genuine Cinch Trap backed by our lifetime warranty and the expertise of a team that lives and breathes mole and gopher control. It’s the perfect choice for anyone who values local craftsmanship and proven results.
Local Garden Centers and Hardware Stores
If you want to see a few options in person, your local hardware store or garden center is a great place to start. These stores typically carry a range of pest control products and can be a convenient one-stop shop for your gardening and lawn care needs. The staff can often provide helpful advice based on what other local customers have found success with. While you’re there, you can also pick up other supplies you might need, like gloves and a trowel. For more general information on managing moles, the Oregon State University Extension Service offers some great local insights.
Professional Pest Control Services
Let’s be honest, sometimes you just don’t have the time or the desire to deal with moles yourself, especially if you’re facing a large-scale invasion. In that case, calling a professional pest control service is a smart move. These experts have the experience to quickly identify primary tunnels and set traps for maximum effectiveness. When looking for a service in the Portland area, ask if they use trapping as their primary method, as it’s the most reliable way to handle a mole problem. A professional can take the guesswork out of the process and offer a swift resolution, giving you back your weekend.
How Do You Find Active Mole Tunnels?
Setting a mole trap is one thing, but setting it in the right place is what really makes the difference. Moles create a complex network of tunnels, and many of them are temporary feeding paths they only use once. Placing your trap in one of those is like waiting for a bus on a street that’s been closed for years. The key to success is finding their main travel routes, the active “highways” they use daily.
Think of yourself as a detective. Your mission is to identify the mole’s commute. It’s simpler than it sounds and just takes a little observation. By focusing your efforts on active tunnels, you dramatically increase your chances of catching the culprit quickly and reclaiming your yard. We’ll walk through a few easy methods to pinpoint exactly where you should place your mole traps for the best results. With the right strategy, you can stop guessing and start trapping effectively.
Test for Recent Activity
The most reliable way to know if a tunnel is active is to perform a simple test. Find a raised tunnel that looks promising and gently press down a one-inch section with your heel or a small stick, collapsing the tunnel without completely destroying it. Mark the spot with a flag or stick so you can find it again easily. Now, you just have to wait. If a mole is using that tunnel regularly, it will repair the damage, usually within 12 to 24 hours. When you see the collapsed section has been pushed back up, you’ve found your spot. This is a clear sign that a mole is actively using this path, making it the perfect place to set your trap.
Look for Fresh Mounds
Those volcano-shaped mounds of dirt in your yard are more than just an eyesore; they’re clues. Fresh molehills are a dead giveaway that a mole is actively digging nearby. Look for mounds with loose, dark, and moist soil, as this indicates recent excavation. Older mounds will often be flattened by rain, faded in color, or may even have weeds starting to grow on them. While you don’t set a trap directly in a mound, a cluster of fresh ones points you to an active tunnel system. Follow the raised ridges leading away from these fresh mounds to find the main travel lanes you’ll want to test for activity.
Find Their Main Travel Routes
Moles are creatures of habit. They establish main runways that they use as primary corridors to travel across your property. These are often straighter than the winding, squiggly feeding tunnels. A great way to find these routes is to look along structural elements in your yard. Moles often create their main tunnels alongside sidewalks, driveways, fence lines, or the foundation of your home. These features provide cover and a straight path to follow. Walk the perimeter of your property and look for these long, straight ridges. These are the mole highways, and they are the most effective places to set a trap because you can be confident the mole will pass through again. For more tips, check out our mole and gopher FAQs.
What Are Common Mole Trapping Mistakes to Avoid?
You’ve followed the signs, set your traps, and waited. And waited. If you’re coming up empty-handed, don’t get discouraged. Mole trapping is part science and part art, and a few small adjustments can make all the difference. Often, a lack of success isn’t about the trap itself, but about how and where it’s being used. Even seasoned gardeners can fall into a few common traps (pun intended) when trying to clear their yards of these tunneling pests. It’s a common experience, but definitely a solvable problem.
The good news is that these mistakes are easy to fix. By understanding a mole’s behavior and learning the proper technique, you can turn your trapping efforts from frustrating to fruitful. It starts with knowing where to place your trap for maximum impact, continues with consistent monitoring, and ends with a setup so perfect that the mole doesn’t know what’s coming. Getting these details right is the key to reclaiming your lawn. Before you give up, let’s walk through the most common errors and learn exactly how it works when you do it right. We’ll cover everything from finding the mole’s main highway to making sure your trap is perfectly camouflaged, so you can get back to enjoying your yard.
Placing Traps in the Wrong Spot
Location is everything in real estate, and it’s just as critical in mole trapping. A frequent misstep is placing traps in the wrong tunnels. Moles create a complex network of underground paths, but they don’t use all of them regularly. Those winding, shallow tunnels you see just under the grass are often temporary feeding tunnels, used once and then abandoned. Placing a trap there is a gamble. Instead, you need to find their superhighways: the deeper, straighter main tunnels they use for daily travel. These are the most strategic locations for your mole traps. Focusing your efforts on these active runways dramatically increases your chances of a successful catch.
Forgetting to Check and Maintain Your Traps
It’s easy to adopt a “set it and forget it” mindset, but that’s a recipe for failure in mole trapping. Moles are active creatures, and a trap can be sprung at any time. Checking your traps at least once a day is essential. This allows you to promptly deal with a captured mole and reset the trap if needed. Consistent monitoring also gives you valuable feedback. If a trap remains untouched for more than 48 hours, it’s a strong indicator that you’ve chosen an inactive tunnel. Don’t be afraid to pull it up and move it to a more promising location. An active approach is always more effective than a passive one. For more tips, check our FAQs.
Making Common Setup Errors
The devil is in the details, and a sloppy setup can alert a mole to danger. One of the biggest errors is allowing light or air to enter the tunnel after placing the trap. Moles are highly sensitive to changes in their environment, and a sudden draft or sliver of light will cause them to back up and dig around your trap. After setting your trap, be sure to cover the hole completely, packing soil around it to create a light-proof seal. You should also compact the soil on the sides of the trap within the tunnel. This makes it easier for the mole to go into the trap rather than trying to push around it. A careful setup makes your trap feel like a natural part of the tunnel, ensuring the mole proceeds without suspicion.
How to Set Your Mole Trap for Success
You’ve got the best tool for the job, and now it’s time to put it to work. Setting your mole trap correctly is just as important as choosing the right one. A little bit of strategy goes a long way in making sure you catch that pesky mole on the first try. It’s all about thinking like a mole: Where do they go, when are they most active, and what will make them feel secure enough to enter the trap? Let’s walk through the simple steps to make your trapping efforts a success.
Find the Perfect Spot for Your Trap
Location is everything when it comes to trapping moles. You want to place your trap in a main runway, not the winding feeding tunnels that branch off from it. Think of these as the mole’s highways. Moles often create these main routes along straight lines like fence lines, driveways, or the foundation of your house. A great way to find one is to poke a small hole in a tunnel and check back in a few hours. If the hole is repaired, you’ve found an active, frequently used tunnel. This is the perfect place for your mole trap. Placing it here ensures the mole will pass through it on their regular commute.
Know the Best Time to Set Traps
Timing your trap placement can make a big difference. Moles are most active in the spring and fall, especially after a good rain when the ground is soft and easy to dig through. This is when they are busy expanding their tunnel networks, making it an ideal time to intercept them. While they create a lot of mess in their feeding areas, it’s best to set traps in their main traveling runs because they will come back through them more often. Once you’ve set your trap, check it daily. Moles are fast, and you want to remove them quickly once they’ve been caught.
Follow Key Safety Precautions
A successful setup is a safe one. First, always handle your trap with care, following the specific setup instructions to avoid snapping your fingers. When placing the trap in the tunnel, your goal is to make it look like a natural part of the run. Make sure there isn’t even the tiniest amount of air or light getting into the run around the trap, as this can make a mole suspicious. Cover the set trap with a bucket or a piece of sod to block light and keep it safe from curious pets or children. Finally, be aware of your local wildlife regulations. Failing to follow local laws when trapping moles is an oversight that can lead to problems.
Should You DIY or Hire a Pro for Mole Removal?
Deciding whether to tackle a mole problem yourself or call in a professional is a common crossroads for homeowners. There’s no single right answer, as it really depends on the scale of your mole invasion, your budget, and how much time you’re willing to invest. Both paths can lead to a mole-free yard, but they offer very different experiences. Let’s break down the pros and cons of each approach so you can make the best choice for your situation.
When to Call a Professional
Let’s be honest, sometimes a mole problem feels like a full-scale invasion. If you look out at your lawn and see a maze of tunnels and mounds that seems to have appeared overnight, you might feel overwhelmed. This is a perfect time to call a professional. Companies like Mole Trappers PDX specialize in handling large-scale infestations and can take the problem off your plate entirely. If you’ve already tried a few things without success or simply don’t have the time to learn the ins and outs of mole behavior, hiring an expert is a smart, stress-free option. They have the experience to assess the situation quickly and get to work.
The Perks of DIY Trapping
For many homeowners, handling a mole problem on their own is not only possible but also incredibly satisfying. According to wildlife damage management experts, trapping is the most effective and practical way to control moles. Taking the DIY route puts you in control. You learn to read your own lawn, identify active tunnels, and place traps for the best results. It’s a skill that serves you for years to come. With a straightforward and effective tool, the process is much simpler than you might think. This approach gives you the confidence to protect your yard whenever a new pest shows up, saving you from having to make a call for help every time.
Comparing Costs: DIY vs. Pro Services
Cost is often the deciding factor. Professional services typically come with a setup fee plus a per-mole charge. For example, some local services charge around $150 just to come out, with an additional fee for every mole they catch. While effective, these costs can add up quickly, especially if you have a persistent mole family. In contrast, investing in a few high-quality mole traps is a one-time expense. A durable, American-made steel trap can be used season after season. While it requires a bit of your time to set up, the long-term savings are significant. You’re not just paying to solve today’s problem; you’re investing in a permanent solution for your toolkit.
What to Look for in a Portland-Proof Mole Trap
Choosing the right mole trap can feel like a big decision, especially when you just want those dirt mounds gone from your yard. In a place like Portland, with our famously damp soil and persistent drizzle, not just any trap will do the job. You need a tool that’s built for our specific environment. The most effective traps share a few key characteristics: they’re tough enough to handle the weather, simple enough for anyone to set up, and reliable enough to catch a mole on the first try.
When you’re comparing options, think about the long game. A cheap, flimsy trap might seem like a good deal at first, but it will likely rust or break after one season in the wet ground, forcing you to buy another one next year. Investing in a well-made trap saves you money and frustration over time. Look for one that feels sturdy and is made from quality materials that can stand up to the elements. Pay attention to the setup instructions, too. A trap is only effective if you can set it correctly, so finding one with a straightforward design is crucial for your success. Finally, the trigger mechanism is the heart of the trap. A sensitive, well-designed trigger ensures the trap springs at just the right moment. Let’s break down exactly what makes a mole trap truly Portland-proof.
Durability for Pacific Northwest Weather
Here in the Pacific Northwest, our gear needs to be as resilient as we are. The constant rain and damp soil can be tough on outdoor equipment, and mole traps are no exception. A trap that rusts or warps won’t function properly, if at all. That’s why durability is at the top of the list. You should look for mole traps made from weather-resistant materials like galvanized steel. This material choice ensures your trap can sit in a damp tunnel for days without degrading, giving you long-term mole control without needing frequent replacements. A durable trap is a reliable one, ready to work season after season.
Ease of Use and Setup
Let’s be honest, most of us aren’t professional trappers. We’re gardeners, homeowners, and people who just want our lawns back. The last thing you need is a complicated trap that requires special tools or a degree in engineering to set. The best traps are designed for straightforward, effective use. A simple, easy-to-set trap means you can get it in the ground quickly and safely, increasing your chances of success. When you’re looking at different models, consider how it works. A trap with a simple, intuitive design is a game-changer, allowing you to solve your mole problem without a huge learning curve.
A Sensitive Trigger Mechanism
A mole trap can be built like a tank, but if the trigger isn’t sensitive enough, it’s just a piece of metal in your lawn. The trigger is what makes the trap effective. Moles are cautious creatures, and they can sometimes push dirt ahead of them as they move, accidentally setting off a poorly designed trap without getting caught. A sensitive trigger mechanism is designed to activate with the slightest pressure from the mole itself, not the dirt around it. This precision is essential for a successful catch. A reliable trigger means you can set your trap with confidence, knowing it will spring at the exact right moment.
Mole Trap Prices and Where to Buy Them in Portland
When you’re ready to tackle a mole problem, one of the first questions you’ll have is about cost. Seeing your carefully tended lawn or garden disrupted by a network of tunnels is frustrating, and you want a solution that’s both effective and affordable. The price of getting rid of moles in your yard can vary quite a bit, depending on whether you decide to buy your own traps or hire a professional service. Both paths have their pros and cons, and the right choice for you really comes down to your budget, your timeline, and how hands-on you want to be.
In the Portland area, you have plenty of options. You can invest in high-quality, reusable traps that will last for years, or you can call in an expert to handle the entire process for you. We’ll walk through the average costs for both DIY trapping and professional services, and show you where you can find the best tools for the job. Understanding the financial side of things will help you create a mole-removal plan that works for your yard and your wallet, so you can get back to enjoying your outdoor space.
Average Cost for a Quality Trap
Investing in a good mole trap doesn’t have to break the bank. A reliable, well-made trap typically costs between $15 and $30. While you might find cheaper options, a quality trap is a smart investment. Durable materials like galvanized steel ensure your trap can withstand Portland’s wet weather and be used season after season. When you consider the cost of replanting a damaged lawn or garden, a one-time purchase of a few effective mole traps is a smart, affordable way to protect your yard. It’s often more cost-effective than single-use or less-durable alternatives that need frequent replacing.
What to Expect from Professional Service Pricing
If you’d rather leave mole removal to the experts, hiring a professional is a great option. In the Portland area, you can expect to pay a setup fee, which often starts around $150. This initial charge usually covers the expert’s time to assess your property, identify active tunnels, and strategically place the traps. After the setup fee, many companies charge a per-mole fee, which is typically about $35 for each mole they catch. Many professional services also include a guarantee for a set period, like two months, giving you peace of mind that the problem will be handled effectively.
Buying Direct from Cinch Traps vs. Local Retailers
When you’re ready to buy, you have a couple of great choices: purchasing directly from a manufacturer like Cinch Traps or visiting a local retailer. Buying directly from our online shop gives you access to our full range of handmade traps and accessories, all backed by a lifetime warranty. It’s a straightforward way to get a proven tool delivered right to your door. Alternatively, many local garden centers and hardware stores in the Portland area carry mole traps. Shopping locally allows you to see the trap in person and get advice from staff. Some local pest control companies may also recommend or sell the traps they trust for their own professional services.
Related Articles
- Mole Kit | Cinch Traps | The Best Mole & Gopher Trap
- Mole Trap | Cinch Traps | The Best Mole & Gopher Trap
- The Best Way to Catch a Mole: A Step-by-Step Guide
- 7 Things to Know Before You Buy Mole Trap Online
- 4 Best Mole Traps for Lawns (Tested & Reviewed)
Frequently Asked Questions
How many traps should I buy for my yard? A great starting point is two or three traps. While a single mole can be responsible for all the damage you see, having multiple traps allows you to cover a few different active tunnels at once. This significantly increases your odds of catching the mole quickly, especially if you’re not 100% certain which tunnel is the main highway.
Are Cinch Traps safe to use around children and pets? Because our traps are set underground within the mole’s tunnel, they are generally out of sight. However, for extra precaution, you can cover the area where you’ve set a trap with a bucket, a board, or a piece of sod. This creates a physical barrier that keeps curious pets and children away and has the added benefit of blocking all light from the tunnel, which makes your trap more effective.
How long should I wait before moving a trap to a new location? Patience is important, but you don’t want to wait forever. If a trap hasn’t been sprung after 48 hours, it’s a good sign that you’ve placed it in an inactive or abandoned tunnel. At that point, it’s best to pull it up and move it to another spot where you’ve confirmed recent mole activity.
My trap was sprung, but there’s no mole. What went wrong? This is a common frustration, and it usually points to a small setup issue. Often, the mole has pushed a plug of dirt ahead of itself, which triggered the trap before the mole could enter. To prevent this, make sure you pack the soil firmly on the sides of the trap inside the tunnel. This encourages the mole to move straight through the trap instead of trying to push dirt or dig around it.
How do I know when my mole problem is solved? You’ll know you’ve succeeded when you stop seeing new signs of damage. After you catch a mole, keep an eye on your lawn for a week or two. If no new mounds or surface ridges appear, you can confidently declare victory. Moles are solitary animals, so it often only takes catching one or two to completely solve the problem in your yard.
