Let’s be honest: when you hear the phrase “DIY mole control kit,” you might be a little skeptical. Many of us have tried store-bought repellents or gimmicky gadgets only to watch new molehills pop up the very next day. It’s easy to assume that getting rid of moles for good is a job best left to the pros. The truth is, a DIY approach can be incredibly effective, but only if you use the right method. Forget the folklore and temporary fixes. We’re going to explore what the research says, compare traps to repellents, and show you what to look for in a kit that delivers professional-grade results.
Key Takeaways
- Trapping offers a definitive solution: While repellents and homemade remedies can temporarily deter moles, trapping is the only method that physically removes the animal, providing a permanent fix to your lawn damage.
- Proper placement is everything: Your success depends less on the specific tool and more on your strategy. Finding a mole’s main, active tunnels is the most critical step for ensuring your trap is effective.
- Invest in a quality, reusable trap: Cheaper, temporary fixes often cost more in the long run through repeat purchases. A durable, steel trap is a one-time investment that provides a reliable solution for years to come.
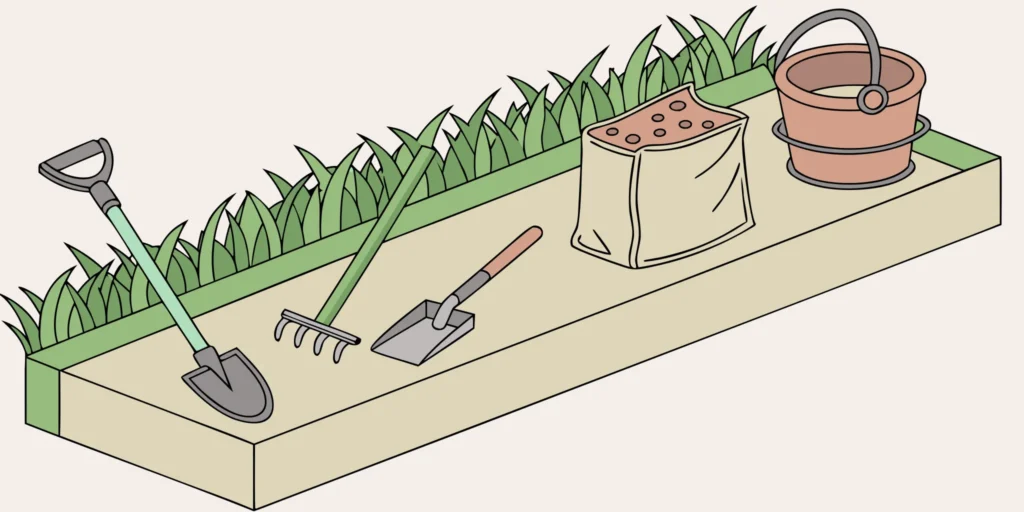
What’s in a DIY Mole Control Kit?
When you decide to tackle a mole problem yourself, you’ll quickly find a wide world of DIY mole control kits. These aren’t one-size-fits-all solutions. A “kit” can be anything from a pre-packaged box from a big-box store to a set of instructions for building your own trap out of a five-gallon bucket. The goal of any kit is to give you the tools and knowledge to handle the mole invasion without calling in a professional.
The contents of these kits vary wildly, typically falling into one of three categories: traps, baits, or repellents. Some kits might combine these methods, offering a multi-pronged attack. The effectiveness of any kit, however, doesn’t just depend on what’s in the box. Success hinges on your ability to correctly identify that you have a mole problem (and not a gopher one), find their active tunnels, and place the solution correctly. Moles are surprisingly clever, and a poorly placed trap or repellent won’t do you much good. Before you invest your time and money, it’s helpful to understand exactly what these kits contain and how they claim to work. You can find more details in our mole and gopher FAQs.
The Essential Tools You’ll Need
At the heart of any DIY kit are the tools designed to either eliminate or deter moles. The most common tools are traps, which physically capture the mole. These range from simple homemade devices to more sophisticated, professional-grade mole traps designed for quick and effective results. Other kits include poison baits, often shaped like worms or grubs to trick moles into eating them. Then there are repellents, which come as granules, liquids, or sonic spikes. These aim to make your yard an unpleasant place for moles to live. No matter the tool, your most essential asset is knowledge: knowing how to find the main mole runways is crucial for any method to work.
How These Kits Get the Job Done
Each type of kit uses a different strategy to solve your mole problem. Poison baits, like those that mimic earthworms, work by ingestion. The mole eats the bait and dies underground. Repellents take a different approach; they don’t kill the moles but instead try to drive them away. Products with ingredients like castor oil or pellets that create environmental stress are designed to make moles abandon their tunnels and find a new home elsewhere. Traps offer the most direct method. By placing a trap in an active tunnel, you can physically remove the mole from your yard, providing clear proof that the problem has been handled. Understanding how it works is key to setting them up for success.
Comparing the Best DIY Mole Control Kits
When you’re ready to take mole control into your own hands, you’ll find a lot of options out there. From professional-grade traps to homemade repellents, the right choice depends on your specific needs and how quickly you want to see results. Let’s break down some of the most common DIY mole control kits so you can find the best fit for your yard.
Why Professionals Use Cinch Traps
There’s a reason pest control experts and seasoned gardeners rely on Cinch Traps. The Mole Kit by Cinch Traps is a complete, handmade trapping system designed to eliminate moles fast. Unlike flimsy alternatives, these traps are built from durable galvanized steel for repeated use, season after season. The kit gives you everything you need to get started, and its straightforward design is praised by customers for being both incredibly effective and easy to set up. When you want a no-fuss solution that delivers professional results, this is the kind of tool you look for.
A Look at Other Common Brands
Beyond Cinch Traps, you’ll see other types of kits on hardware store shelves. Plunger traps and scissor traps are also popular among DIY enthusiasts, each using a different mechanism to catch moles in their tunnels. You will also find kits that focus on repellents instead of trapping, often using castor oil as the active ingredient. These options vary quite a bit in their effectiveness and ease of use, so it’s always a good idea to read recent user reviews before making a purchase. What works for one person’s lawn might not be the best solution for yours.
Store-Bought Kits vs. Homemade Solutions
Store-bought kits offer convenience by bundling everything you need. A comprehensive kit often includes multiple traps, flags for marking tunnels, a digging tool, and detailed instructions, which is perfect for a beginner. On the other hand, homemade solutions can be a cost-effective first step. A simple castor oil mixture can act as a natural repellent that makes your lawn less appealing to moles. You can create a spray by mixing a half-cup of castor oil with a half-cup of dish soap and diluting it with water. While this won’t remove existing moles, it can help deter new ones from moving in.
Do DIY Mole Control Kits Actually Work?
When you see those telltale mounds of dirt popping up across your lawn, your first instinct might be to grab a DIY mole control kit. They seem convenient and promise a quick fix, but their effectiveness can be a mixed bag. The success of any kit really comes down to the methods and tools it includes. Some rely on repellents or poisons, while others use traps. Understanding the difference is key to reclaiming your yard and ensuring the problem is gone for good, not just temporarily pushed next door.
Ultimately, a DIY approach can work, but only if you use a proven method. It requires identifying active tunnels correctly and placing your tools strategically. While some kits offer a good starting point, many experienced gardeners and even professionals find that building their own “kit” with high-quality, reliable traps is the most effective route. This way, you invest in a permanent solution instead of temporary deterrents.
What Real Customers Are Saying
Many people are drawn to DIY kits because they want to handle a mole problem themselves without the high cost of hiring a professional. Customer feedback often highlights ease of use and affordability as major perks. For example, some companies offer DIY mole control kits that bundle everything you need, which customers appreciate. The convenience of having a pre-packaged solution can feel like a great first step.
However, success isn’t always guaranteed. Even with a kit, you still need to correctly identify active mole tunnels and understand the pest’s behavior. Moles are surprisingly smart and can quickly learn to avoid poorly placed traps or ineffective repellents. While some users find success, others report that the moles simply moved to a different part of the yard, making the problem feel endless.
Traps vs. Repellents: Which Is More Effective?
Most DIY mole control methods fall into two categories: repellents and traps. Repellents aim to make your yard an unpleasant place for moles to live. Some products work by killing their food source, like grubs and earthworms. Others use ingredients with strong smells, like castor oil, which is known to upset a mole’s digestive system and encourage them to leave. While these can offer a temporary fix, they rarely solve the problem permanently. Moles may just relocate to another area of your property or return once the repellent wears off.
Traps, on the other hand, are designed to eliminate the mole directly. This is the method most professionals use because it provides a definitive solution. A well-placed trap in an active tunnel is the quickest way to remove the animal causing the damage. While the idea might seem intimidating, modern traps are designed for safety and effectiveness. Using a trap ensures the specific mole creating havoc in your yard is gone for good.
The Proof: What University Studies Reveal
When you look at the research, the evidence points toward trapping as the most reliable mole control method. Studies from multiple universities have consistently shown that trapping is more effective than repellents or poisons. In fact, Cinch Traps have been ranked #1 in these studies for their simple design and high success rate. This is because a trap directly addresses the source of the problem.
The effectiveness of any DIY kit, regardless of its contents, depends heavily on proper use. You need to correctly identify active tunnels and place the device perfectly. As some mole control guides point out, success is all about technique. Repellents can be hit-or-miss, but a quality trap like one of our handmade mole traps offers a proven, long-term solution backed by decades of results and a lifetime warranty.
How Much Should You Budget for Mole Control?
Figuring out how much to spend on mole control can feel like a guessing game. The truth is, the cost depends entirely on the approach you take. You can find a wide range of products on the market, from temporary repellents to professional-grade traps, and their prices vary just as much as their effectiveness. Think of it as an investment in your lawn and garden. A small, recurring mole problem might only need a basic solution, while a full-blown invasion calls for more reliable tools.
Before you pull out your wallet, it’s helpful to understand what you’re paying for. Are you buying a quick fix that you’ll have to replace next season, or are you investing in a permanent solution that will protect your yard for years to come? Let’s break down the costs of different kits so you can make a smart choice for your budget and your backyard.
The Cost of a Starter Kit
If you’re just starting to tackle a mole issue, a basic starter kit can seem appealing. These kits typically cost around $50 and often include chemical repellents, sonic spikes, or less durable traps. They can be a decent entry point if you have a minor problem or want to test a DIY method without a big financial commitment. However, these solutions often provide temporary results. Repellents can wash away with the rain, and cheaper traps may break or rust after a single season, forcing you to buy them again year after year. This cycle of repurchasing can end up costing you more time and money than you initially saved.
Investing in a Premium Solution
For a more persistent mole problem, investing in a premium solution is often the most effective and economical choice in the long run. These options might range from $85 and up, but the higher price reflects superior quality and design. Instead of flimsy plastic, you’ll find durable, rust-resistant materials like galvanized steel. Premium kits usually feature highly effective mole traps that are designed for quick, humane kills and can be reused for decades. This initial investment saves you the frustration and recurring cost of replacing less effective products that just don’t get the job done. It’s about solving the problem correctly the first time.
Considering Long-Term Value and Warranties
When you’re comparing prices, don’t forget to consider the long-term value. A trap that costs less upfront but breaks after a few uses isn’t really a bargain. The best products are built to last and are backed by a solid guarantee. Some companies offer satisfaction guarantees, but a lifetime warranty is the true mark of a confident brand. It means the company stands behind its product and you only have to buy it once. This kind of reliability not only saves you money over time but also gives you the peace of mind that your mole problem is handled for good. You can often learn more about a product’s durability by checking its FAQs page.
Choose the Right Mole Control Method for Your Yard
Picking the right way to handle a mole problem isn’t a one-size-fits-all situation. The best approach for your yard depends on a few things, like how many moles you’re dealing with, the size of your property, and whether you have kids or pets playing outside. Before you buy any kit or trap, take a moment to consider these factors. A little planning upfront will help you choose a solution that’s effective, safe, and gives you back your beautiful lawn.
Assess the Severity of Your Mole Problem
First, play detective. Are you seeing one or two molehills, or does your yard look like it’s breaking out in a bad case of dirt-mound acne? The number of mounds can give you a good idea of how serious your mole situation is. Moles are fast diggers and can create extensive tunnel networks quickly, so what looks like a minor issue can escalate. A single mole can be responsible for several mounds, but a yard covered in them likely means you have a well-established pest. Identifying the scope of the problem will help you decide if you need one or two traps or a more comprehensive setup to cover multiple active areas.
Factor in Your Yard’s Size and Soil Type
The size of your yard and the type of soil you have play a big role in mole control. A small, contained garden is much easier to manage than several acres of land. For larger properties, you’ll need more traps to effectively cover the territory. Moles also have preferences. They love moist, loamy soil because it’s easy to tunnel through and is usually full of their favorite snacks: earthworms and grubs. If you have this type of soil, you’re more likely to have a persistent mole problem. Understanding your yard’s conditions helps you anticipate where moles will be most active, which is key for successful trap placement.
Keep Your Kids and Pets Safe
For most of us, safety is the top priority. When you have children or pets running around, using poisons or chemical repellents can feel risky. While some repellents are marketed as safe for pets and livestock, many people prefer to avoid chemicals altogether. This is where a high-quality trap becomes the best option. Unlike baits that can be accidentally ingested by other animals, Cinch mole traps are a mechanical solution. They are set underground inside the mole’s tunnel, safely out of reach of curious pets and little hands. This gives you an effective way to eliminate the mole without introducing any harmful substances into your yard.
How to Set Up Your Mole Control Kit for Success
Having the right tools is only half the battle. Your success really comes down to understanding a little bit about mole behavior and being strategic with your setup. Even the best kit won’t work if it’s placed in the wrong spot. By following a few simple steps, you can make sure your efforts pay off and you can get back to enjoying your yard.
Find Active Mole Tunnels
Moles create a complex network of tunnels, but they only use a few of them as their main travel routes. Placing a trap in a tunnel they rarely use is a waste of time. You need to find their superhighways.
Here’s a simple trick to identify an active tunnel: Gently poke a small hole in the top of a surface runway with your finger or a small stick. Mark the spot with a flag. If the mole repairs the hole within 24 to 48 hours, you’ve found an active tunnel. This is the perfect place to set your trap. Moles are creatures of habit and will consistently use these main paths. The entire process is detailed in our How It Works guide.
Place Your Traps Strategically
Once you’ve located an active runway, it’s time to place your trap. Every trap is a little different, so always read the instructions that come with your specific kit. For Cinch Traps, you’ll want to excavate a small section of the tunnel, just big enough to fit the trap inside.
The goal is to place the trap directly in the mole’s path so they have to pass through it. Make sure it’s set securely and level with the bottom of the tunnel. Cover the area lightly with dirt or a piece of sod to block out any light. Our durable, galvanized steel mole traps are designed for a quick and effective setup right in these main tunnels.
Apply Baits and Repellents Correctly
Many DIY kits include baits or repellents. Repellents, often made from castor oil, are designed to make your yard smell and taste unpleasant to moles, encouraging them to move elsewhere. For these to have any effect, you need to apply them liberally near active tunnels, dens, and any plants you want to protect.
Baits, on the other hand, are designed to look and feel like a mole’s natural food source. While these methods can sometimes work, they often produce mixed results. Trapping remains the most direct and reliable way to solve a mole problem because it physically removes the animal. You can find more answers to common questions on our FAQs page.
Which Homemade Mole Remedies Actually Work?
When you first spot a molehill, your initial thought might be to find a quick fix using things you already have around the house. Many homemade remedies are based on repelling moles with strong smells or tastes they find unpleasant. These methods aim to make your yard so uninviting that the moles decide to pack up and move next door. While they can sometimes offer a temporary solution, it’s important to understand that repellents don’t solve the problem permanently. They simply encourage the moles to leave for a little while, and they might come right back once the repellent wears off.
The effectiveness of these DIY solutions can vary quite a bit depending on your soil, the size of the mole population, and how desperate they are for food. Think of these as the first line of defense. They are low-cost and easy to try, but they often require consistent reapplication to have any lasting impact, especially after a good rain. If you’re dealing with a stubborn mole or a widespread infestation, you’ll likely find that these remedies aren’t enough to get the job done. Still, if you want to give them a shot, let’s look at a few of the most common homemade remedies and how they are supposed to work.
The Castor Oil Method
This is one of the most popular DIY mole repellents, and the logic behind it is pretty simple: moles can’t stand the smell or taste of castor oil. It also gives them an upset stomach if they ingest it, making your lawn a very unpleasant place to dine. To try this method, you can create a simple spray. Foremost Insurance Group offers a popular guide on getting rid of moles with this recipe: mix three parts castor oil with one part dish soap. Then, add four tablespoons of that mixture to a gallon of water in a watering can or sprayer. Apply the solution generously over the mole tunnels and any visible mounds. You’ll need to reapply this mixture regularly, especially after it rains, to keep the scent strong enough to be effective.
Other Natural Deterrents to Try
If you’re a coffee drinker, you might have another natural deterrent right in your kitchen. Moles have sensitive noses and are reportedly not fans of the strong smell of coffee. Some homeowners have found success by sprinkling their used coffee grounds around molehills and tunnel entrances. This simple trick can encourage a mole to vacate your yard without traps or poisons. Other gardeners plant strong-smelling flowers and herbs like marigolds, daffodils, or garlic around the perimeter of their gardens as a preventative measure. While these scent-based deterrents are easy to implement, their success is often anecdotal and may not be enough to stop a determined mole. They work best as part of a larger mole control strategy.
Simple Yard Modifications That Help
A more proactive way to handle a mole problem is to make your yard less attractive to them in the first place. Moles are not there to ruin your lawn for fun; they’re there for the food. Their primary diet consists of earthworms, grubs, and other lawn insects. If you have a healthy, thriving population of these critters, you’re essentially rolling out a welcome mat for moles. One of the most effective long-term strategies is to get rid of moles in your yard by reducing their food supply. You can apply grub-control products to your lawn to eliminate a major food source. Also, try not to overwater your grass. Excessively damp soil is easier for moles to tunnel through and attracts more earthworms to the surface.
Avoid These Common DIY Mole Control Mistakes
Tackling a mole problem yourself can be satisfying, but a few common missteps lead to frustration. Even the best tools won’t work if they aren’t used correctly. Let’s walk through the most frequent mistakes so you can solve your mole problem without the trial and error. Avoiding these pitfalls helps you reclaim your yard faster and feel confident in your approach. Getting it right the first time saves time, money, and the headache of seeing new molehills pop up.
Improper Setup and Placement
Where you place your trap is everything. You can have the most effective trap on the market, but if it’s not in an active tunnel, you won’t catch a thing. Moles use certain main tunnels as their superhighways. As the experts at Mole Busters note, success depends on “proper tunnel identification… and correct placement.” To find a busy route, press down on a few runs in your yard. Check back the next day to see which ones have been pushed back up. That’s your active tunnel. Following a clear how-it-works guide is the best way to ensure your setup is flawless.
Bad Timing and Seasonal Errors
Timing your mole control efforts makes a huge difference. Moles are most active near the surface during the spring and fall when the ground is moist and full of earthworms. Trying to set traps in a dry summer or when the ground is frozen is much less effective. According to ScottsMiracle-Gro, you’ll have the most luck trapping in an active runway during these peak seasons. By focusing your efforts in the spring and fall, you’re working with the moles’ natural behavior, not against it, which increases your chances of success.
Overlooking Basic Safety Precautions
When you’re focused on getting rid of moles, it’s easy to forget about basic safety. First, make sure you’re actually dealing with moles and not gophers, as the trapping methods can differ. If you’re not sure, a good FAQ page can help you identify the culprit. Always handle your traps carefully and according to the instructions. If you have pets or children who play in the yard, be mindful of where you place your traps. Choose a high-quality, durable mole trap that is designed to be effective and secure when set correctly, minimizing risks to non-target animals and your family.
Maintain Your Mole-Free Yard
Once you’ve successfully trapped the moles in your yard, the next step is making sure they don’t come back. Maintaining a mole-free lawn isn’t about constant work; it’s about being observant and proactive. A little bit of regular attention can prevent a small issue from turning into a full-blown invasion all over again. Think of it as simple yard upkeep, just like mowing or weeding. By creating a simple routine, you can protect your hard work and keep your lawn looking its best. The key is to stay consistent and know what to look for, so you can catch any new activity before it gets out of hand.
Create a Simple Inspection Schedule
Moles can move in quickly, so the best way to prevent a new family from settling in is to catch them early. You don’t need a complicated plan, just a simple weekly habit. Once a week, take a walk around your property with the specific goal of looking for signs of new mole activity. Pay close attention to areas where you had problems before. Look for fresh mounds of dirt or new surface ridges snaking across your lawn. If you spot something, you can act immediately instead of letting the mole establish a complex network of tunnels. A quick five-minute walk is all it takes to stay ahead of the game.
Care For Your Traps and Equipment
Your mole traps are an investment, and with a little care, they can last a lifetime. After each use, take a moment to clean your traps. Remove any dirt, grass, or debris to ensure the trigger mechanism works smoothly the next time you need it. Storing your traps in a dry place like a garage or shed will keep them in top condition. Cinch Traps are made from durable, galvanized steel to withstand the elements, but proper storage is always a good habit. Taking care of your mole traps ensures they’ll be ready to go the moment you spot a new tunnel.
Know When Your Mole Problem Is Solved
So, how can you be sure the moles are really gone? The most obvious sign is a complete lack of new activity. You won’t see any new mounds or surface tunnels appearing in your yard. To confirm, you can flatten all the existing mounds with a rake or shovel. If they remain flat for a week or two and no new ones pop up, you can be confident you’ve solved the problem. It’s a good idea to leave your traps set for an extra week just to be certain. Once that time passes without any new mole signs, you can pull up your traps and enjoy your beautiful, mole-free yard.
Related Articles
- Get Rid of Moles Permanently: What Really Works
- The Best Way to Catch a Mole: A Step-by-Step Guide
- 4 Best Mole Traps for Lawns (Tested & Reviewed)
- Mole Kit | Cinch Traps | The Best Mole & Gopher Trap
- FAQS moles gophers | Cinch Traps | The Best Mole & Gopher Trap
Frequently Asked Questions
How do I know if I have moles or gophers? The easiest way to tell the difference is by looking at the dirt mounds. Moles create cone-shaped, volcano-like mounds because they push dirt straight up from their tunnels. Gophers, on the other hand, leave fan-shaped or crescent-shaped mounds with a distinct dirt plug off to one side. Correctly identifying your pest is the first step to solving the problem.
Are traps safe to use around my children and pets? Yes, when used correctly, high-quality traps are a very safe option. Unlike poison baits that can be accidentally eaten, traps like ours are set underground directly inside the mole’s tunnel. This placement keeps the mechanism out of reach of curious kids and pets who are playing on the surface of the lawn, giving you an effective solution without the worry.
Why is trapping considered more effective than using repellents? Trapping offers a permanent solution, while repellents often provide only a temporary fix. Repellents work by making your yard unpleasant, which might encourage a mole to move to your neighbor’s property for a little while. However, they often return once the repellent wears off. A trap physically removes the specific animal causing the damage, ensuring the problem is solved for good.
What should I do if I set a trap but don’t catch a mole? If you haven’t had any luck after a couple of days, the most likely reason is that the trap isn’t in an active runway. Moles dig a lot of tunnels, but they only use a few as their main travel routes. Try finding a different tunnel and use the poke test: press down a small section, and if it’s repaired within 24 to 48 hours, you’ve found a busy path. Move your trap there for better results.
How many traps do I actually need? This really depends on the size of your yard and the scale of your mole problem. If you only have a few mounds in a small area, one or two traps placed in the main tunnels might be all you need. For larger properties or a more serious infestation with mounds all over, using several traps at once will help you cover more ground and resolve the issue much faster.
