You don’t need to hire a professional to get professional results in your own yard. The secret is using the same tools and techniques the experts rely on. You already have the tool: the Cinch Trap, a favorite among pest control pros for its reliability and durable design. Now, this guide will give you the technique. We’ll cover the small but critical details that make all the difference, like getting the depth just right and ensuring the trigger is perfectly sensitive. These are the official cinch trap setting instructions you need to stop gophers in their tracks and reclaim your lawn with confidence.
Key Takeaways
- Find the main runway for a quick catch: Your success hinges on placing traps in an active gopher tunnel. Look for fresh mounds with dark, moist soil and use a probe to confirm the tunnel’s location before you start digging.
- Master the setup for a successful trigger: Always use two traps facing opposite directions to cover both approaches. Before placing them, double-check that the trip pins are fully engaged and the trap fits snugly within the tunnel walls.
- Stay consistent for long-term success: Trapping is an active process, so check your traps every 24 to 48 hours and be ready to move them to a new location if you don’t see results. A quick cleaning after each catch will also keep your trap working effectively for years.
How Does a Cinch Trap Work?
If you’re wondering what makes Cinch Traps a go-to solution for gopher problems, the answer lies in their simple yet incredibly effective design. For over a century, these traps have relied on a straightforward mechanical principle that works with a gopher’s natural instincts, not against them. This approach makes them both reliable and easy for anyone to use, from first-time gardeners to seasoned professionals. Let’s break down exactly how they work and why they’ve stood the test of time.
Understanding the Spring-Loaded Design
At the heart of every Cinch Trap is a powerful, spring-loaded mechanism. When you set the trap, you are loading tension into the spring. The trap has a trigger plate that sits just inside the gopher tunnel. When a gopher moves through its tunnel to plug the opening, it pushes dirt against this trigger. This small movement is all it takes to release the spring, causing the galvanized steel jaws to snap shut instantly. The entire process is designed for a quick and humane dispatch, ensuring the pest doesn’t suffer. This simple, powerful action is what makes the trap so dependable.
Why Cinch Traps Are So Effective
The effectiveness of Cinch Traps comes from a combination of smart design and durable construction. Unlike other traps that go completely underground, these are placed on the surface with the jaws reaching down into the tunnel. This setup uses a gopher’s own behavior against it. Gophers hate open holes in their tunnels and will instinctively try to plug them with dirt. As they push soil toward the light, they trigger the trap. Because our Cinch gopher traps are handmade in Oregon from galvanized steel, they are built to last. You can count on them to work season after season, providing a reliable solution to protect your yard and garden.
What You’ll Need to Set Your Trap
Before you head out into the yard, gathering the right tools will make setting your gopher trap a much smoother process. Having everything you need on hand means you can find the tunnel, place the trap, and get back to your day without any extra trips to the garage. Think of it as your gopher-trapping toolkit. It’s not complicated, and you probably have most of these items already. We’ll also cover a few simple but important safety steps to ensure the process is secure for everyone, including pets and kids who might be playing in the yard.
Your Essential Tool Checklist
Let’s get your gear in order. First, you’ll want to wear a sturdy pair of gloves to protect your hands and keep your scent off the trap. You will also need a shovel to dig an opening into the gopher’s tunnel system. To find the tunnel, a probe is essential; a long Phillips-head screwdriver or a similar sturdy rod works perfectly. Once you’ve located the tunnel, a narrow trowel or soil knife helps clear the opening. Finally, you’ll need your gopher traps. Cinch Traps are designed to be powerful and easy to set, so you can feel confident whether it’s your first time or your hundredth.
Prepare for Safety
A little preparation goes a long way in keeping your yard safe while you trap. The most important rule is to always cover your set traps. This protects curious children, pets, and other non-target animals from accidentally springing the trap. A flat piece of plywood or even sturdy cardboard works well. Just place it over the hole and use soil to seal the edges, which also blocks light and air from entering the tunnel and alerting the gopher. Always start your trapping efforts at fresh mounds of dirt, as these indicate active tunnels. Following these simple safety guidelines ensures your pest control is effective and worry-free.
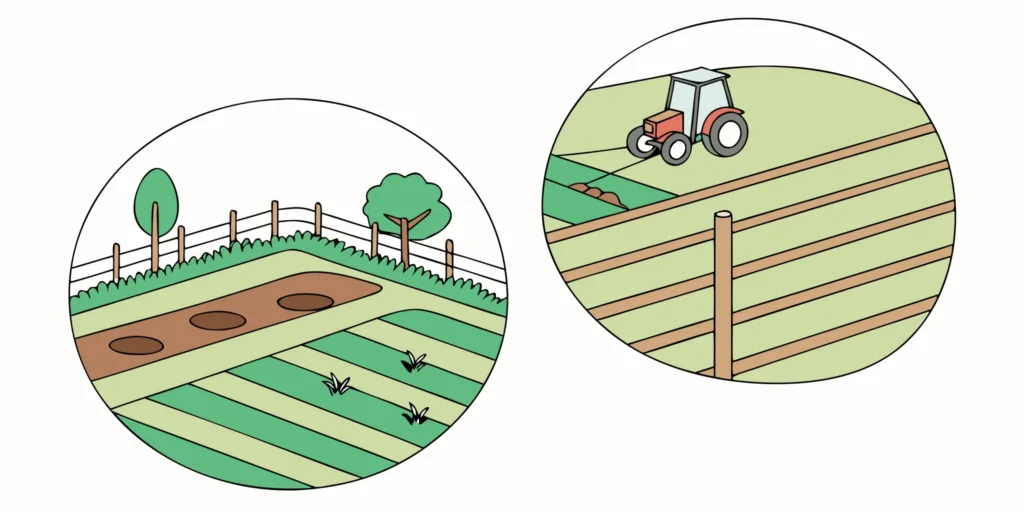
How to Find Active Gopher Tunnels
Setting a gopher trap is all about location. Gophers create a complex network of tunnels, but they don’t use all of them at once. Placing your trap in an old, abandoned runway is a common mistake that leads to a lot of frustration and zero results. The key to a quick catch is finding a tunnel that’s currently in use. Think of it as setting up on a busy highway instead of a deserted side street; you want to be where the action is.
Before you even think about setting your gopher trap, you need to do a little detective work in your yard. Luckily, gophers leave behind some pretty obvious clues that tell you exactly where they’ve been digging. By learning to spot fresh activity and confirming the tunnel’s location, you can place your trap with confidence and dramatically increase your chances of success. Taking a few extra minutes to find the right spot will save you days of waiting and wondering why your trap is still empty. It’s the most important step in the whole process, and getting it right makes everything else easier. Let’s walk through exactly how to pinpoint an active gopher tunnel so you can get the job done right the first time.
Look for Fresh Gopher Activity
Your first clue is the gopher mound itself. Fresh mounds are easy to spot because the soil is darker and moister than the surrounding dirt. It will look like it was just pushed up from the ground. Older mounds, on the other hand, will be dried out, lighter in color, and may have started to flatten from the weather.
To be certain you’ve found an active area, try this simple trick: take a rake and level any mounds you see. Come back a day or two later and check for new ones. A fresh mound is a clear sign that a gopher is working in that tunnel system right now. This is where you’ll want to focus your efforts.
Test the Tunnels
Once you’ve identified a fresh mound, you need to find the main tunnel connected to it. Gopher mounds are created from side tunnels they use to push dirt out, so the main runway is usually nearby. To find it, you’ll need a probe. You can use a long screwdriver, a sturdy stick, or one of our specialized probes.
Start probing the ground around the mound, about 6 to 12 inches away from the base. Push the probe into the ground until you feel it suddenly drop into an empty space. That give in resistance means you’ve found the tunnel. This step is crucial because it confirms the exact path the gopher is using, ensuring your trap is placed directly in its way.
How to Set a Cinch Trap, Step-by-Step
Alright, you’ve got your traps and you’re ready to reclaim your yard. Setting a Cinch Trap is a straightforward process that gets easier with a little practice. The key is to be methodical and place the trap where the gopher is most likely to travel. Follow these five steps, and you’ll be setting traps like a pro in no time.
Prepare the Tunnel Opening
First, you need to find an active gopher tunnel. Look for a fresh mound of dirt, as this is a sure sign of recent activity. Using a small shovel or trowel, clear the loose dirt away from the mound. You’ll need to dig down about six to eight inches until you find the main tunnel, which often splits into two separate runways. Once you’ve located the tunnel, clear out any remaining dirt to create enough space to easily place two traps inside. A clear opening ensures the traps can function without any obstructions.
Position the Trap Correctly
For the best results, you’ll want to use two traps in each hole you dig. Gophers can travel through their tunnels from either direction, and using two traps doubles your chances of catching them. Place one gopher trap into each of the branching tunnels, making sure they face in opposite directions. The jaws of the traps should be pointing into the tunnel, away from the opening you created. This setup creates a catch zone that is nearly impossible for a gopher to pass through without triggering one of the traps.
Set the Spring Mechanism
This part might seem tricky at first, but it’s simple once you get the hang of it. Hold the trap so the two loose wires hang freely. Pull the trigger wire back toward the base and hold it steady. Next, lift the active jaw wire and carefully move it to the other side of the trap base, setting it under the trigger wire. The trap is now set and under tension. Always handle the set trap with care, holding it by the base. For a great visual guide, you can watch the video on our How It Works page.
Fully Engage the Trip Pins
This is a critical step for a successful catch. Before placing the trap in the tunnel, double-check that the trip pins (the two loose, hanging wires) are pushed all the way to their stops. If the pins aren’t fully engaged, they can get stuck and fail to trigger the trap when a gopher pushes past them. A properly set trap should be sensitive enough to spring with just a light nudge from the gopher as it moves through its tunnel. Taking a moment to confirm this will save you a lot of frustration later.
Cover and Secure the Trap
Once your traps are in place, you can decide whether to cover the opening. You don’t have to cover it, but it’s a good idea if you have curious pets or small children who might wander near the area. A simple piece of plywood or an upside-down bucket works perfectly to block access while still allowing you to check the traps easily. Some people prefer to leave the hole open, as the light can attract the gopher to come investigate and plug the hole, which leads them right into the trap.
Where to Place Your Trap for the Best Results
You’ve got the best gopher trap on the market, and you’ve learned how to set it. Now comes the most important part: deciding where to place it. A perfectly set trap in the wrong spot is just a piece of metal in the ground; that gopher will simply dig a new tunnel around it. Success isn’t just about the tool you use, it’s about the strategy behind it. Think of it like fishing, you need to know where the fish are biting. For gophers, this means finding their busiest underground highways.
Gophers are creatures of habit. They create a complex network of tunnels, but they have their favorite routes for traveling and foraging. Placing your trap in a secondary, less-used tunnel is a common mistake that leads to days of frustration and a yard full of new mounds. Your goal is to intercept them on their main path. Taking an extra ten minutes to properly scout the location will save you so much time and effort later. It’s the single most effective thing you can do to ensure a quick catch. The following steps will show you exactly how to identify the perfect spot and set yourself up for success on the very first try.
Find the Main Gopher Runway
Your first mission is to find the gopher’s main runway. This is the primary tunnel they use to get around their territory, and it’s where your trap will be most effective. Start by looking for the freshest mound of dirt in your yard, which indicates recent activity. A fresh mound will have dark, moist soil. Once you’ve found it, use a small shovel or trowel to clear away the loose dirt from the plug. Dig down about six to eight inches until you uncover the tunnel system. You’ll usually find two tunnels branching off in opposite directions. This is the gopher’s main thoroughfare and the ideal place to set your trap. You can find more details and diagrams in our guide that explains how it works.
Get the Depth and Angle Right
Once you’ve located the main runway, you need to make sure the trap fits perfectly inside. The goal is to create a situation where the gopher has no choice but to pass through the trap. The tunnel opening should be just wide enough for the trap’s jaws to fit snugly, almost touching the sides. If the tunnel is too wide, the gopher might be able to squeeze around the trap instead of through it. Use your hands or a small trowel to carefully sculpt the opening, removing any loose dirt or roots that could interfere with the mechanism. This small adjustment makes a huge difference and forces the gopher to move directly over the trigger, ensuring a successful catch every time.
Use Multiple Traps for Better Success
For the best results, don’t just use one trap, use two. Since you’ve uncovered a runway with tunnels heading in opposite directions, you don’t know which way the gopher will be traveling next. Placing two gopher traps in the tunnel, one facing each direction, doubles your chances of a quick catch. This is the same strategy the professionals use because it’s so effective. It covers all your bases and is the fastest way to solve your gopher problem for good. By setting up this simple ambush, you can be confident that no matter which way the gopher comes from, one of your traps will be waiting. It’s a small extra step that delivers a much bigger payoff.
Common Mistakes to Avoid When Setting Your Trap
Setting a gopher trap can feel like an art form, but it’s really about precision. Even with the most effective trap on the market, a few small setup errors can be the difference between success and an empty trap. The good news is that these common mistakes are easy to fix. By paying attention to a few key details, you can make sure your trap is perfectly positioned and ready to work, saving you time and frustration. Let’s walk through the most frequent slip-ups so you can avoid them from the start and get your yard back to being yours.
Improper Trip Pin Placement
One of the most common hangups happens with the trip pins. It’s absolutely essential that the trap’s trip pins are pushed all the way to their stops, locking the mechanism into place so it’s ready to fire. If they aren’t fully engaged, they can get stuck, which means the trap won’t spring when a gopher passes through. Before you place the trap in the tunnel, give the pins a quick double-check to confirm they are set correctly. Taking a moment to understand how it works will make this step feel like second nature after just a few tries. This single detail is often the most critical factor in a successful set.
Ensuring the Trap Fits the Tunnel
Size matters when it comes to tunnels. If you place your trap in a tunnel that is wider than the trap’s jaws, the gopher might just squeeze past it without triggering the mechanism. You want to create a path of least resistance that leads directly through your trap. The ideal placement is in a tunnel where the jaws of your gopher trap almost touch the sides. This forces the gopher to move over the trigger plate, ensuring a successful catch. If you find the main runway is too large, it’s better to find a narrower connecting tunnel. Don’t try to force it; proper placement is key to making the gopher’s natural path work for you.
Checking Your Trap on Time
Patience is important, but you don’t want to set your trap and forget about it. Gophers are busy, and things can change quickly underground. Make it a habit to check your traps every 24 to 48 hours. If you check too late, you might miss your chance or find that the gopher has buried your trap with dirt, which is their way of blocking what they see as an intruder. If a trap is consistently untouched or buried after a couple of days, it’s a clear sign to relocate it to a fresher, more active mound. You can find more troubleshooting advice on our FAQs page to help you adapt your strategy.
Adjusting Trap Sensitivity
For a creature as quick as a gopher, your trap needs to be just as fast. A trap that is not sensitive enough might allow the gopher to push dirt over it or brush against the trigger without setting it off. For gophers, you want to set your Cinch Trap to be highly sensitive, so it “fires instantly.” This hair-trigger setting ensures that the moment the gopher makes contact, the trap activates. This immediate response is crucial for an effective and humane catch, maximizing the chances that your efforts will pay off quickly. Don’t settle for a loose trigger; a sensitive set is a successful set.
How to Check Your Set Traps
Setting your Cinch Trap is a great first step, but the real secret to success is knowing how to check your work. Consistent monitoring helps you understand what’s happening underground so you can make smart adjustments. Think of it as a conversation with the gopher; you just need to know how to read the signs. It’s less about waiting for a result and more about actively gathering clues to pinpoint where these critters are most active. A gopher might plug a tunnel, ignore a trap, or walk right into it, and each action gives you valuable information for your next move.
This process turns trapping from a guessing game into a clear strategy. By checking your traps regularly, you learn the specific patterns of the gophers in your yard. You’ll start to see which mounds are decoys and which lead to their main highways. This active approach is what makes trapping so effective. It allows you to adapt, moving your traps to more promising locations and ensuring they are always set for the best chance of success. Let’s walk through the simple routine for checking your traps, what to look for, and when to make your next move.
Check Your Traps Every 24-48 Hours
Patience is key, but you don’t want to wait too long. Plan to check your traps every 24 to 48 hours. This regular check-in is your best source of information. It tells you if you’ve successfully caught a gopher, if the gopher has outsmarted your trap by burying it, or if the tunnel you chose simply isn’t active. If you find an untouched trap after two days, don’t get discouraged. It’s just a sign that it’s time to try a new spot. Consistent monitoring is the fastest way to learn gopher behavior and get results, answering many of the common questions found in our trapping FAQs.
Know the Signs of a Triggered Trap
When you check your trap, you’re looking for clues. A triggered trap doesn’t always mean you’ve caught a gopher, so it’s important to know what to look for. If the trap is sprung and the tunnel opening is plugged with dirt, the gopher likely set it off while trying to block the tunnel. If the trap is sprung but the opening is clear, it might have been a misfire. In either case, you’ll want to carefully reset it. Understanding how the spring mechanism works will help you troubleshoot. A successful catch will be obvious, with the gopher held firmly in the trap.
Know When to Move Your Trap
If a couple of days go by and your trap remains untouched, it’s time for a change of scenery. A trap that hasn’t been sprung or has been buried under a mound of dirt is a clear signal to move it. This isn’t a setback; it’s a strategic relocation. Your goal is to find the gopher’s main runway, and sometimes that takes a bit of trial and error. Simply pull the trap and find a fresh mound to try again. For larger properties with extensive tunnel systems, using multiple gopher traps at once can help you cover more ground and find the most active tunnels faster.
What to Do After You’ve Caught a Gopher
Congratulations, you’ve successfully caught a gopher! It’s a great feeling to see your efforts pay off. But before you celebrate, there are a few final steps to take. Properly handling the trap, disposing of the gopher, and cleaning up the area will ensure your yard stays gopher-free for the long haul. Let’s walk through exactly what to do next to wrap up the job.
Safely Remove the Trap
First things first, let’s get that trap out of the ground safely. Even after it has been sprung, it’s always a good idea to handle it with care. I recommend wearing a sturdy pair of gardening gloves for this part. Carefully uncover the trap and pull it straight out of the tunnel. The design of our gopher traps makes this process straightforward. Once you’ve removed the trap, you can release the gopher. The mechanism is designed for a quick and humane dispatch, so it’s a clean process.
Dispose of the Gopher Properly
Now that you’ve removed the gopher from the trap, it’s time for disposal. One of the things people appreciate about Cinch traps is that there’s usually no blood, which makes removing the gopher much easier. The most common way to dispose of the animal is to place it in a plastic bag, seal it, and put it in your outdoor trash can. You can also choose to bury it in a part of your yard away from gardens or play areas. Be sure to check your local city or county guidelines, as there might be specific regulations for animal disposal in your area.
Clean Up and Fill the Tunnels
This last step is one you don’t want to skip. An empty gopher tunnel is like a furnished apartment with a “For Rent” sign for the next gopher that comes along. To prevent a new tenant from moving in, you need to collapse the tunnels after a catch. Use a shovel or a garden tool to break down the tunnel system around the area where you placed the trap. The goal is to put the dirt back into the burrow and pack it down firmly. This simple action makes it much harder for other gophers to use the old network, encouraging them to move on from your yard. For more tips, check out our FAQs.
Why Isn’t My Cinch Trap Working?
It can be incredibly frustrating to set a trap perfectly, only to find it empty or pushed aside the next day. If you’re feeling stumped, don’t worry. Usually, a small, simple adjustment is all it takes to get things working. Gophers are clever creatures, and successful trapping often involves a bit of detective work to understand their habits and your specific yard conditions.
Before you move the trap to a new location, let’s walk through a few common issues. From the mechanics of the trap itself to the type of soil you’re working with, fine-tuning your approach can make all the difference. These troubleshooting tips will help you identify what might be going wrong and get you back on track to reclaiming your lawn.
Troubleshoot Trigger Issues
The most common reason a trap fails is a problem with the trigger mechanism. A Cinch Trap is a simple machine, but it needs to be set just right to be effective. First, double-check the trigger pins. According to the experts at Gophers Limited, you need to “make sure the trap’s trip pins are pushed all the way to their stops so they don’t get stuck.” If they aren’t fully engaged, the trap won’t spring when the gopher moves through. Also, clear away any small pebbles, roots, or clumps of dirt that could jam the jaws or the trigger. The trap needs a clear path to snap shut instantly. For a visual refresher, reviewing how it works can help you spot any issues with your setup.
Adjust for Different Soil Types
Your yard’s soil composition plays a huge role in trapping success. As New Mexico State University notes, “Trapping can be difficult in dry, heavy clay, or gravelly soils because it’s hard to dig.” If you have dense, clay soil, the trap’s jaws might struggle to close with enough force. Try carving out a slightly larger pocket for the trap so its moving parts don’t get clogged or slowed down by the heavy dirt. In contrast, if your soil is very loose or sandy, the tunnel might collapse, or the trap could shift. In this case, gently pack the soil around the placed trap to create a firm, stable base that won’t move when the gopher investigates.
Consider Seasonal Gopher Activity
Timing is everything. Gophers are most active in the spring and fall when the ground is moist and easy to dig. They also have daily routines. Setting your traps in the early morning gives you the best shot, as this is when they are typically clearing out their tunnels. Remember that “gophers are very protective of their burrows and will quickly try to close any open holes.” Sometimes, a gopher will simply push a wall of dirt into the trap to plug the opening without ever passing through the trigger. If this keeps happening, you may need to place the trap a little deeper in the tunnel, past the point where they tend to do their patch-up work.
How to Maintain Your Cinch Trap
Your Cinch Trap is built from durable, galvanized steel and designed to last a lifetime. But like any quality tool, a little bit of care will keep it in top-notch condition for years of successful trapping. Proper maintenance isn’t just about longevity; it’s about ensuring your trap functions flawlessly every single time you set it. Think about the environment it works in: underground, exposed to dirt, moisture, and grit. These elements can affect the sensitive trigger mechanism over time if left unchecked.
A clean, well-lubricated trap is more sensitive, triggers more reliably, and works more effectively. Gophers can be wary creatures, and a trap that carries old scents or doesn’t spring smoothly might be ignored or even plugged with dirt. Taking a few minutes to care for your trap after a catch and before storage will protect your investment and guarantee it’s always ready to tackle the next pest problem in your yard or garden. Think of it as simple upkeep that pays off with consistent results, season after season. This small effort makes a big difference in your success rate and ensures your trap remains a dependable solution.
Clean and Store Your Trap Properly
After you’ve caught a gopher, it’s a good idea to clean your trap before setting it again. Any lingering scents could make the next gopher wary. Start by removing any dirt or debris. Once the trap is clean and completely dry, applying a lubricant is a great next step. Using a product like the CINCH Maintenance Spray helps mask any human or predator scents left behind, making your trap more appealing to the next target. When you’re done trapping for the season, give it a final cleaning and a light spray before storing it in a dry place like a shed or garage to prevent rust.
Perform Regular Maintenance Checks
Before you set your trap, take a moment to give it a quick inspection. Check for any signs of corrosion and make sure all the moving parts are working smoothly. The most important thing to check is that the small eyelet wires can rotate freely when the trap is sprung. If they are stuck or stiff, the trap might not trigger correctly. A quick spritz of maintenance spray can help fight corrosion and keep everything moving as it should. These simple checks ensure your trap is always in prime working condition, giving you the best chance of success. You can find all the necessary trap accessories to keep your equipment in great shape.
Related Articles
- Trapping Gophers Effectively: Proven Results with Cinch Traps
- Trapping Tips & Wildlife Control Guides for Gophers | Cinch Traps
- Gopher Trap | Cinch Traps | The Best Mole & Gopher Trap
Frequently Asked Questions
Is the Cinch Trap a humane way to deal with gophers? Yes, it is. The trap is designed around a powerful spring-loaded mechanism that works instantly. When a gopher triggers the trap, the jaws close with immediate force for a quick dispatch. This ensures the animal does not experience prolonged suffering, which is a core principle of humane pest control.
Do I need to use any bait with my Cinch Trap? You do not need any bait. The trap’s design works with a gopher’s natural behavior, not by luring it with food. Gophers instinctively want to close any open holes in their tunnels. By placing the trap correctly in their main runway, you use their own dirt-plugging instinct to trigger the mechanism, which is far more effective than any bait.
How can I tell if I have gophers or moles? The easiest way to tell is by looking at the mounds of dirt. Gophers create crescent-shaped or fan-shaped mounds with a visible dirt plug on one side. Moles, on the other hand, create cone-shaped, volcano-like mounds with no visible entry or exit hole because they push dirt straight up from their deeper tunnels.
My trap was sprung, but there’s no gopher. What happened? This is a common situation, and it usually points to one of two things. The gopher may have pushed a large amount of dirt into the trap from a distance, triggering it without passing through. Alternatively, the trap might not have been sensitive enough. Always make sure the trip pins are fully engaged and that the trap is placed snugly in the tunnel to ensure the gopher makes direct contact.
How many traps should I buy for my yard? For the best results, we always recommend using traps in pairs, placing one in each direction of an active tunnel. A set of two traps is a great starting point for a small yard with one or two active mounds. If you have a larger property or are dealing with a more widespread gopher problem, having four to six traps allows you to address multiple tunnel systems at once and resolve the issue much faster.
