Let’s get straight to the point: if you want to get rid of moles, you need to trap them. It’s the method trusted by professionals and seasoned gardeners for a reason—it works. But success isn’t just about buying a trap; it’s about knowing how to use it effectively. Where you place it, how you set it, and what you do afterward all play a crucial role. This guide is your complete playbook for mole trapping. We’ll cover everything from identifying active tunnels to avoiding common mistakes, giving you a clear, step-by-step plan. You’ll learn the best way to catch a mole and get your lawn back.
Key Takeaways
- Focus on High-Traffic Tunnels: Your success depends entirely on placing traps in a mole’s main travel routes, not just any tunnel. Confirm a runway is active by flattening a small section—if it’s repaired within 24 hours, you’ve found the perfect spot.
- Proper Trapping Technique is Essential: Trapping is the only guaranteed removal method, but your technique matters. Always wear gloves to avoid leaving your scent, and check your traps daily so you can quickly move them to a new location if needed.
- Make Your Yard Less Appealing for the Long Term: To keep moles from returning, remove their main attractions. Manage the grub population to reduce their food supply and avoid overwatering your lawn, as soggy soil makes for easy digging.
Do You Have Moles? Look for These Telltale Signs
You’ve put so much work into your lawn and garden, so finding it disturbed is frustrating. Before you can tackle the problem, you need to be sure you’re dealing with moles and not another critter like a gopher or vole. Moles leave behind very specific clues. Let’s walk through the telltale signs that a mole has made your yard its new home, so you can confirm your suspicions and get ready to take action.
Raised Tunnels Across Your Lawn
One of the most obvious signs of a mole is a network of raised ridges crisscrossing your lawn. These look like little veins just under the surface of the grass. These are shallow feeding tunnels that moles create as they search for their next meal of earthworms, grubs, and insects. Moles can dig these surface tunnels at a surprising speed—up to 18 feet per hour! They also create deeper, more permanent tunnels for nesting and to take shelter during cold or dry weather. You won’t see these deeper tunnels, but you’ll see the evidence they leave behind in the form of molehills.
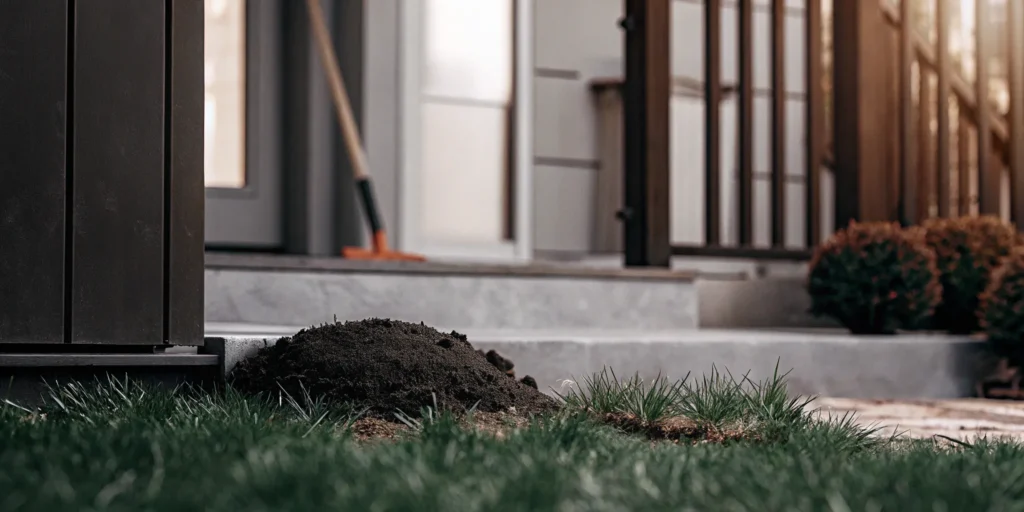
Mounds of Fresh Dirt (Molehills)
If you see volcano-shaped mounds of fresh soil popping up in your yard, you’ve likely found a molehill. Unlike the surface ridges, these conical piles of dirt are the entry and exit points for a mole’s deeper tunnel system. Think of them as little excavation sites. As the mole digs its main highways and living quarters several inches underground, it has to push the excess dirt up to the surface. Finding these molehills is a sure sign of an established mole presence. Our FAQs page can help you distinguish these from the fan-shaped mounds left by gophers.
Unexplained Plant and Root Damage
Here’s a common misconception: moles eat your plants. They actually don’t! Moles are insectivores, meaning their diet consists of insects, grubs, and earthworms. The problem is, their constant tunneling can cause serious collateral damage to your garden beds and lawn. As they dig in search of food, they disturb the root systems of your flowers, vegetables, and grass. This can create air pockets around the roots, causing them to dry out and your plants to wilt or die. So while they aren’t eating your prize-winning tomatoes, their activity is still a major threat to your garden’s health.
How to Test for Active Tunnels
Before you set a trap, you need to know where the mole is currently active. Placing a trap in an old, abandoned tunnel is a waste of time. Luckily, there’s a simple way to check. Find a surface tunnel—one of those raised ridges—and gently flatten a small section with your foot. Mark the spot with a flag or stick so you can find it again easily. Check back in 12 to 24 hours. If the flattened section has been pushed back up, you’ve found an active runway. This is the perfect spot to set your mole trap for the best chance of success.
Why Trapping Is Your Best Bet for Mole Removal
When you’ve got mole tunnels crisscrossing your beautiful lawn, you want a solution that works—period. While the internet is full of quick fixes and DIY remedies, most seasoned gardeners and pest control experts agree on one thing: trapping is the most effective and reliable way to get rid of moles. Unlike methods that merely annoy moles or pose risks to your family, trapping directly addresses the source of the problem.
It’s a straightforward approach that gives you clear results. You’ll know exactly when you’ve caught the culprit, and you can stop wasting money on products that don’t deliver. By focusing on trapping, you’re choosing a proven strategy to reclaim your yard from these persistent pests. Let’s break down why this method stands head and shoulders above the rest.
Common Mole Myths, Busted
If you’ve spent any time searching for mole solutions, you’ve probably come across promises of magical repellents, sonic spikes, or poisons that claim to send moles packing. Unfortunately, most of these are just myths. Products designed to simply deter moles often fail because the animals can easily dig new tunnels to avoid the unpleasant sound or smell, leaving you right back where you started. Many homeowners spend a lot of time and money on these ineffective solutions only to find their mole problem getting worse. The truth is, the only way to guarantee a mole is gone for good is to physically remove it from your property.
Traps vs. Baits: A Clear Winner
So, if removal is the goal, what about baits? While some poison baits have been scientifically proven to work, trapping is still considered the superior method by most experts. With baits, you can’t be sure if the mole actually took it or if it was effective. You’re left guessing and waiting for new tunnels to stop appearing. Trapping, on the other hand, provides definitive proof of success. When you check your trap, you know for certain whether you’ve caught the mole. This clear feedback loop makes the process much more efficient and gives you peace of mind. Using effective mole traps is simply the most direct path to solving your problem.
A Safer Solution for Your Family and Pets
One of the biggest advantages of trapping is that it’s a poison-free method. Spreading poison baits across your lawn creates a potential hazard for children, pets, and other local wildlife that might accidentally ingest them. Choosing to trap eliminates that risk entirely. While some trap designs can have exposed parts that might be a concern in yards where kids and pets play, many modern traps are designed with safety in mind. By opting for a well-designed, secure trap, you can confidently manage your mole problem without introducing harmful chemicals into your environment. You can learn more about how it works to see how a simple, mechanical solution can be both safe and effective.
A Guide to the Different Types of Mole Traps
When you start looking for a mole trap, you’ll quickly realize there are a few different styles on the market. Choosing the right one can feel a bit overwhelming, but it really comes down to understanding how each one works. The three main types you’ll encounter are harpoon traps, scissor-jaw traps, and tunnel traps. Each is designed to work in a slightly different way, and some are more effective and easier to use than others.
The most important factor for success isn’t just the trap itself, but how well it aligns with a mole’s natural behavior. Moles spend almost their entire lives underground in their tunnel systems, so the most effective traps are designed to work within that environment. Let’s break down the pros and cons of each type so you can feel confident picking the best tool for the job.
Harpoon Traps
You’ve probably seen harpoon traps at your local hardware store. They are designed to be staked into the ground directly over an active mole tunnel. When a mole moves through the tunnel and pushes up on the soil, it hits a trigger pan. This action releases a set of sharp spikes, or a “harpoon,” down into the tunnel to catch the mole.
While they are simple to set up, their effectiveness can be hit or miss. The trap relies on the mole pushing up enough dirt to activate the trigger, which doesn’t always happen. Because the mechanism is above ground, it can also be a potential hazard for pets, children, and even your lawnmower if you forget where you placed it.
Scissor-Jaw Traps
Scissor-jaw traps, as the name suggests, use a pair of clamping jaws that work like scissors. Unlike harpoon traps, these are placed directly inside the mole’s tunnel. You dig a small opening into an active run, place the set trap inside, and then cover the hole to block out any light. When the mole comes to investigate and clear the blockage, it pushes against a trigger plate, causing the jaws to snap shut.
This design is generally more effective than the harpoon style because it works with the mole’s instinct to keep its tunnels clear. Since the entire trap is underground, it’s also a safer option for your yard, keeping it out of sight from pets and people.
Tunnel Traps
Tunnel traps are a category of traps designed to be placed inside the mole’s runway. Both scissor-jaw and Cinch traps fall into this group. The core idea is to intercept the mole in its most-used travel lanes, rather than in the shallow, temporary feeding tunnels near the surface. Moles are creatures of habit and will repeatedly use these main tunnels as highways to get around your yard.
By placing a trap in one of these active “highways,” you dramatically increase your chances of a catch. The mole is simply going about its daily routine when it encounters the trap. This method is widely considered the most reliable way to handle a mole problem because it targets the animal’s predictable behavior.
The Cinch Trap Advantage
The Cinch Trap is a time-tested tunnel trap that perfects this approach. Our mole traps are designed for maximum effectiveness and ease of use. You place them directly in an active tunnel, and their simple yet powerful design catches moles traveling from either direction. Because they are handmade in Oregon from durable, galvanized steel, they won’t rust or break down over time—in fact, we guarantee them for life.
What truly sets Cinch Traps apart is their simple, reliable mechanism that works with the mole’s natural instincts. There are no complicated parts, and you can learn how it works in just a few minutes. It’s a straightforward, powerful solution that has been proven effective for over 100 years.
How to Set a Mole Trap for Guaranteed Results
Okay, you’ve got your trap, and you’re ready to reclaim your yard. The secret to success isn’t just having the right tool—it’s knowing exactly how to use it. Setting a mole trap correctly is a simple process, but every step matters. By focusing on the right location and using a bit of strategy, you can solve your mole problem for good. Let’s walk through the three key steps to setting your trap like a pro.
Step 1: Find and Prep an Active Tunnel
First things first, you need to play detective. Moles create a network of tunnels, but they only use some of them regularly. To find an active runway, look for the raised ridges of earth across your lawn. Here’s a simple trick: gently step on a small section of a tunnel to flatten it. Mark the spot and check back in 12 to 24 hours. According to the University of Minnesota Extension, if the mole has pushed the soil back up, you’ve found an active tunnel. This is exactly where you want to place your trap, as it confirms the mole is actively using that path. Prepping the area by clearing any debris will give you a clean slate for setting the trap.
Step 2: Position the Trap for Success
Now that you’ve found an active tunnel, it’s time to pick the perfect spot. Moles have main “highways” they use to travel between feeding areas. These are typically the longer, straighter tunnels in your yard. Placing your trap in one of these main runs is far more effective than setting it near a random molehill, which is just an exit point for dirt. Think of it as setting up a roadblock on a busy street. By targeting a high-traffic area, you dramatically increase your chances of a quick catch. Our How It Works guide shows exactly how to identify and use these main tunnels for the best results.
Step 3: Set the Trap Safely
With your location chosen, the final step is setting the trap. For a Cinch Trap, you’ll want to dig a small hole over the active tunnel, just big enough for the trap to fit inside. Place the trap so its jaws straddle the tunnel path. Once it’s in position, press it down firmly so it’s secure in the ground. Always handle the trap carefully and follow the specific instructions for your model. Our durable, galvanized steel mole traps are designed to be both incredibly effective and easy to set safely, giving you peace of mind while you get the job done.
What to Do After You’ve Set Your Traps
Once your traps are in the ground, the waiting game begins. But it’s not a passive process. Staying on top of your traps is the key to resolving your mole problem quickly. Here’s what you need to do next to ensure you get results.
Check Your Traps Daily
Moles are active around the clock, so it’s important to check your traps frequently—ideally once in the morning and once in the evening. A quick walk around your yard is all it takes. Regular checks ensure you can deal with a captured mole right away, which is more humane and keeps the process moving. Staying on top of your traps also helps you quickly identify if a trap has been accidentally sprung or needs to be moved. This simple habit dramatically increases your chances of success with our mole traps.
How to Safely Handle a Caught Mole
When you see a trap has been sprung, it’s time to investigate. Carefully dig away the soil around the trap to get a clear view. Be prepared for the possibility that the mole may still be alive. If it is, you will need to dispatch it humanely; a quick, firm strike to the head with a shovel is the most common method. Always wear gloves when handling the trap or the mole to protect yourself. Your safety is the priority, so take your time as you inspect and handle the trap. Our FAQs page offers additional tips for handling these situations.
Proper Disposal Methods
Once you’ve caught a mole, you need to dispose of it properly. Wearing gloves, place the mole in a plastic bag, tie it securely, and put it in your regular trash. Another option is to bury it in a location away from your garden or play areas, at least a foot deep to prevent other animals from digging it up. Proper disposal is a simple but important final step that helps keep your yard clean and hygienic. It’s the last piece of the puzzle in effectively managing your mole problem and getting back to enjoying your lawn.
When to Reset or Move Your Trap
If a trap hasn’t caught anything within a day or two, it might be in the wrong spot. Moles use a network of tunnels, but they only frequent some of them. Remember to test for an active tunnel by poking a hole in it and checking back later. If the hole has been plugged, you’ve found a winner. If your trap isn’t getting results, don’t hesitate to move it to a different, confirmed active run. Understanding the way our traps work in these active tunnels is crucial for success. Keep adjusting until you find the mole’s main highway.
Common Mole Trapping Mistakes (and How to Avoid Them)
Even with the most effective trap on the market, a few common slip-ups can stand between you and a mole-free yard. It’s frustrating to do everything right, only to come up empty-handed. The good news is that these mistakes are easy to fix. By paying attention to a few key details, you can dramatically increase your success rate and get the results you’re looking for. Let’s walk through the most frequent errors so you can avoid them from the start.
Mistake #1: Placing Traps in Old Tunnels
Moles are busy diggers, creating an extensive network of tunnels under your lawn. But here’s the secret: they don’t use all of them regularly. Many tunnels are temporary feeding paths that they use once and then abandon. Placing a trap in one of these deserted tunnels is like waiting for a bus on a route that’s no longer in service. To be effective, you must focus on their main travel routes. As we covered earlier, you can find an active tunnel by pressing down a small section with your foot. If the mole repairs the damage within 24 to 48 hours, you’ve found a winner. Setting your mole traps in these active runways is the single most important step for success.
Mistake #2: Leaving Your Scent on the Trap
Moles have a poor sense of sight, but they make up for it with a powerful sense of smell. They are incredibly sensitive to foreign scents, and the smell of a human can be enough to make them avoid your trap entirely. Think of it as a warning sign that something is amiss in their tunnel. To prevent this, always handle your traps with gloves. This simple step stops your scent from transferring to the metal. For extra measure, you can rub some fresh dirt from the tunnel onto the trap to help it smell like its natural environment. This helps the trap blend in, making it seem like just another part of the tunnel system.
Mistake #3: Poor Placement and Timing
Beyond finding an active tunnel, the timing of your checks is critical. It’s easy to set a trap and forget about it for a few days, but this is a missed opportunity. You should check your traps at least once every 24 hours. This allows you to promptly and humanely deal with a captured mole. It also gives you valuable feedback. If a trap hasn’t been sprung after a couple of days, it’s a clear sign that you should move it to a different active tunnel. Making trap-checking a part of your daily routine ensures you stay on top of the situation and can quickly adapt your strategy for better results. If you have more questions, our FAQs page is a great resource.
What About Other Mole Removal Methods?
When you’re staring at a yard full of mole tunnels, you’ll probably come across a lot of different advice. From store-bought repellents to sonic spikes, it can be tough to know what actually works. While trapping is the most proven and effective method, it’s worth understanding the other options out there. Let’s walk through some of the most common alternatives to trapping and see how they stack up against a real, long-term solution.
The Truth About Repellents and Poisons
It’s tempting to reach for a spray or a poison pellet that promises a quick fix. Unfortunately, many products that claim to get rid of moles simply don’t work. Moles primarily eat earthworms and grubs, so they are rarely interested in poison baits. Repellents can also be ineffective, washing away with the first rain. While you’re trying these methods, the number of moles in your yard can grow quickly, turning a small issue into a major infestation. The best and only real way to get rid of moles is by trapping them. Using effective mole traps is a direct approach that removes the source of the problem instead of just temporarily inconveniencing it.
Do Sonic Spikes and Natural Deterrents Work?
You might have seen solar-powered stakes that send vibrations into the ground or natural deterrents containing castor oil. The idea is to make the environment so unpleasant that moles decide to pack up and leave. While mechanical “thumpers” and certain repellents can sometimes encourage moles to move, the effect is often temporary. Instead of leaving your property entirely, they may just shift their tunneling activity to another part of your lawn, a few feet away from the annoying sound or smell. These methods act more like a temporary fence than a real solution. Understanding how it works to actually remove the mole is key to reclaiming your yard for good.
When It Makes Sense to Call a Professional
Tackling a mole problem yourself is incredibly rewarding, but sometimes you need to call for backup. If you have a very large property with a widespread infestation or you feel completely overwhelmed by the problem, it’s best to contact a professional pest control service. They have the experience to assess large-scale issues and can handle the removal process for you. Interestingly, you’ll find that most professionals rely on trapping as their primary method—it’s the industry standard for a reason. For more complex situations, our FAQs can help you decide on the best course of action for your specific mole or gopher problem.
How to Keep Moles from Coming Back for Good
Once you’ve successfully trapped the moles tearing up your yard, the next step is to make sure their relatives don’t move in. Prevention is all about making your property less of a five-star resort for these underground pests. By adjusting a few things in your yard care routine and setting up some simple barriers, you can create a long-term defense against future mole invasions. It’s not about making your yard sterile or unattractive—it’s about making it the wrong kind of attractive for moles. These strategies focus on removing the key things moles look for: abundant food and easy-to-dig soil. Combining these preventative measures with a reliable set of mole traps on hand for any newcomers is the most effective way to keep your lawn smooth and mole-free for the long haul.
Maintain a Healthy Lawn
It might sound counterintuitive, but a lush, healthy lawn can be a huge draw for moles. They love the soft, moist soil because it’s easy to tunnel through in their search for food. The key isn’t to neglect your lawn, but to manage it wisely. Avoid overwatering, as soggy soil is prime real estate for moles and their food source, earthworms. Instead, water deeply but less frequently to encourage deep root growth and allow the topsoil to dry out a bit between waterings. You can also help by aerating compacted soil, which improves drainage. A well-maintained lawn is great, but a waterlogged one is an open invitation for moles to start digging.
Manage the Grub Population
Moles aren’t interested in your prize-winning roses or vegetable garden; they’re carnivores. The ridges and mounds they create are simply byproducts of their relentless hunt for insects. Their diet consists mainly of earthworms, grubs, and other subterranean bugs. If you can reduce their food supply, your yard becomes a much less appealing place for them to live. Consider using beneficial nematodes or a milky spore treatment to naturally reduce the grub population in your lawn. By turning off the all-you-can-eat buffet, you’ll encourage moles to find their meals elsewhere. You can learn more about their diet and behavior on our FAQs page.
Make Your Yard Less Inviting to Moles
Creating physical barriers is another excellent way to protect your property. If you have a garden, building raised beds and lining the bottom with hardware cloth is a surefire way to stop moles from tunneling up and disturbing your plants’ roots. For larger areas, you can dig a trench about two feet deep around the perimeter of your yard and fill it with gravel or line it with wire mesh to create an underground fence. Some people also try mechanical “thumpers” that send vibrations into the ground to annoy moles and encourage them to leave. While these deterrents can help, they work best as part of a broader strategy to make your yard a no-go zone for moles.
Related Articles
- FAQS moles gophers | Cinch Traps | The Best Mole & Gopher Trap
- Get Rid of Moles Permanently: What Really Works
- Cinch Traps | The Best Mole & Gopher Trap
Frequently Asked Questions
How can I be sure I have moles and not gophers? The easiest way to tell the difference is by looking at the dirt mounds. Moles create cone-shaped, volcano-like mounds because they push dirt straight up from their deep tunnels. Gophers, on the other hand, create fan-shaped or crescent-shaped mounds because they push dirt out of their tunnels at an angle.
I have tunnels all over my yard. How many moles am I actually dealing with? It’s easy to assume you have a whole army of moles, but you’d be surprised. Moles are solitary animals, and a single mole can dig up to 18 feet of tunnel in just one hour. All that damage you see is often the work of just one or two very busy individuals. This is great news because it means you only need to catch one or two to solve your problem.
My trap has been set for two days and hasn’t caught anything. What should I do? Don’t get discouraged! This usually means the trap is in a tunnel that the mole isn’t using regularly. Moles have many feeding tunnels that they abandon after a single use. The best thing to do is find a different spot. Use your foot to flatten a few sections of different tunnels and check back the next day. The one that has been pushed back up is an active highway, and that’s the perfect new location for your trap.
Will getting rid of grubs in my lawn also get rid of the moles? Reducing the grub population is a great long-term strategy for making your yard less attractive to moles, but it’s not a quick fix. Grubs are only one part of a mole’s diet; their primary food source is actually earthworms. So, even with fewer grubs, a mole will still find plenty to eat. The only guaranteed way to remove a mole that has already moved in is with a trap.
Is there a best time of year to trap moles? You can effectively trap moles any time you see fresh signs of activity, like new tunnels or mounds. However, spring and fall are often the most productive seasons. During these times, the soil is moist and easy for them to dig in, so they are typically more active near the surface. Trapping during these peak seasons can often bring faster results.
